
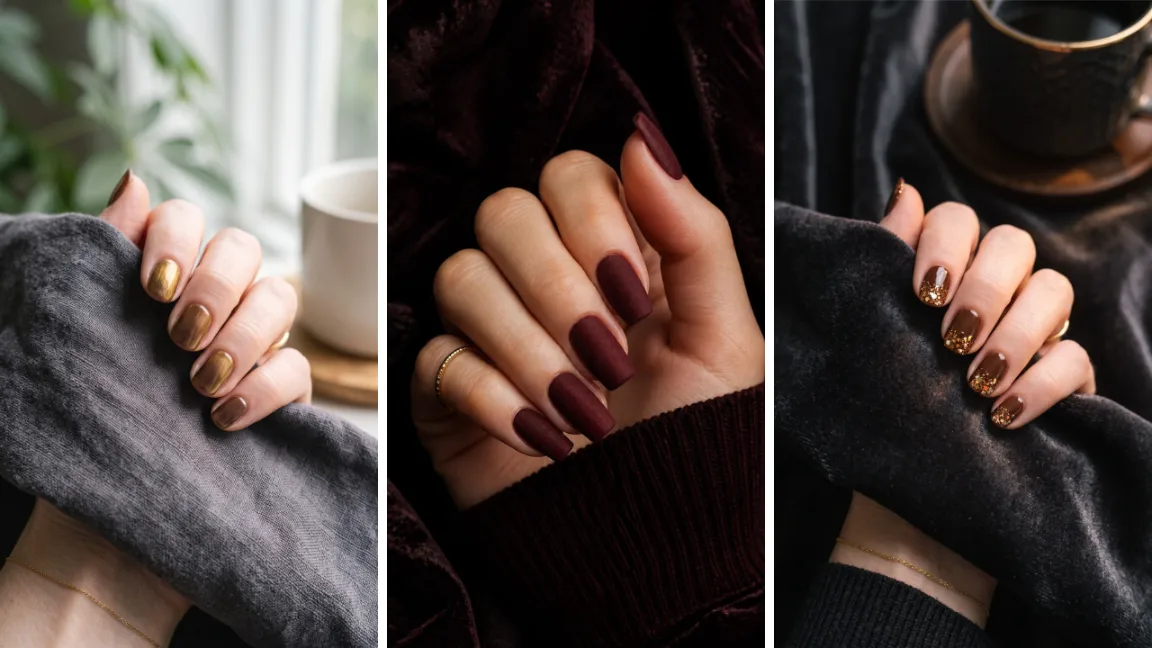
Short nails get overlooked every fall, mostly because people assume you need length for a design to look finished.
That is not true, and once you see a few short fall nails done right, you notice how much cleaner and more wearable they look than long acrylics stacked with rhinestones.
The trick with short nails in autumn is picking colors and textures that read as intentional even in a small space.
A deep plum chrome tip or a warm cinnamon marble swirl carries just as much personality on a stubby almond shape as it does on a coffin nail, sometimes more, because there is less surface fighting for attention.
Below are 25 ideas built around real, doable techniques: chrome, marble, negative space, foil, and a few classic French variations with an autumn twist.
Pick one for this weekend or save the whole list for when you are ready to switch up your fall manicure.
1. Cinnamon Swirl Marble Nails for a Cozy Fall Look
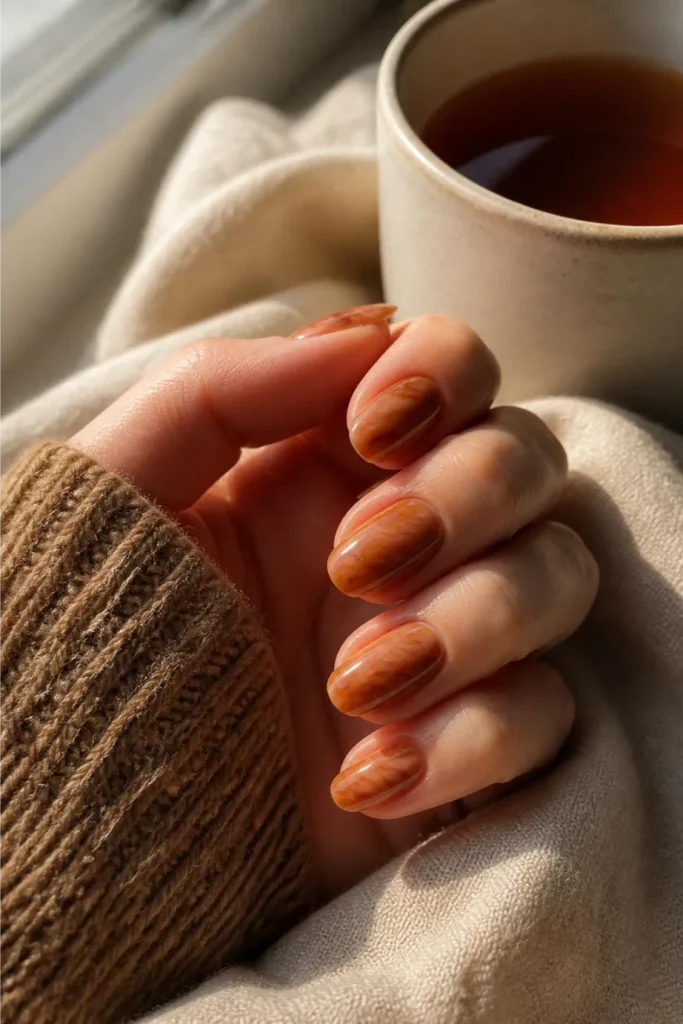
Start with a milky beige base and skip the usual white marble veins. Pull two polishes, a warm cinnamon and a soft caramel, through the wet top coat with a thin nail art brush before it dries.
Keep the swirls loose. Tight, symmetrical veins look painted on purpose, and the whole point is that it looks a little imperfect, like it happened naturally.
Good to know before you start:
- Use a fast drying top coat between swirls so colors don’t muddy together
- Work on one nail at a time so the base doesn’t dry too fast
- A dotting tool works fine if you don’t have a nail art brush
Paint two coats of a milky beige base and let it dry fully.
Dip a thin brush in cinnamon polish and drag loose lines across the wet top coat, then repeat with caramel.
Seal with a high shine top coat before the marble lines fully set.
2. Pumpkin Spice Ombre Fade on Short Almond Nails
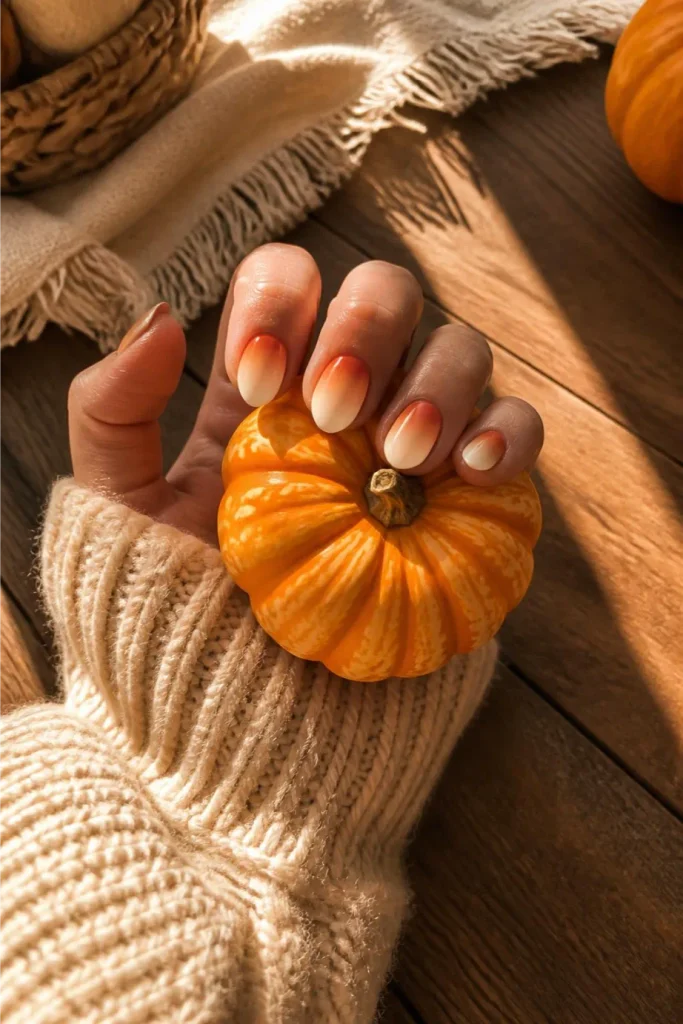
An ombre fade solves what people usually give long nails credit for: looking finished without a single hand painted detail.
On short almond nails, blend burnt orange into a soft cream starting from the tip, using a makeup sponge instead of a brush for a cleaner gradient, then dust a fine gold shimmer right where the two colors meet.
Two things keep it from looking muddy:
- Dab the sponge in short taps instead of dragging it across the nail
- Wipe the sponge clean between layers so old color doesn’t transfer
Under twenty minutes, no hand painting required.
A plain cream base with no shape or contrast, easy to mistake for bare nails in photos.
Burnt orange melts into cream with a thin gold line marking the fade, so the color looks deliberate.
3. Matte Terracotta with a Single Gold Foil Accent Nail
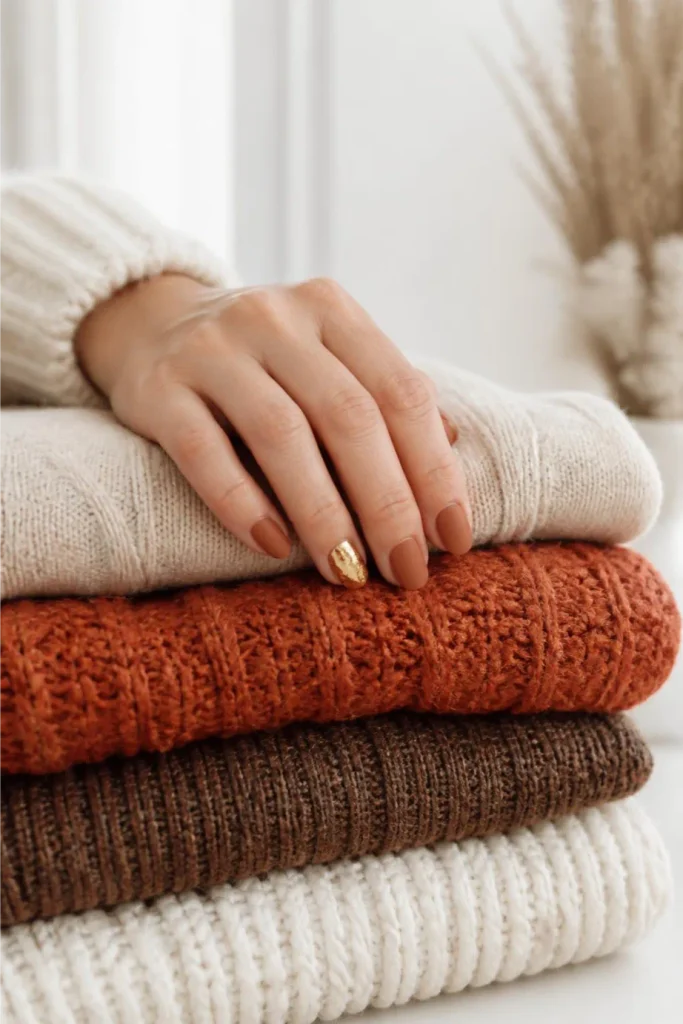
Matte polish alone can look flat under bad lighting, which is the real reason so many matte manicures get repainted within a week.
Keep four nails in a matte terracotta and turn the ring finger into a glossy gold foil accent instead of adding shine to all five.
What makes the contrast work:
- File all nails to the same length first, foil shows every uneven edge
- Apply the matte top coat last, after the foil accent is fully cured
Best for nails filed to an even length, since the foil edge shows anything uneven underneath it.
💡 Quick Tip
Press the foil on with a cuticle stick instead of your finger. Body heat can make the foil stick unevenly and leave gaps.
4. Deep Plum Chrome Tips for Short Square Nails
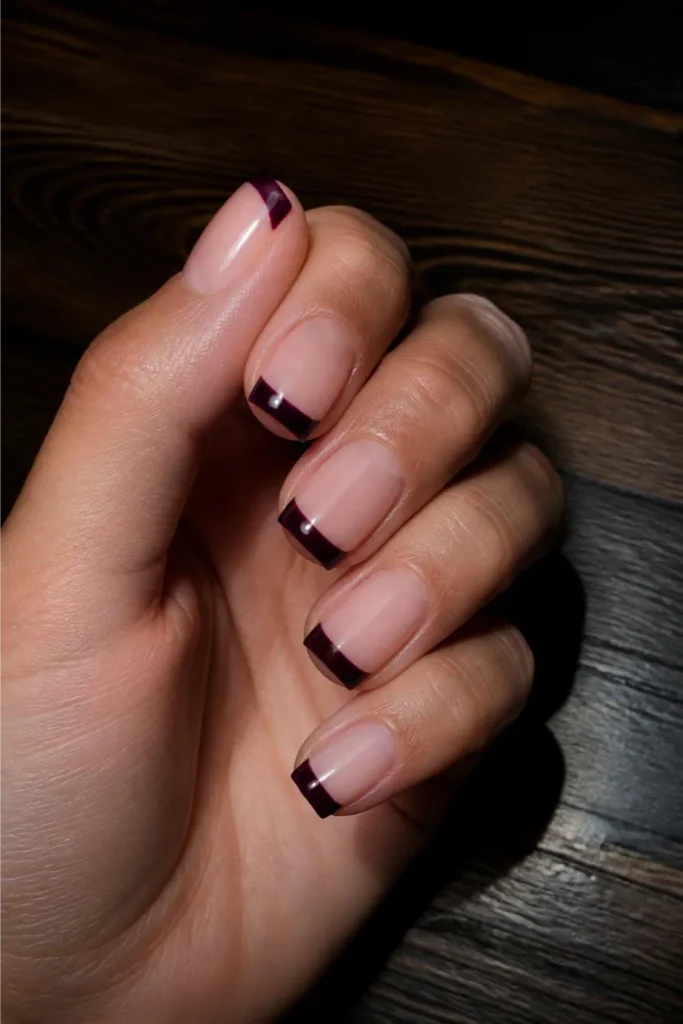
A short square nail with a deep plum chrome tip catches light differently than a full chrome nail, since the plain nude base stays matte and only the tip mirrors the room around it.
Apply chrome powder over a fully cured gel tip with a soft applicator, buff it in small circles until the shine evens out, then seal with a non UV top coat so the chrome doesn’t dull.
Keep a cuticle oil pen nearby. Plum chrome shows fingerprints faster than lighter chrome shades.
5. Burnt Orange French Tips with a Thin Gold Line
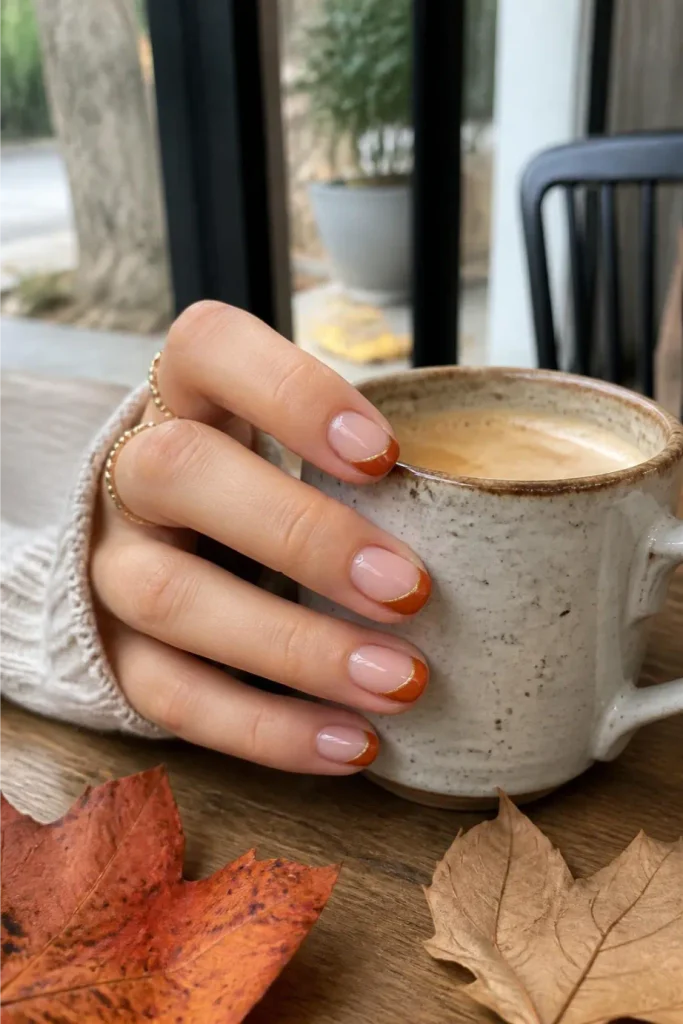
A classic French tip reads clean but can look plain on short nails once the color goes warm for fall.
Adding one thin gold line between the burnt orange tip and the nude base changes that without adding much time, since it is one careful stroke with a striping brush.
Compare the two versions before you pick:
| Classic French | Gold Lined French |
|---|---|
| Quick two step application | Adds one extra striping step |
| Best for everyday wear | Best for photos and close ups |
6. Chocolate Brown Glazed Donut Nails
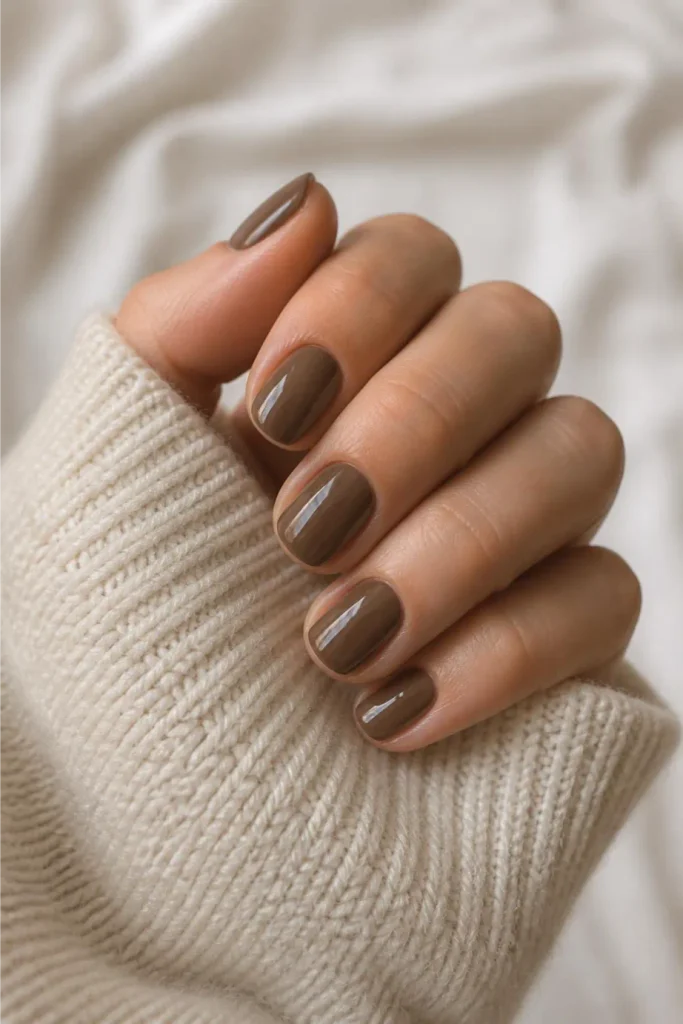
The glazed donut look never really left, and on short nails it works even better because the shine has less surface to travel across before it looks uneven.
Swap the usual pearly white for a rich chocolate brown base, then layer a chrome glaze top coat that catches light without any glitter or design underneath it.
At a glance, here is what makes this one work:
7. Rust Red Negative Space Leaf Art
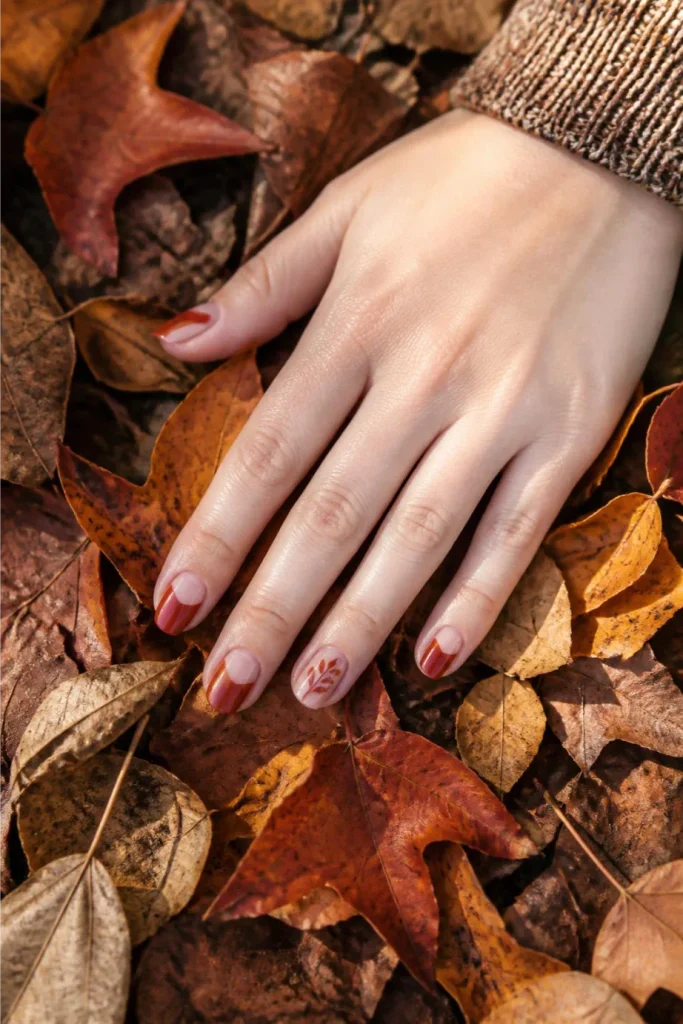
Paint a rust red base but stop short of the cuticle line, leaving a thin crescent of bare nail showing at the bottom.
Use that gap to hand paint one small leaf shape in a slightly darker red, right where the color and the bare nail meet. It reads as a tiny detail from a distance and a real design up close.
Grab these before you start:
What to grab first
8. Olive Green Matte Base with Copper Foil Flakes
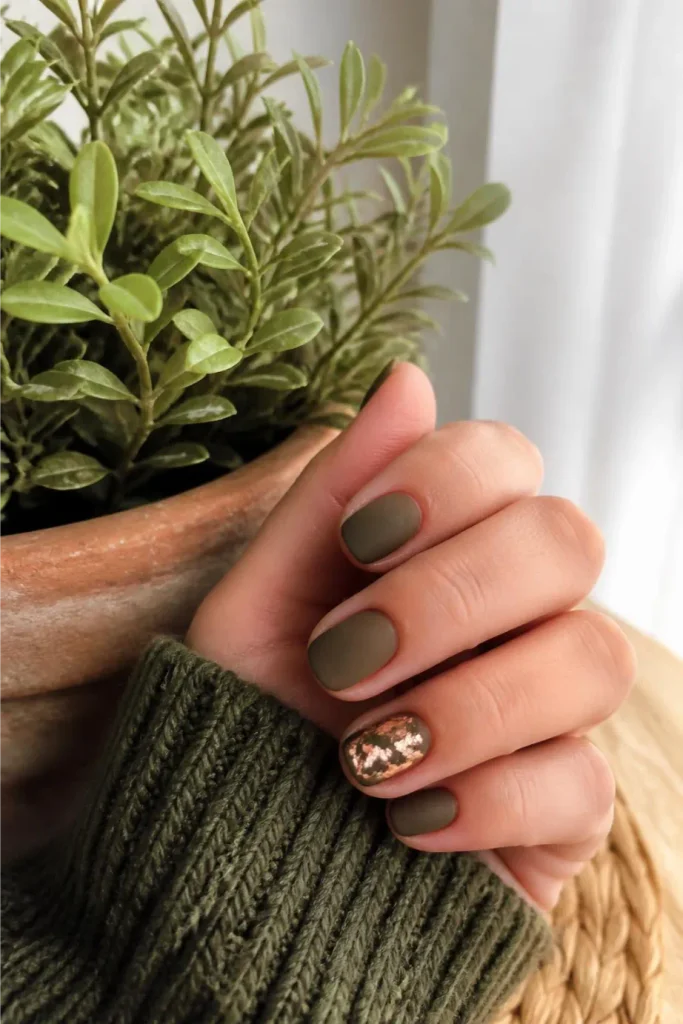
The most common mistake with foil flakes is pressing them into wet polish. They shrink, clump, and lose their shape almost every time.
Let the olive green matte base cure completely first, then press a thin layer of top coat on just one nail, drop the copper flakes in while it is tacky, and seal before the top coat fully sets.
Let the base cure fully before adding any top coat.
Use tweezers to place flakes one at a time.
Pressing flakes into wet, uncured polish.
Overloading one nail with too many flakes at once.
9. Espresso Brown Almond Nails with Tortoiseshell Print
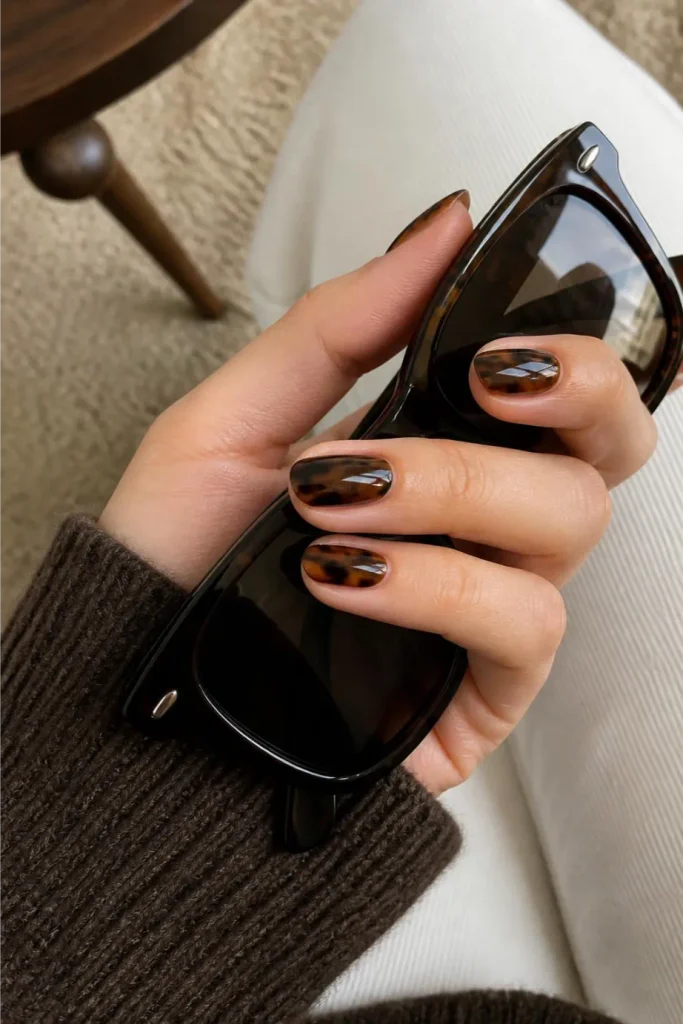
There is a reason tortoiseshell keeps showing up every fall. It looks intentional and a little unpredictable at the same time, since no two blobs of color line up the same way twice.
Paint a warm espresso brown base, then dab small irregular shapes in amber and black using a fine brush, letting some edges blur together and others stay sharp.
A few notes on getting the print right:
- ▸Uneven shapes look more real than perfectly round dots.
- ▸Let each dab dry slightly before adding the next color.
- ▸A matte top coat softens the print for a more natural look.
10. Mustard Yellow Half Moon Manicure
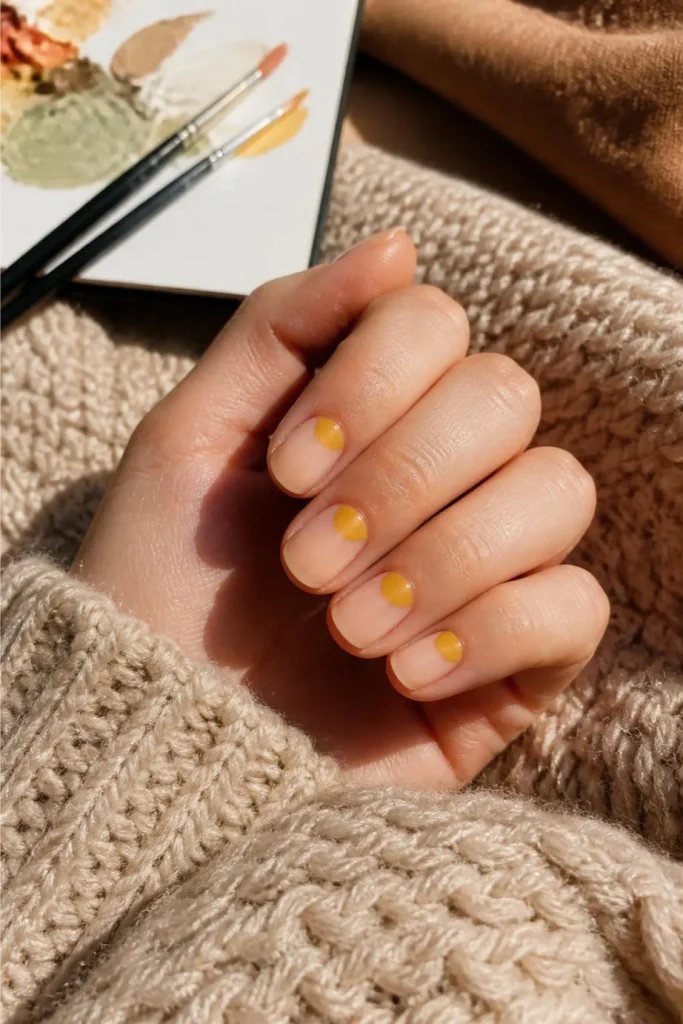
People tend to think half moon manicures need a steady hand and a special tool, but a round hole reinforcement sticker from the office supply aisle works just as well.
Center it near the cuticle, paint mustard yellow over the exposed nail, peel it off, and the moon shape at the base stays bare.
A hole reinforcement sticker gives a cleaner half moon line than any brush can.
11. Burgundy Velvet Matte Short Coffin Nails
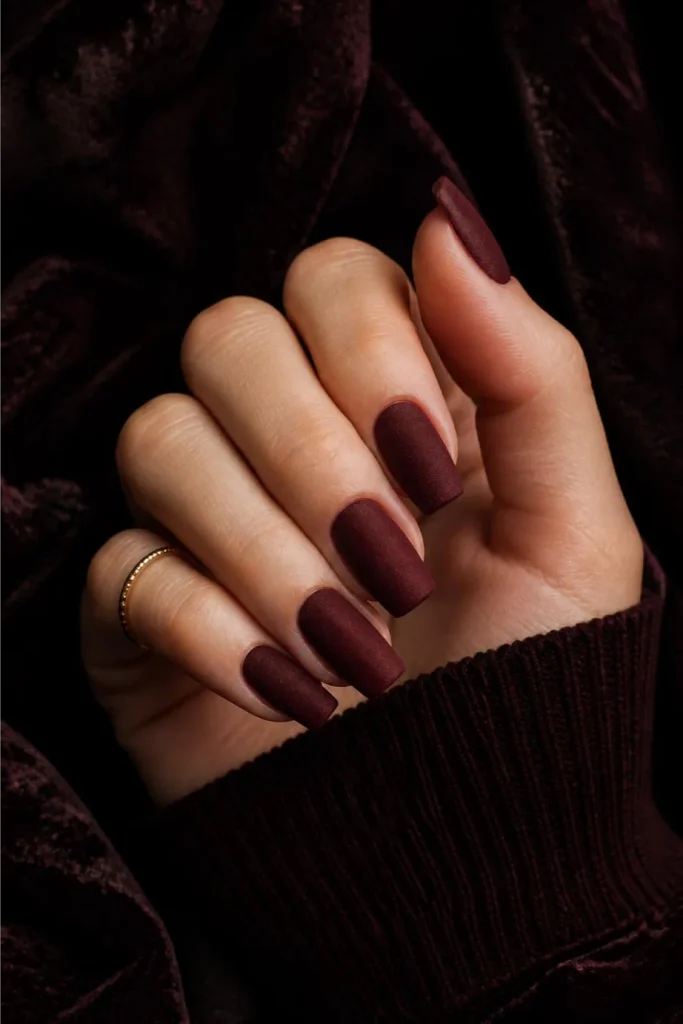
Matte polish on a dark shade like burgundy has one rule most people skip: apply a thin, even top coat layer, because a thick one turns velvet matte into a chalky, uneven finish instead of the soft suede look you want.
Short coffin nails hold this shade especially well since the flat matte surface doesn’t compete with a lot of shine at the tip.
📌 Good To Know
Matte top coats set fast. Work in thin layers and avoid going back over a spot once it starts to dull, or you’ll leave brush marks.
12. Caramel Latte Milky Nails with a Glossy Top Coat
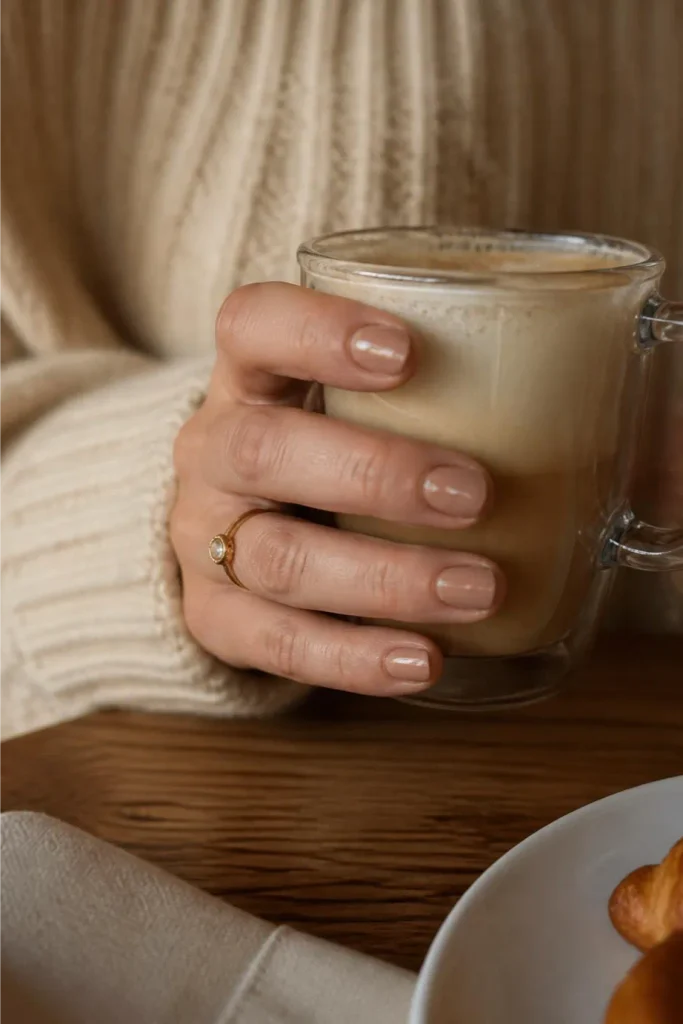
Milky nails photograph better than almost any other short nail trend, mostly because the sheer caramel latte base still shows a hint of your natural nail underneath instead of sitting flat and opaque.
Two thin coats keep it looking like skin with warmth added, not like a solid beige polish.
Three heavy coats of opaque beige, flat and a little chalky looking.
Two sheer coats over a glossy top coat, warm and lit from within.
13. Deep Teal Accent Nail Paired with Warm Neutrals
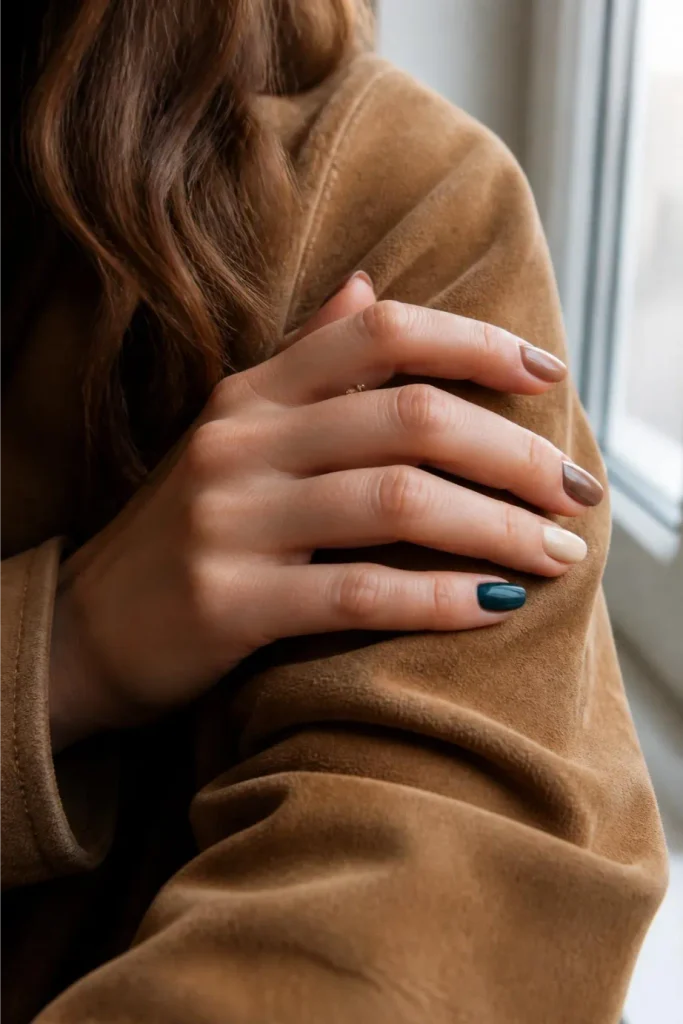
Keep four nails in a warm neutral, something close to your own skin tone, and turn only the ring finger into a deep teal accent.
The contrast works because teal sits opposite orange and brown tones on the color wheel, so it pulls attention without clashing with the rest of the set.
Paint four nails in a warm neutral shade close to your natural undertone.
Paint the ring finger in a deep teal, two coats for full opacity.
Seal all five with the same glossy top coat so nothing looks mismatched in finish.
14. Copper Chrome French Tips on Short Oval Nails
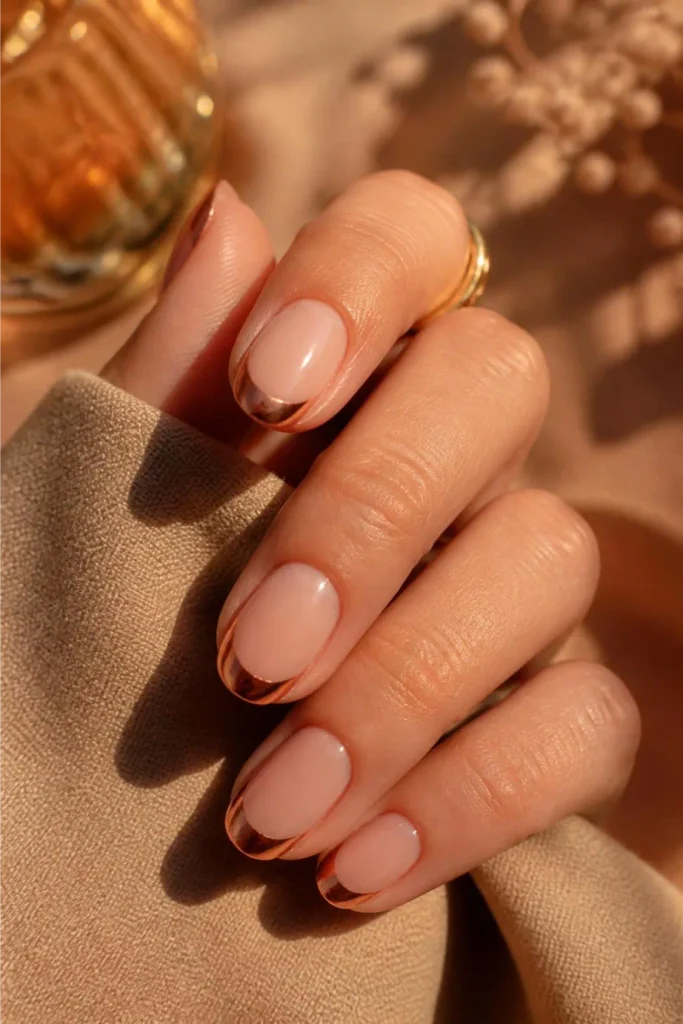
The mistake people make with chrome French tips is buffing the powder too close to the cuticle line, which blurs the edge that makes a French tip look like a French tip in the first place.
Keep the copper chrome contained to the top third of the nail and the line stays crisp even on a short oval shape.
15. Spiced Wine Marble Swirl with Gold Vein Detail
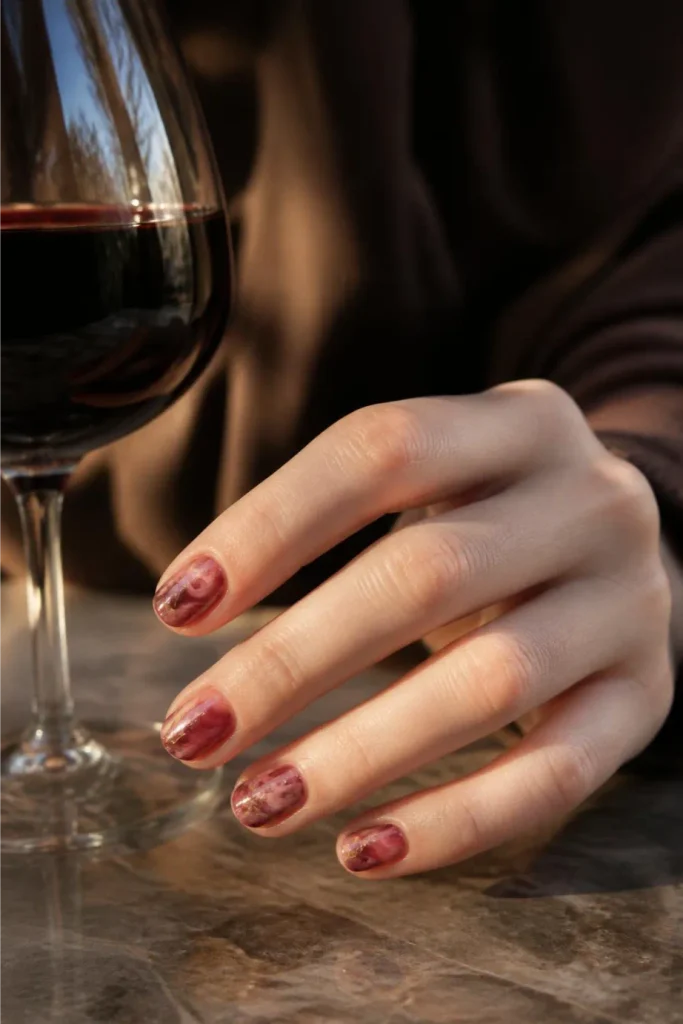
There are two ways to marble a nail, and they give noticeably different results on a spiced wine base.
One uses a wet on wet swirl technique straight on the nail, the other floats the colors in a bowl of water first and dips the nail through. Both work on short nails, but they suit different comfort levels.
| Wet Swirl Method | Water Marble Method |
|---|---|
| Faster, less cleanup | Messier, needs tape around the finger |
| Good for a first attempt | Gives sharper, more defined veins |
16. Warm Taupe Nails with a Single Line Art Leaf
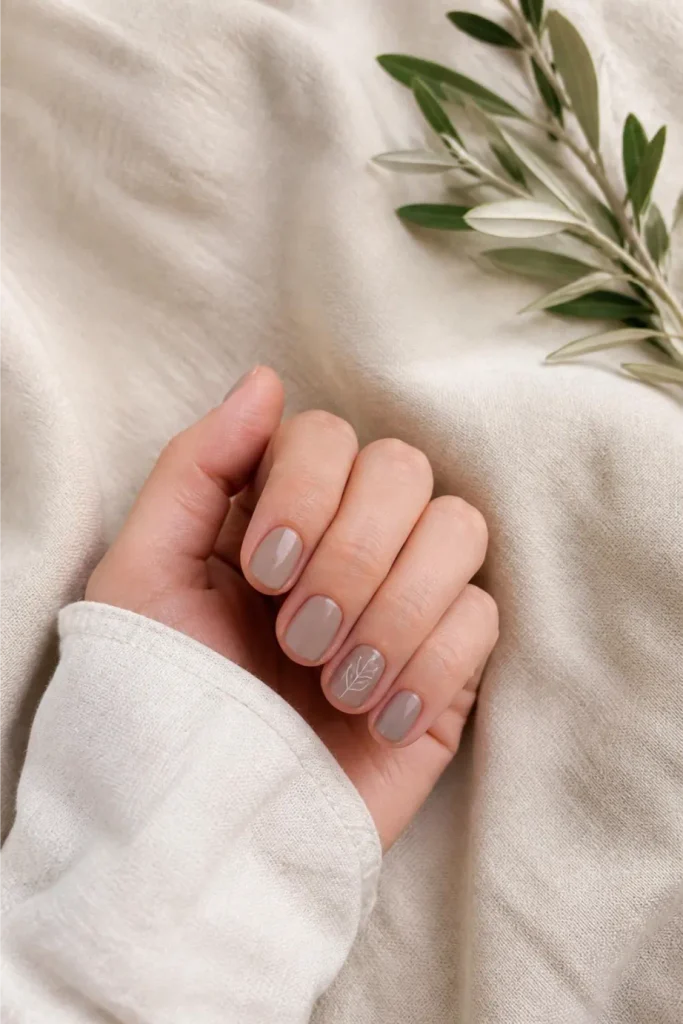
One thin line of gold or black paint can do more work than a full nail art design, especially on a small canvas like a short nail.
Paint all five nails a warm taupe, then use a striping brush to draw one simple leaf outline on a single accent nail, nothing filled in, just the outline.
17. Cider Orange Cat Eye Chrome Finish
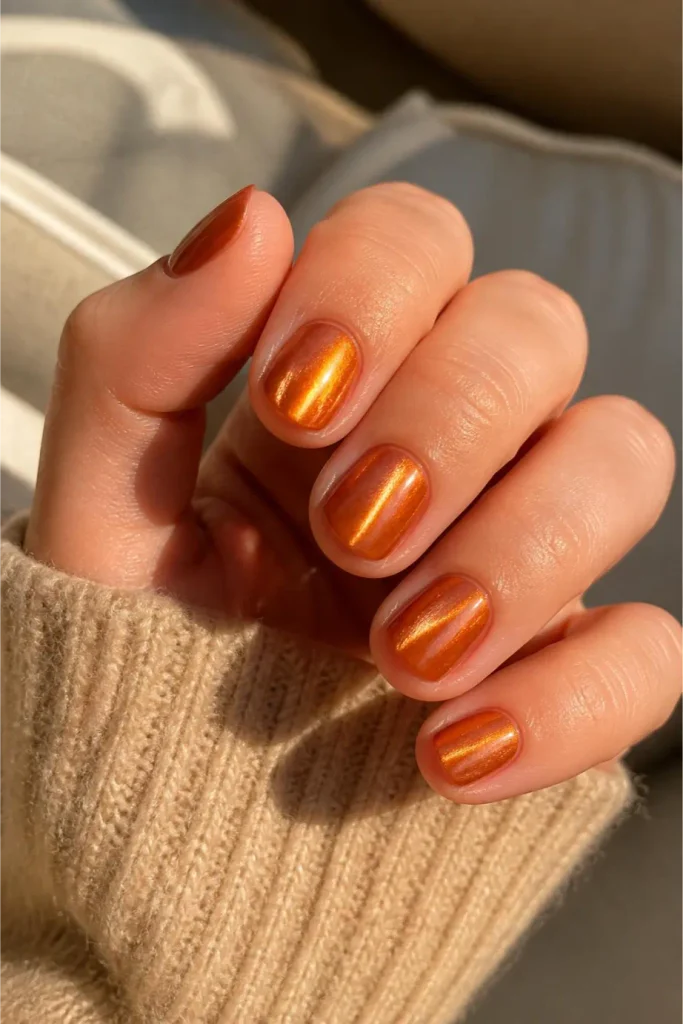
A lot of people buy magnetic cat eye polish and never get the streak to show up right, usually because they hold the magnet too far from the nail or move it before the polish sets.
Paint the cider orange magnetic polish, hold the magnet close without touching the wet polish, and hold it steady for a full ten seconds before curing.
What to grab first
18. Deep Forest Green Glossy Short Squoval Nails

Squoval nails, square with softened corners, hold a deep glossy color better than almost any other short shape because the flat top catches light evenly instead of splitting it at a point.
A rich forest green in two coats, sealed with a thick glossy top coat, looks closer to a bottle of wine than a bottle of polish.
File corners into a soft square before painting.
Apply a thick, glossy top coat for depth.
Leaving sharp corners, they chip faster on short nails.
Using a matte top coat, it flattens the wine like richness.
19. Toasted Almond Nude with Fine Gold Speckles
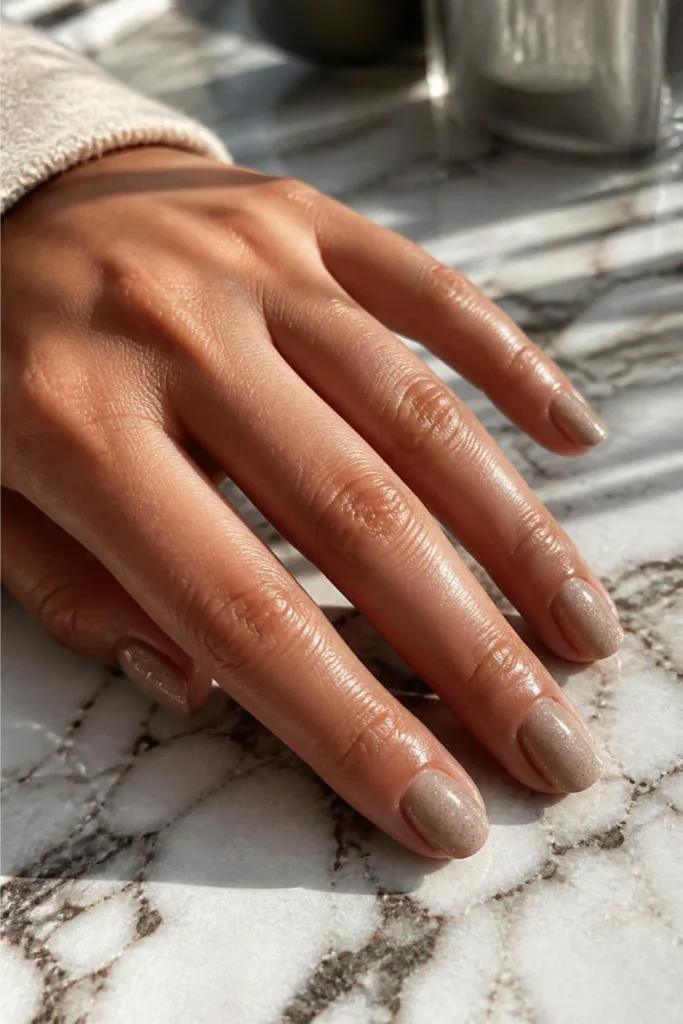
There is something about a plain nude that feels unfinished the moment fall hits, even when it is well done.
Flicking fine gold speckles across a toasted almond base fixes that without turning it into a full design.
Load an old, dry brush lightly with gold polish and tap it against your finger a few inches above the nail so the speckles land at random.
- ▸Use an old, dry brush, never a wet one, for the flick.
- ▸Tap gently, a hard flick sends polish flying off the nail.
- ▸Cover nearby fingers with tape while you work.
20. Rich Mahogany Red French Tip with Rounded Edge
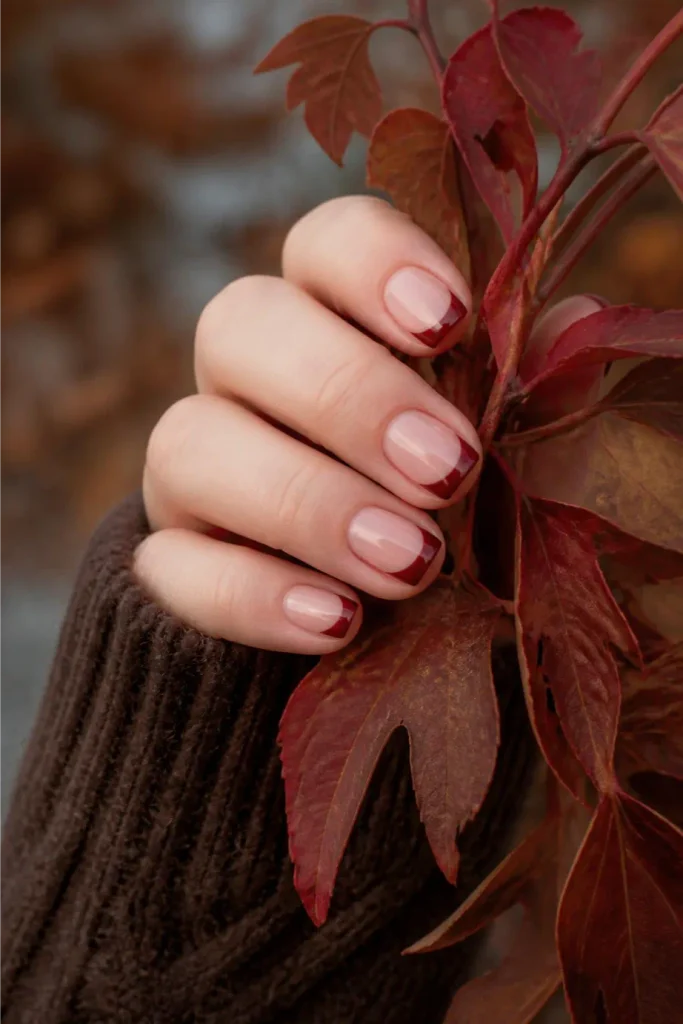
Skip the sharp, straight French line for this one.
A rounded tip edge, following the natural curve of a short nail, looks softer against a rich mahogany red than the crisp geometric line most French tips use.
A rounded French line always looks softer and more natural on a short nail than a straight one.
21. Amber Glass Nails with a Golden Shimmer Finish
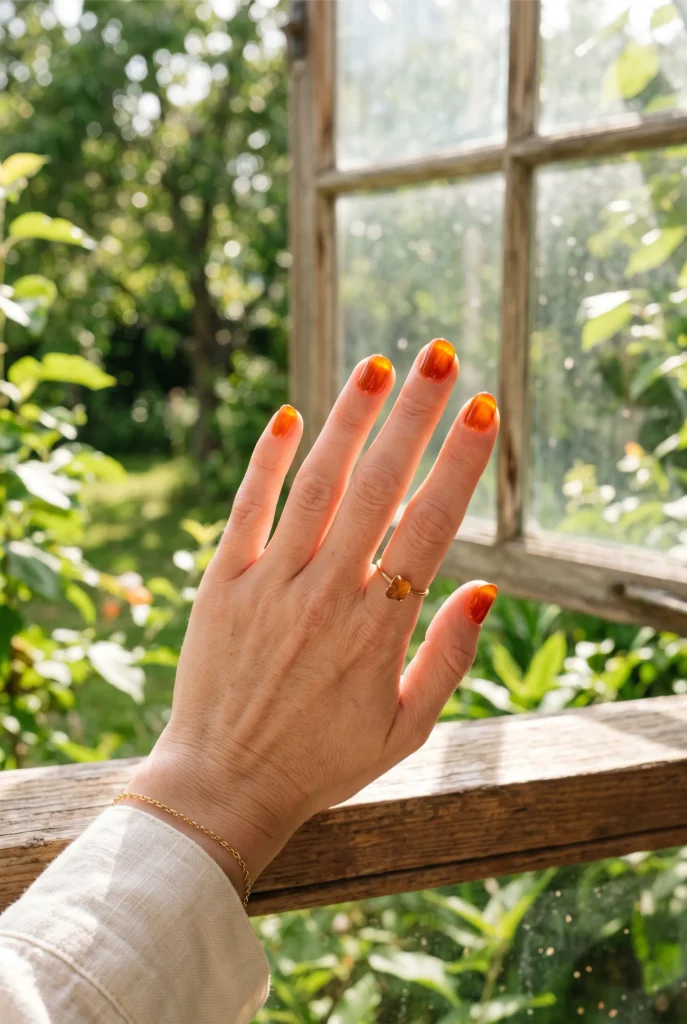
Glass nails usually mean clear and glossy, but an amber tinted version keeps that wet, glass like shine while adding warmth that suits fall better than plain clear.
Mix a drop of amber shimmer polish into a clear gel base, apply thin, and the color stays translucent enough to still look like glass.
💡 Quick Tip
Add the shimmer polish drop by drop and test on one nail first. Too much and it turns opaque instead of glassy.
22. Cranberry Red Matte with a Glossy Accent Nail
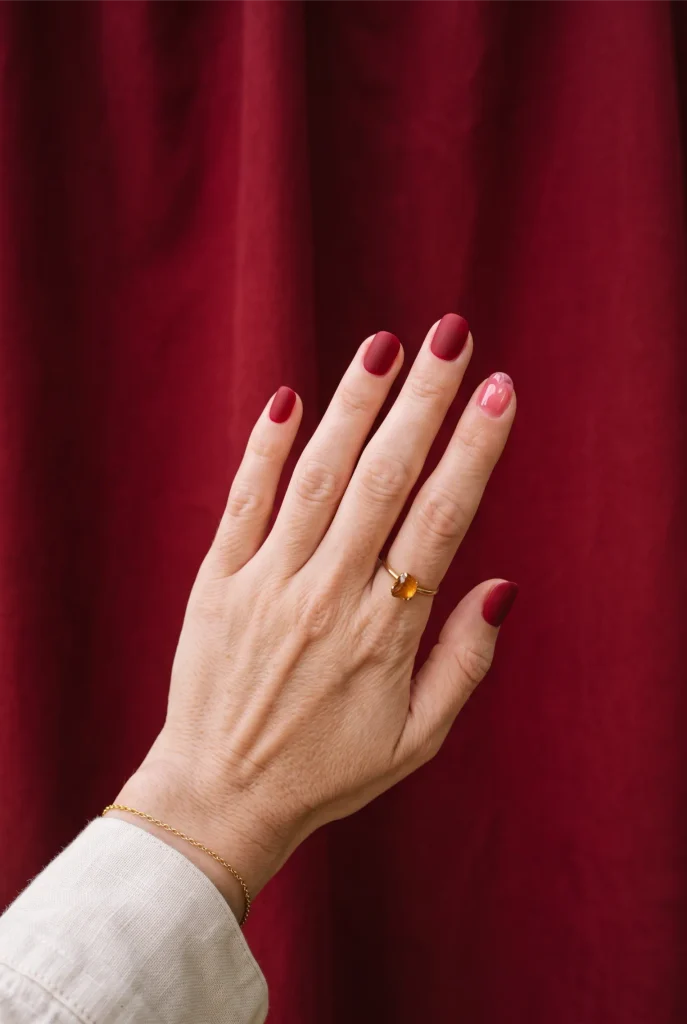
Four matte nails and one glossy one is a small swap that changes how the whole set reads.
Keep the cranberry red matte on four fingers, then leave the same cranberry red glossy, no matte top coat, on just the pinky.
The color stays identical, only the finish changes, and that contrast alone photographs well.
All five nails matte, flat and a bit one note under indoor light.
Same color, one glossy pinky, and the set suddenly has depth.
23. Autumn Plaid Print on One Accent Nail
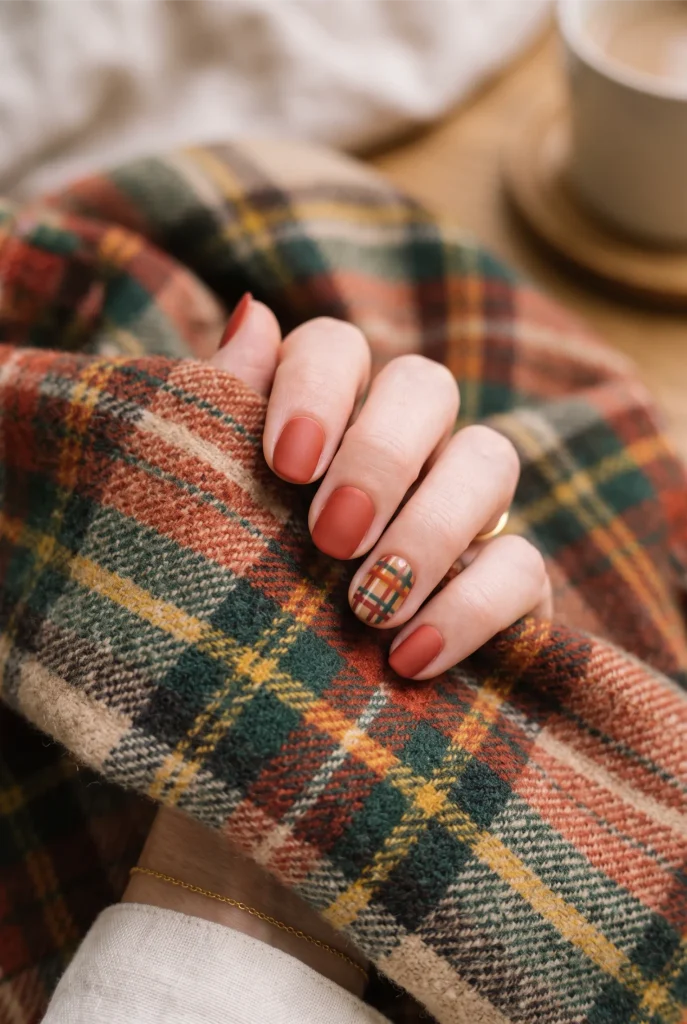
Plaid looks complicated but it is really just straight lines crossing at even angles.
Paint a cream base on your accent nail, then use a striping brush to lay down two thin burgundy lines, two thin mustard lines running the opposite direction, and one thinner black line through each set for the classic plaid grid.
Paint a cream base on the accent nail and let it fully dry.
Draw two burgundy lines one way, two mustard lines the other way.
Add one thin black line through each direction to finish the grid.
24. Warm Chestnut Brown with a Chunky Glitter Tip
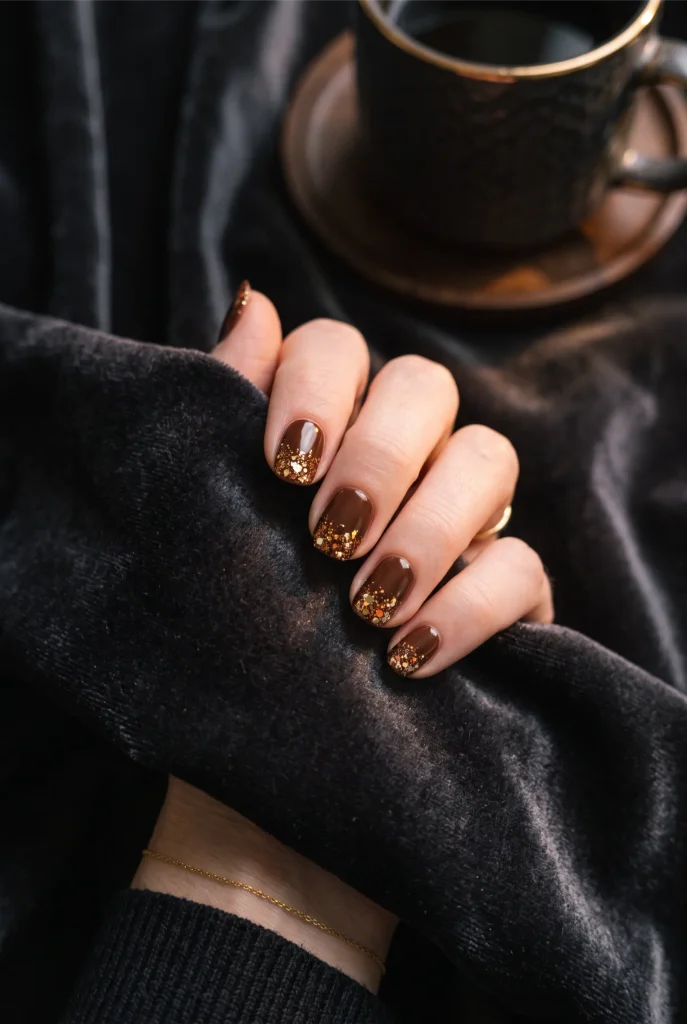
Fine glitter can look washed out on a short nail, there just isn’t enough room for it to catch light the way it does on a longer tip.
Chunky glitter, the kind with visible flecks instead of dust, solves that.
Paint a warm chestnut base, then pack chunky gold and copper glitter onto just the tip using a damp brush to pick up and place each piece.
25. Smoky Topaz Duochrome Nails for Short Round Shapes
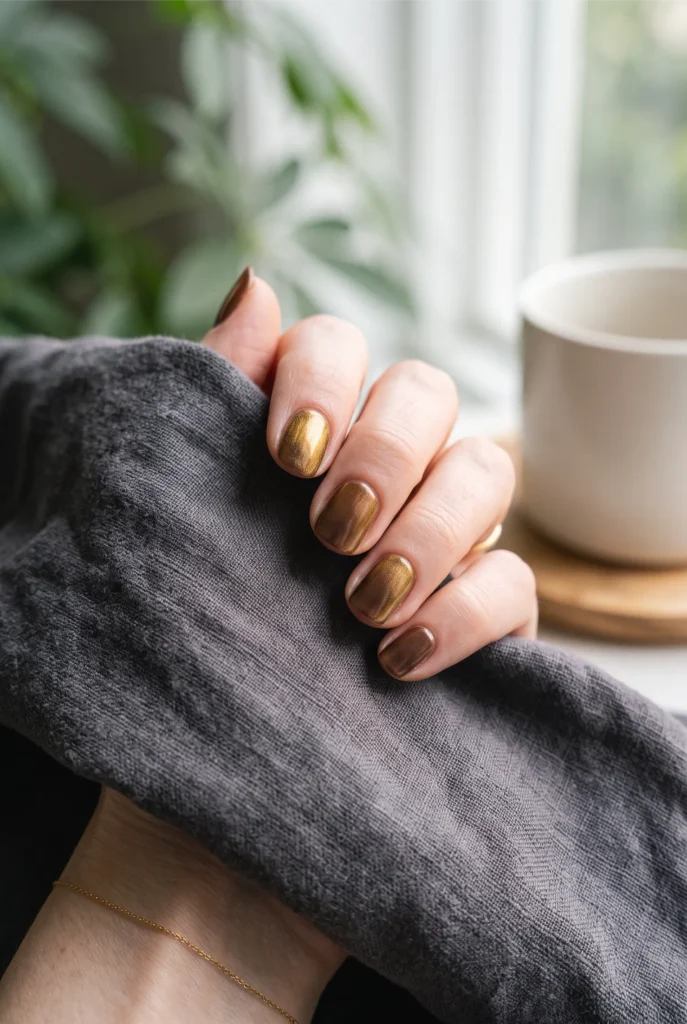
Duochrome polish shifts between two colors depending on the angle it catches light, and a smoky topaz shade moves between gold and deep brown in a way that looks almost alive under daylight. It needs almost nothing else.
One clean base, two thin coats, and a round nail shape that lets the color shift show as your hand moves.
What to grab first
Short nails don’t need extra length to carry a good fall look, they need the right color and a finish that suits the shape you already have.
Chrome, matte, marble, and a few French tip twists cover most of what shows up on Pinterest this season, and none of them take more than half an hour to do at home.
Start with whichever short fall nails idea matches supplies you already own, a chunky glitter tip if you have loose glitter on hand, or a milky nude if you just want something simple and warm.
The rest will still be here when you’re ready for the next one.
Save this list for the next time you’re staring at a bare manicure and can’t decide what fall color to reach for.


