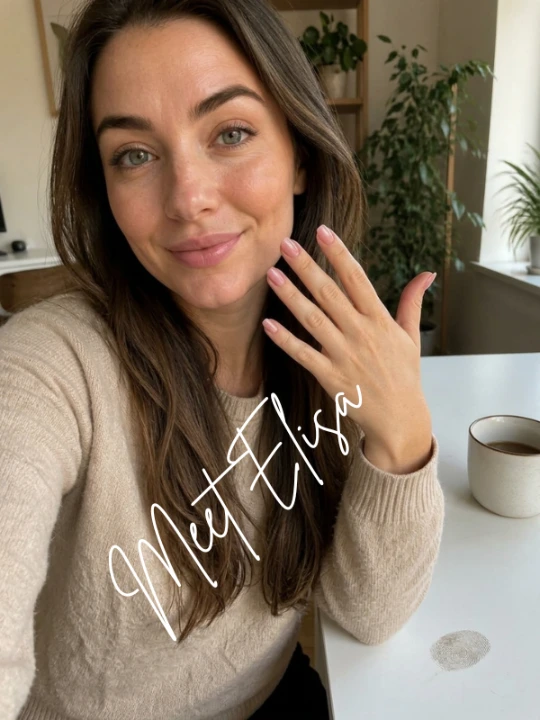

Creating beautiful nail art at home doesn’t have to involve an expensive collection of brushes, complicated equipment, or professional salon supplies.
In fact, some of the prettiest nail designs use just a few basic tools and a little creativity.
If you’re new to DIY nail art, knowing what to buy can feel overwhelming. There are dotting tools, liner brushes, nail art pens, stamping kits, sponges, stickers, and countless other accessories available. But do you really need all of them?
The good news is that you don’t.
With a small collection of affordable nail art tools, you can create simple polka dots, delicate flowers, clean stripes, French tips, and plenty of other everyday designs.
The trick is choosing versatile tools that are easy to use and learning what each one can do.
In this guide, we’ll explore the tools for simple nail art that beginners actually need, a few household alternatives worth trying, and the optional accessories you can add later.
Your Little Nail Art
Starter Kit ♥
Beautiful nail designs don’t require a professional salon setup. Start with a few simple tools and let your creativity shine!
4 Essentials to Get Started
01. Basic Nail Polish
Start with a base coat, a few favorite colors, and a top coat. These create the foundation for almost every simple nail design.
02. Nail Art Brushes
A thin liner brush helps create stripes, curves, fine lines, and tiny details. A small brush can make a big difference.
03. Dotting Tools
Perfect for making polka dots, flowers, hearts, and cute patterns. A toothpick or bobby pin can work as a budget alternative.
04. Nail Art Decorations
Add personality with nail stickers, glitter, rhinestones, and decals. They’re easy shortcuts to eye-catching designs.
1. Start With the Basic Nail Preparation Tools
Before experimenting with nail art, it’s helpful to prepare your nails properly. A smooth, neatly shaped nail surface makes it easier to apply polish and create clean designs.
You don’t need an elaborate manicure kit. A few basic items will do.
Nail File
A nail file is one of the most useful tools for any at-home manicure. It helps shape your nails, smooth rough edges, and create a consistent length before applying polish.
For everyday nail art, an ordinary emery board or gentle nail file is usually sufficient.
What can you use it for?
- Shaping square, round, oval, or squoval nails.
- Smoothing rough edges.
- Maintaining a consistent nail length.
- Preparing your nails before applying polish.
Beginner tip: File gently in one direction rather than aggressively sawing back and forth. Choose a file appropriate for natural nails.
Nail Buffer
A nail buffer has multiple surfaces designed for smoothing the nail surface and refining its appearance.
However, you don’t need to buff your nails every time you create nail art. Excessive buffing can thin and weaken natural nails.
For beginners, a gentle buffer is an optional addition rather than an essential purchase.
Base Coat and Top Coat
These two products are more important than many beginners realize.
A base coat is applied before colored polish. It provides a suitable starting layer and can help reduce staining from certain nail colors.
A top coat goes over your finished design. It adds shine or a chosen finish and helps protect the artwork from everyday wear.
For a basic nail art collection, these are two of the most useful polish products to own.
2. Dotting Tool: The Easiest Way to Create Cute Designs
A dotting tool is one of the best beginner nail art tools because it makes creating small, rounded details much easier.
It usually has a small metal ball at one or both ends. Different ball sizes allow you to create different-sized dots without needing advanced brush control.
What can you create with a dotting tool?
- Polka dot nails.
- Simple flower petals.
- Tiny hearts with additional detailing.
- Daisy-inspired patterns.
- Minimalist accent nails.
- Small decorative details.
For example, you can create a simple daisy design by placing five small dots in a circle and adding a contrasting dot in the center.
You can also arrange tiny white dots over a nude or pink base for a delicate, everyday manicure.
Household alternative: A clean bobby pin with a rounded end can work for basic dots. A toothpick can also create smaller dots, although the results may be less consistent.
Beginner tip: Place a small amount of polish on a palette or disposable surface. Dip the tool into the polish and gently touch it to the nail. Reload the tool as needed to keep your dots reasonably consistent.
3. Fine Nail Art Brush: For Lines and Small Details
If you want to create stripes, delicate patterns, or simple French tip designs, a fine nail art brush is worth adding to your collection.
Unlike the wider brush that comes inside a regular nail polish bottle, a detail brush has a narrow tip that gives you more control.
What Is a Striping Brush?
A striping brush is a particularly thin, often elongated nail art brush designed to create lines.
It’s useful for:
- Vertical and horizontal stripes.
- Thin French tip details.
- Minimalist geometric patterns.
- Simple curved lines.
- Abstract nail designs.
- Delicate decorative accents.
For example, you can paint a nude base color and add one thin white or metallic line down the center of each nail for a simple minimalist look.
You don’t need an entire professional brush collection to begin. One fine liner brush can cover many basic techniques.
Beginner tip: Use a small amount of polish and practice on a piece of paper or a nail art practice surface before working directly on your nails.
4. Nail Art Tape and Guide Stickers for Cleaner Designs
Not every nail design requires steady hands. Sometimes, a simple adhesive guide can make the process much easier.
Nail art tape and guide stickers are especially helpful when you want defined shapes and clean-looking edges.
Striping Tape
Striping tape consists of very thin adhesive strips that can help create geometric patterns and straight-line designs.
You can use it to create:
- Straight stripes.
- Color-blocked nails.
- Negative-space designs.
- Simple geometric patterns.
- Metallic-looking decorative lines when using metallic nail art tape.
French Tip Guides
French tip guides are curved stickers that help you create a more consistent smile line when painting the tips of your nails.
They’re useful if you’re still learning how to paint French tips freehand.
Round Reinforcement Stickers
The circular stickers used to reinforce holes in paper can also serve as simple nail art guides.
They can help create half-moon designs and curved negative-space patterns.
Beginner tip: Make sure your base polish is completely dry before applying adhesive guides. Press the edges down gently, apply your contrasting color, and remove the guide carefully before the polish becomes too dry.
5. Small Cleanup Brush: Your Secret to Neater Nail Art
Even simple nail designs can become messy when polish spreads beyond the nail edges.
A small cleanup brush helps correct these mistakes without requiring you to remove your entire manicure.
Look for a small, flat or angled brush with soft, compact bristles.
What is it useful for?
- Cleaning polish around the nail edges.
- Correcting uneven French tip lines.
- Removing small polish smudges.
- Tidying the outline of detailed designs.
You can use the brush with a small amount of nail polish remover, following the product’s instructions.
A dedicated cleanup brush isn’t absolutely necessary on your first day, but it’s a useful addition once you start experimenting with more detailed designs.
Beginner tip: Keep your brush clean between uses and avoid flooding the surrounding skin with remover.
6. Makeup Sponge for Easy Ombre Nail Designs
Do you love soft gradient nails but find them difficult to paint with a regular nail polish brush?
A small makeup sponge can help.
Makeup sponges are commonly used for creating blended color effects because their textured surface transfers polish in a stippled pattern.
You can experiment with:
- Pink-to-white ombre nails.
- Two-color gradients.
- Pastel gradient designs.
- Subtle sunset-inspired nails.
- Glitter gradient effects.
How to Use a Makeup Sponge for Nail Art
- Apply your chosen base color and allow it to dry.
- Place two or three complementary polish colors next to each other on a suitable surface.
- Lightly press the sponge into the colors.
- Gently dab the sponge over the nail to transfer the gradient.
- Repeat with light layers until you achieve the desired effect.
- Clean up the surrounding skin and finish with a top coat once the design is dry enough.
The first attempt may look a little uneven, so don’t worry if the gradient isn’t perfect immediately.
Beginner tip: Protect the skin around your nails with suitable liquid latex barrier products or carefully clean the surrounding area afterward.
7. Nail Polish Remover, Cotton Pads, and a Small Palette
These aren’t decorative nail art tools, but they make the entire process easier.
Nail Polish Remover
Nail polish remover helps remove old polish and correct mistakes.
Keep a suitable remover available when practicing nail art. Follow its label instructions and use it in a well-ventilated area.
Cotton Pads or Lint-Free Wipes
These are useful for removing old polish, cleaning your tools, and keeping your workspace tidy.
Lint-free wipes can be particularly convenient when working with small decorative details because they leave fewer loose fibers behind.
Nail Art Palette
A small palette gives you somewhere to place drops of polish before using a dotting tool or brush.
You don’t need an expensive professional palette. A clean, non-porous surface intended for cosmetic use can work for mixing or holding small amounts of polish.
Beginner tip: Avoid placing nail polish directly on your furniture or other surfaces that could be damaged by spills.
8. Which Nail Art Tools Can You Replace With Household Items?
One of the easiest ways to save money when starting nail art is to experiment with suitable household alternatives.
You may already have a few useful items at home.
| Household item | Possible nail art use |
|---|---|
| Bobby pin | Creating simple dots |
| Toothpick | Tiny dots and fine details |
| Makeup sponge | Creating gradient effects |
| Paper reinforcement stickers | Half-moon nail designs |
| Adhesive tape | Basic geometric patterns |
| Small clean brush | Cleaning up nail polish edges |
These alternatives are useful for practicing basic techniques, but they won’t always produce the same precision as dedicated nail art tools.
For example, a bobby pin can create simple polka dots, but a double-ended dotting tool offers more size options.
Similarly, ordinary adhesive tape isn’t specifically designed for nail art. Test it carefully and avoid applying it to wet or delicate polish.
9. What Nail Art Tools Can Beginners Skip?
It’s easy to get carried away when browsing nail art accessories online. Many kits contain tools that look exciting but may not be particularly useful when you’re just starting.
Here are some items you can comfortably leave for later.
Nail Stamping Kits
Stamping kits use engraved plates, special polish, and a stamper to transfer patterns onto nails.
They’re useful for creating detailed designs, but you don’t need them to learn basic nail art techniques.
Electric Nail Drills
Electric drills are generally associated with professional nail services and specific artificial nail techniques.
They aren’t necessary for simple designs using regular nail polish. Beginners should avoid purchasing one just because it appears in a large nail art kit.
Large Professional Brush Sets
A set containing 15 or 20 different brushes might look attractive, but most beginners won’t use every brush.
Start with one fine liner brush and a dotting tool. Add specialized brushes only when you have a particular design in mind.
UV or LED Nail Lamps
A nail lamp is not needed for ordinary air-drying nail polish.
UV or LED lamps are used with compatible light-curable products, such as gel nail systems. These products have different application and safety requirements.
If you’re learning basic nail art, regular nail polish is a simpler starting point.
10. Your First Simple Nail Art Kit: A Practical Shopping Checklist
If you’re starting from scratch, you don’t need to purchase everything mentioned in this article.
Here’s a practical starter collection that covers the majority of simple DIY nail designs.
Essential starter supplies:
- Nail file.
- Base coat.
- Two or three nail polish colors.
- Top coat.
- Dotting tool.
- One fine liner brush.
- Nail polish remover.
- Cotton pads or lint-free wipes.
Useful additions:
- Striping tape.
- French tip guide stickers.
- Small cleanup brush.
- Makeup sponge.
- Small nail art palette.
You can begin with the essential collection and gradually add accessories as you discover which designs you enjoy creating.
Three Easy Nail Designs to Try With Your Starter Kit
Wondering what you can actually create with these tools?
Here are three beginner-friendly ideas.
1. Simple Polka Dot Nails
Use a dotting tool and two contrasting polish colors. Apply a solid base, allow it to dry, and add small dots across one or two accent nails.
2. Minimalist Line Art
Use a fine liner brush to create a single vertical line, a delicate curve, or a simple geometric detail over a neutral base color.
3. Easy French Tip Nails
Use French tip guide stickers to help create curved tips. Apply your chosen tip color, remove the guides carefully, and finish with a top coat when the design is ready.
These designs demonstrate why a small collection of versatile tools is often enough to get started.
11. How to Keep Your Nail Art Tools Clean and Organized
Taking care of your tools helps keep your workspace organized and makes your next manicure easier.
Here are a few simple habits:
- Clean nail art brushes according to the type of polish used and the brush manufacturer’s instructions.
- Remove polish residue from dotting tools after use.
- Keep your brushes protected so their tips don’t bend or spread.
- Store nail polish bottles tightly closed and follow their storage instructions.
- Avoid sharing personal manicure tools without appropriate cleaning.
- Replace worn-out disposable items when necessary.
Don’t cut or forcefully push back your cuticles when preparing your nails. The American Academy of Dermatology advises against cutting or aggressively pushing cuticles because they help protect against infection.
Also, follow the warnings on nail product labels and use nail products in a well-ventilated space.
Frequently Asked Questions
1. What tools do you need for simple nail art?
For basic nail art, start with a nail file, base coat, top coat, a few nail polish colors, a dotting tool, and a fine liner brush. Striping tape and a small cleanup brush are useful additions.
2. Can I do nail art without professional tools?
Yes! You can practice many simple designs using household alternatives. A bobby pin can create dots, a toothpick can make tiny details, and a makeup sponge can help create gradient effects.
However, dedicated tools generally offer better control and more consistent results.
3. What is the easiest nail art tool for beginners?
A dotting tool is one of the easiest tools to learn. It requires relatively little brush control and can create polka dots, simple flowers, and other decorative patterns.
4. Do I need a UV lamp for simple nail art?
No. Regular nail polish dries in the air, so you don’t need a UV or LED lamp for ordinary nail art. Lamps are intended for compatible gel products that require light curing.
5. How much should I spend on my first nail art kit?
There is no fixed amount you need to spend. Begin with a few basic supplies rather than purchasing a large professional kit. Use the nail polish and manicure essentials you already own, then add a dotting tool and fine brush if you want to experiment with more designs.
Final Thoughts
Creating beautiful nail art at home doesn’t require a professional collection of supplies. A few versatile tools can help you explore plenty of simple designs, from cute polka dots and delicate flowers to minimalist lines and French tips.
Start with the basics: a nail file, base coat, top coat, a dotting tool, and a fine liner brush. Add tape, a cleanup brush, or a makeup sponge when you’re ready to try something different.
Most importantly, don’t feel pressured to buy every accessory you see online. Learn a few techniques, practice at your own pace, and build your nail art collection around the designs you genuinely enjoy.
Sometimes, the simplest tools are all you need to create a manicure that feels beautifully your own.