Negative space nails look like something that needs a salon appointment: a clean gap of bare nail, a crisp curve of color, a thin line floating where you least expect it.
The good news is that the effect comes from what you leave unpainted, which means there is less to get wrong. If you can paint a straight swipe of polish, you can follow this negative space nail tutorial.
Below you’ll find a short supply list, a step-by-step method, three easy design variations, tips for short nails, and fixes for the problems beginners run into most.
Take your time, work in thin layers, and remember that a slightly imperfect gap often looks intentional.
What Is Negative Space Nail Art?
What Is Negative Space Nail Art?
A modern nail design technique that turns your natural nail into part of the artwork.
The Beauty Behind the Technique
01. Natural Nail as the Canvas
Your natural nail becomes part of the design. Selected areas remain polish-free, creating a beautiful contrast between bare nail and color.
02. Intentional Empty Spaces
Unpainted sections aren’t accidental. They are carefully planned to create geometric shapes, curves, lines, and cutout effects.
03. Beautiful Color Contrast
The technique combines natural nail tones with bold or soft polish colors, making even simple designs look sophisticated.
04. Minimal Yet Creative
From delicate French tips to abstract patterns, negative space creates a clean, modern, and effortlessly elegant manicure.
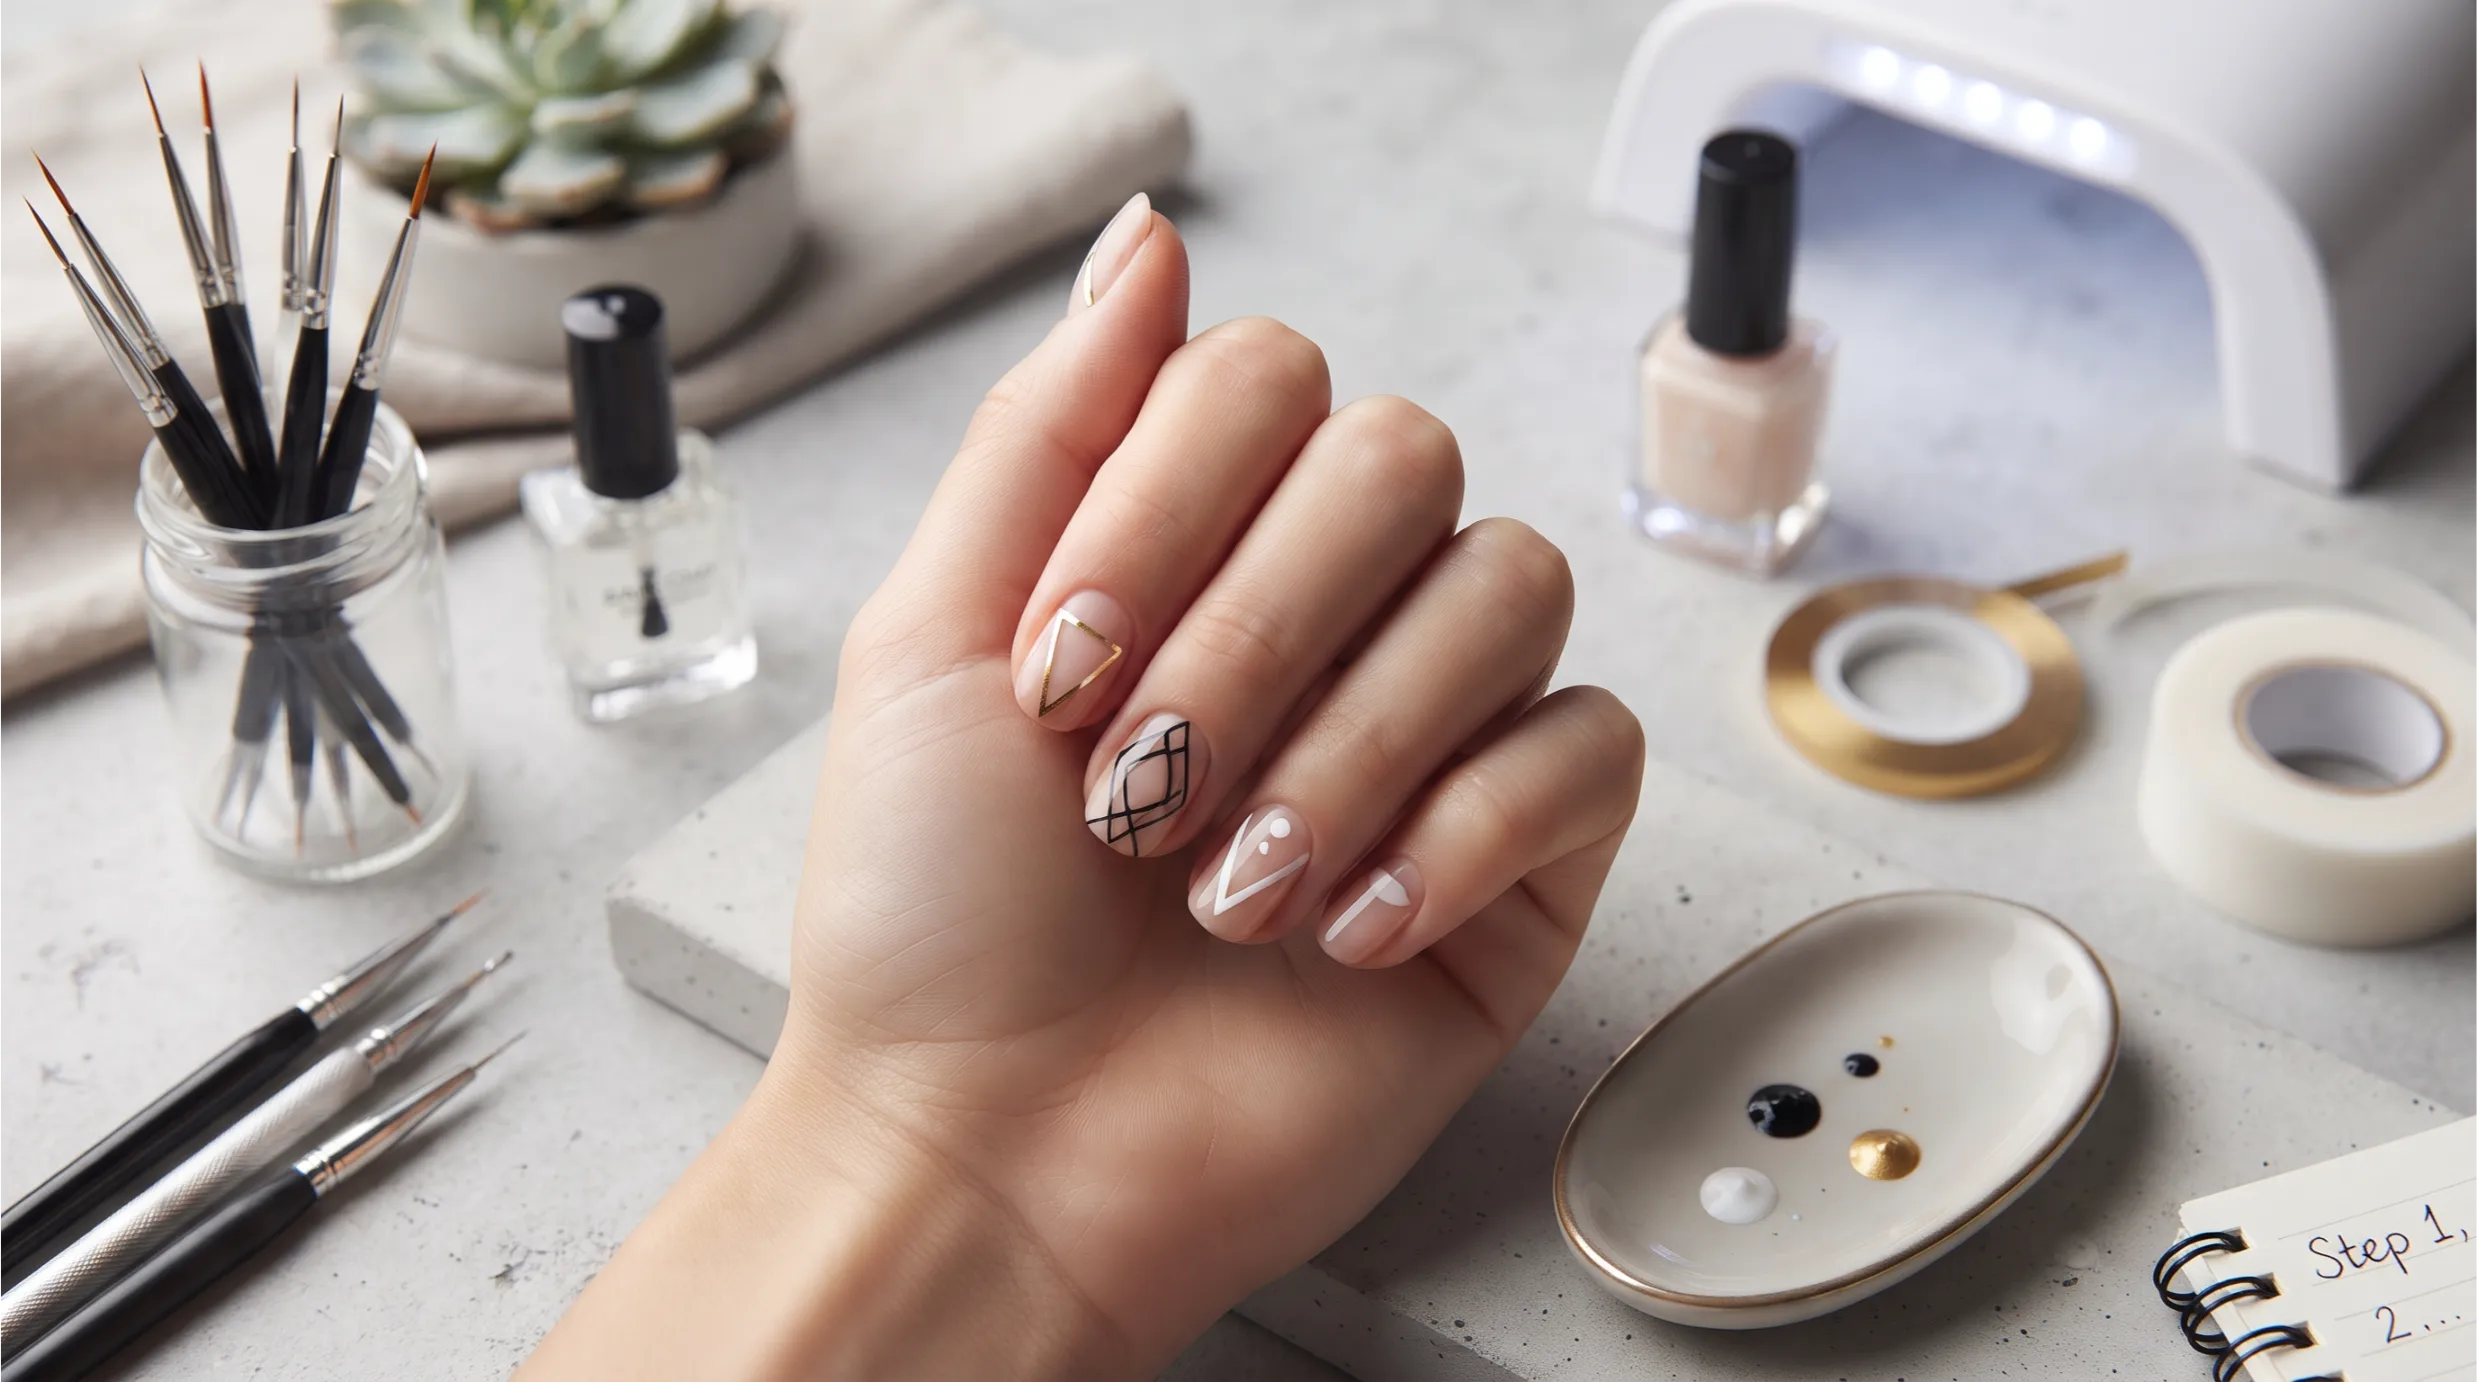
Negative space nail art is a design style where part of the nail is left bare, or covered only with a sheer, clear, or nude layer, and that empty area becomes part of the design.
It works like white space on a poster: it frames the color and makes the shapes stand out.
Popular versions include half-moon cut-outs, diagonal gaps, thin geometric lines, and French tips with a bare center.
Because the look depends on contrast between polish and natural nail, it suits minimalist tastes.
It also feels lighter than full-coverage color, which many people find easier to wear every day.
Why Negative Space Nails Suit Beginners
- Less polish to perfect. You are not covering the whole nail, so there is less surface to keep smooth.
- Easy to fix. If one nail goes wrong, wipe it clean and redo only that nail.
- Forgiving on short nails. A gap or a line can make short nails look longer and tidier without extra length.
- Works with any color. One shade plus a clear base is enough for a polished result.
- Low pressure. The design is meant to look airy, so tiny wobbles read as style rather than mistakes.
What You Need for Negative Space Nails
You don’t need a full nail art kit. A small, inexpensive set is enough:
- Base coat and clear top coat
- One or two polish colors (a sheer nude or pink is optional for the gap)
- Striping tape, nail tape, or hole-reinforcement stickers (optional, but very helpful for clean edges)
- A thin detail brush or dotting tool
- A small flat brush or cotton swab and nail polish remover for cleanup
- A nail file or emery board
- Cuticle oil or hand cream
Regular polish works well for this tutorial. If you use gel polish, you will also need a compatible lamp and should follow the product’s curing instructions.
Prep Your Nails First
Clean, smooth nails make crisp lines easier. Remove old polish, wash and dry your hands, and shape your nails with a file.
The American Academy of Dermatology recommends filing with an emery board to keep nails smooth and free of snags, and slightly rounding the tips for strength.
Dermatologists also advise leaving your cuticles alone rather than cutting them, since cutting can damage the nail and raise the risk of infection (AAD tips via Newswise).
Before you start painting, wipe each nail with a little polish remover on a lint-free pad to clear away natural oils.
If your skin feels dry after removing old polish, apply a little cream and wipe the nail surface again before the base coat.
Negative Space Nail Tutorial: Step by Step
Negative Space Nail Art
Less polish, more creativity. Create an effortlessly chic manicure by letting your natural nail become part of the design.
Create Your Look Step by Step
Prep Your Nails
Clean, shape, and gently buff your nails. Apply a clear base coat to protect your natural nails and create a smooth canvas.
Choose Your Design
Plan your pattern before painting. Try geometric lines, curved shapes, or delicate accents while leaving sections of your natural nail exposed.
Apply Polish Strategically
Use a thin nail art brush or tape to create clean boundaries. Apply polish only where needed, keeping the negative-space areas bare or transparent.
Seal & Finish
Allow the design to dry, then apply a clear top coat over the entire nail for a glossy finish, added protection, and longer-lasting results.
This method creates a classic diagonal gap, the easiest shape to start with. Once it feels comfortable, you can swap in any design from the next section.
Step 1: Apply a Thin Base Coat
Paint one thin layer of base coat over the whole nail and let it dry.
The base coat gives the polish something to grip and keeps color from sitting directly on the nail.
Keep the layer thin so it dries quickly and the tape sits flat later.
Step 2: Decide Where the Gap Will Go
Before touching any color, look at your nail and picture a line from one side near the cuticle to the opposite side near the tip.
That line is your gap edge. Color goes on one side of it and the bare nail stays on the other.
Using a consistent angle across all ten nails looks neat. Alternating the angle or the colored side from nail to nail looks more playful.
Step 3: Place Your Guide
Press a strip of tape along your planned line, smoothing the edges down so polish can’t creep underneath.
Hole-reinforcement stickers work the same way for half-moon shapes at the cuticle. If you prefer freehand, skip the guide and use your thin brush to draw the edge, then fill in the area.
Freehand is faster once you are used to it, but tape is the more forgiving choice for a first attempt.
Step 4: Paint Your Color in Thin Coats
Brush the polish from the edge of the tape outward, using a light touch. Two thin coats look smoother than one thick coat, and thin coats are less likely to pull or smear when you remove the tape.
Don’t overload the brush near the tape line, because excess polish is what forms a ridge or bleeds underneath.
Step 5: Remove the Tape Carefully
Peel the tape off while the final coat is still slightly wet, not fully hardened, pulling slowly away from the painted area.
Waiting until polish is completely dry can cause the edge to chip or lift as the tape comes off. If you used gel, follow your product’s instructions for when to remove the guide, as it differs from regular polish.
Step 6: Clean the Edges
Dip a small flat brush or the tip of a cotton swab in polish remover, squeeze off the excess, and trace along the gap edge to sharpen it.
Work in small strokes and wipe the brush clean as you go.
Step 7: Seal With Top Coat and Moisturize
Apply a clear top coat over the whole nail, including the bare section, so the entire surface is protected and glossy.
Float the brush over the color rather than pressing hard, which helps avoid dragging pigment into the gap. Once everything is dry, finish with cuticle oil or hand cream.
Three Easy Negative Space Nail Designs to Try Next
Half-Moon Cut-Out
Place a hole-reinforcement sticker at the base of the nail, paint the rest in your chosen color, and peel the sticker off to reveal a bare half-moon near the cuticle.
It is one of the simplest negative space nail ideas and works well with deep shades like burgundy or navy.
Negative Space French Tips
Instead of painting a solid white or colored tip, paint a thin curved line along the free edge and leave the area between the line and the tip bare or sheer. You can also reverse it by painting the tip and leaving a gap before the nail bed. Negative space French tips are a softer take on the classic look and suit natural-looking manicures.
Thin Lines and Dot Accents
Use a thin brush or striping tape to add one or two straight lines across a bare or sheer nail, then place a single dot where the lines would meet. Keep the pattern sparse.
This is the most minimal option and a good fit for readers who want something quiet and neat.
Tips for Short Negative Space Nails
Short nails are a great canvas for this style because the bare space keeps the design from feeling crowded.
- Keep gaps narrow, about a third of the nail, so the color doesn’t feel lost.
- Choose vertical or slightly diagonal lines, which tend to visually lengthen the nail.
- Stick to one or two colors so the design stays clean.
- Use a sheer nude or milky base if bare nails look uneven. It softens the contrast without hiding the gap.
Common Mistakes and How to Fix Them
- Polish bleeds under the tape. Press the tape edge down firmly, use thinner coats, and wipe excess polish off the brush. Clean the edge with a remover-dipped brush afterward.
- The edge looks jagged. Remove the tape while the polish is still slightly wet and pull slowly. A flat brush with remover can straighten what remains.
- Color pulls off with the tape. Let the base coat dry fully before applying tape, and avoid pressing the tape onto wet polish.
- Lines look wobbly freehand. Rest your hand on a table, steady the painting hand with your pinky, and paint in short strokes instead of one long line. Or switch to tape for now.
- Top coat smears the design. Use a generous, floating coat and don’t scrub the brush back and forth over the color. Let the color dry between steps.
Keeping Your Negative Space Manicure Looking Fresh
A few small habits help the design last. Use cuticle oil or hand cream daily, wear gloves for washing dishes or cleaning, and avoid using your nails as tools for opening cans or scraping labels, which dermatologists specifically warn against.
When it is time to remove the polish, moisturize afterward, since nails and surrounding skin can feel dry after polish remover.
If you wear artificial nails or gel regularly, the AAD notes that giving your natural nails breaks is wise, and it advises checking product ingredients if you are prone to allergic reactions (AAD manicure tips via Newswise).
Frequently Asked Questions
Can I do negative space nails with regular polish?
Yes. Regular polish works well, especially for beginners, because you can wipe off mistakes with remover. Gel polish gives a longer-lasting finish but requires a lamp and careful curing.
Do I need tape or stickers?
No, but they make clean lines much easier at first. Freehand with a thin brush is the alternative, and it gets easier with practice. Many beginners start with tape and move to freehand once they are comfortable.
How long does a negative space manicure last?
It depends on the polish type, how fast your nails grow, and how hard you are on your hands. Regular polish often lasts several days to about a week, and gel often lasts longer, but results vary. A good base coat and top coat make the biggest difference.
Does negative space nail art work on short nails?
Yes, and it can look especially neat. Narrow gaps, thin lines, and vertical or diagonal shapes keep short nails looking balanced. Avoid wide, heavy blocks of color that make the nail feel crowded.
Will dark polish stain the bare part of my nail?
It can with some pigmented shades, which is one reason to start with a base coat even on the bare section. If you notice yellowing, take a break between manicures and use a base coat each time. If a nail looks discolored or changes shape, see a dermatologist rather than covering it up.
Final Thoughts
Negative space nail art rewards patience more than skill. With a base coat, a simple guide, thin layers of color, and a sealing top coat, you can create a clean, modern manicure that suits short nails, long nails, and everything in between.
Start with a diagonal gap or half-moon on one hand, see how it feels, and experiment with colors from there.
Once you have the basic steps down, this tutorial gives you a foundation for dozens of variations.