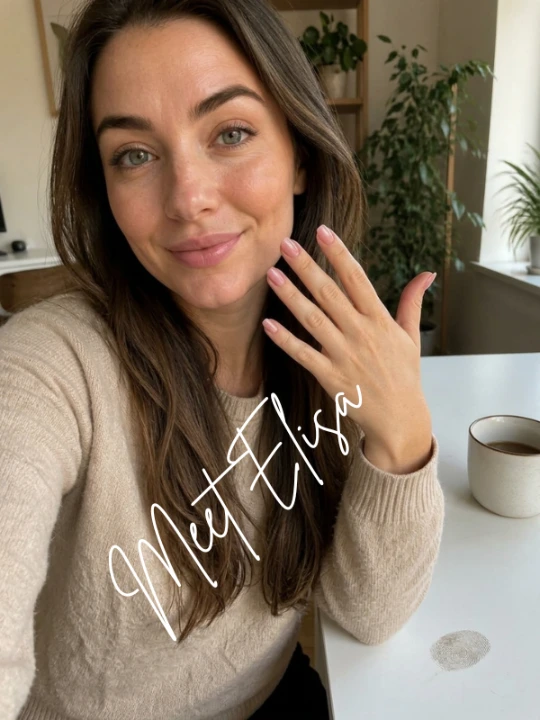

Minimalist nail art is all about keeping things simple, clean, and beautiful. A tiny dot, a delicate line, a subtle French tip, or a small accent can transform an ordinary manicure into something special. You don’t need complicated patterns or lots of decorations to create an elegant look.
However, simple nail designs can sometimes be more challenging than they appear.
When there are only one or two small details on each nail, uneven lines, misplaced dots, and messy polish around the edges become much easier to notice.
If you’re new to DIY manicures, don’t worry. Most minimalist nail art mistakes are easy to correct with a little practice and the right approach.
Whether you’re trying tiny floral details, simple geometric patterns, or neutral nail designs, understanding what to avoid can help you achieve a neater finish.
Here are five common minimalist nail art mistakes beginners make and some practical ways to fix them.
5 Mistakes Beginners Make With Minimalist Nail Art
Less is more — but even the simplest nail designs need a little attention to detail.
5 Things to Avoid
Overcomplicating the Design
Minimalist nail art is all about simplicity. Adding too many patterns, gems, and decorative details can take away its elegant appeal. Choose one subtle focal point instead.
Using Too Many Colors
A crowded color palette can make a simple manicure look busy. Stick to two or three complementary shades such as nude, blush pink, and soft white for a cohesive finish.
Ignoring Spacing and Balance
Tiny details need room to breathe. Uneven spacing or placing designs too close together can affect the overall look. Maintain consistent spacing and visual balance.
Skipping Nail Preparation
Even the prettiest design won’t look polished on an uneven nail surface. Start with clean, shaped, and gently buffed nails. Apply a base coat before adding your design.
Rushing the Details
Thin lines, dots, and geometric patterns require a steady hand. Rushing can create uneven lines and messy edges. Use a fine nail-art brush and let each layer dry properly.
1. Adding Too Many Details to a Minimalist Design
One of the biggest minimalist nail art mistakes beginners make is adding too many decorations.
When you first start exploring nail art, it’s tempting to experiment with everything at once. You might add dots, stripes, tiny flowers, glitter, and metallic accents to the same manicure.
Although each detail may look attractive individually, combining too many elements can take away from the clean appearance that makes minimalist nail art special.
Why This Mistake Happens
Beginners sometimes assume that a design needs more decoration to look interesting. They may also find it difficult to decide which details to leave out.
However, minimalist nail art works best when every element has a purpose. A simple design doesn’t need to fill the entire nail to look beautiful.
How to Fix It
Start with one main design element and build around it only if necessary.
For example:
- Tiny dots: Place one or two small dots near the cuticle or along one side of the nail.
- Simple lines: Try a single vertical or diagonal line on a neutral base.
- Minimal flowers: Create a small flower on just one accent nail.
- Micro French tips: Add a thin colored line along the nail’s free edge.
- Small metallic details: Use one delicate accent instead of decorating every nail.
A good beginner approach is to keep most nails simple and decorate only one or two accent nails.
Beginner tip: Before applying polish, decide exactly what you want each nail to look like. A quick sketch or reference picture can help you avoid adding unnecessary details while working.
2. Using Too Much Nail Polish
Another common mistake is applying too much polish, especially when creating tiny dots, thin lines, and delicate patterns.
Minimalist nail art depends on precise details. When your brush or dotting tool carries too much polish, the design can become thick, uneven, or messy.
For example, a tiny dot can turn into a large blob, while a delicate line may spread into an irregular shape.
Why This Mistake Happens
Beginners often load their tools with too much product because they want the design to appear clearly in one application.
Another reason is rushing. When you’re unfamiliar with nail art tools, it takes time to understand how much polish each design requires.
How to Fix It
Use a smaller amount of polish and work gradually.
Here are some simple techniques:
For tiny dots: Dip only the tip of your dotting tool into the polish. If you’re using a toothpick, use its pointed end and start with a very small amount.
For thin lines: Use a fine nail art brush with a controlled amount of polish. Avoid soaking the entire brush.
For small flowers: Create individual petals using small dots rather than trying to paint the entire flower in one movement.
For accent details: Test your tool on a piece of paper or practice surface before touching your nail.
You can always add another thin layer or refine a detail once the first application has settled.
Beginner tip: Keep a clean brush and a small amount of nail polish remover nearby for correcting accidental marks. Use remover carefully, especially around your skin.
3. Skipping Nail Preparation
Beautiful minimalist nail art starts before you open your favorite polish bottle.
One mistake beginners often make is applying nail polish without preparing the nail surface. They may skip cleaning, shaping, or removing leftover polish from a previous manicure.
Even a lovely minimalist design can look untidy when the underlying manicure isn’t neat.
Why This Mistake Happens
Most beginners focus on the decorative part of nail art. They spend time choosing colors and planning patterns but overlook the importance of preparing their nails.
Uneven nail edges, leftover polish, and visible debris can distract from a simple design.
How to Fix It
Create a simple nail preparation routine before every manicure.
Step 1: Remove old polish.
Use a suitable nail polish remover to remove leftover color. Avoid scraping or aggressively rubbing the nail surface.
Step 2: Clean your nails.
Wash your hands and make sure your nails are clean and dry before applying polish.
Step 3: Shape your nails.
Choose a shape that suits your preference, such as short square, soft square, or oval. Use a nail file gently to smooth rough edges.
Step 4: Look after your cuticles.
Keep the surrounding skin moisturized. Avoid cutting or forcefully pushing back your cuticles, as they help protect the nail area.
Step 5: Apply a base coat.
A suitable base coat can help create a more even surface for your nail color. Follow the product’s instructions.
The American Academy of Dermatology recommends moisturizing nails, avoiding cuticle removal, and taking care when performing manicures.
Beginner tip: Short, neatly shaped nails are an excellent starting point for minimalist nail art. You don’t need long nails to create attractive designs.
4. Choosing Colors That Don’t Work Well Together
Color selection can make a significant difference in minimalist nail art.
A beginner might choose several beautiful polish shades but discover that they don’t create the balanced appearance they imagined.
For example, pairing multiple strong colors with different finishes can make a simple design feel visually crowded.
This doesn’t mean minimalist nail art must always use nude or pale pink polish. The important thing is choosing colors that work together.
Why This Mistake Happens
Beginners often choose colors individually rather than considering how they will look together.
They might select a base color that is too similar to the decorative color, making small details difficult to see. Alternatively, they may combine too many contrasting shades.
How to Fix It
Start with a simple color combination.
Here are five beginner-friendly combinations to try:
- Milky white and soft pink: A delicate combination for a fresh, understated manicure.
- Nude and chocolate brown: A warm pairing that works beautifully for tiny dots and fine lines.
- Beige and white: A classic combination for subtle French tips and geometric details.
- Sheer pink and silver: A soft option for delicate metallic accents.
- Pale lavender and white: A gentle color combination for tiny flowers or simple patterns.
Think about contrast when selecting your colors.
If your base is very light, a slightly darker decorative shade can make small details easier to see. If your base is dark, a lighter accent can create a clearer design.
You can also experiment with different finishes. A glossy neutral base with a matte accent, for example, can create visual interest without adding extra decorations.
Beginner tip: Limit yourself to two or three complementary shades when learning minimalist nail art. Once you’re comfortable, you can experiment with more complicated color combinations.
5. Rushing the Application and Finishing Process
Even a beautifully planned minimalist design can lose its neat appearance when you rush.
One of the most frustrating beginner mistakes is touching the nails before the polish has properly dried. This can cause smudges, fingerprints, uneven lines, or damaged details.
Applying thick layers too quickly can also make it harder to achieve a smooth finish.
Why This Mistake Happens
Beginners often underestimate how much patience a simple manicure requires.
They may apply several layers without allowing enough time between applications or immediately add a top coat while decorative details are still wet.
How to Fix It
Give each stage of your manicure enough time.
Follow this simple application order:
- Prepare and clean your nails.
- Apply a thin base coat according to the product instructions.
- Add your chosen base color.
- Allow the polish to dry sufficiently before adding another coat.
- Create your minimalist details using a fine brush or dotting tool.
- Let the design settle before applying a suitable top coat.
- Allow the finished manicure to dry according to the product instructions.
A top coat can help protect the design and provide a more polished finish. However, it cannot completely fix thick, uneven, or smudged polish underneath.
Also, remember that a manicure can feel dry on the surface before it has fully hardened. Avoid activities that could damage your nails immediately after painting them.
Beginner tip: Set aside enough uninterrupted time for your manicure. Working slowly and carefully is usually more helpful than trying to finish all ten nails in a hurry.
Extra Tips for Better Minimalist Nail Art
Once you understand the five mistakes above, a few additional habits can make your DIY manicures easier.
Practice Before Applying Designs to Your Nails
If you’re trying a new pattern, practice it on paper or a nail art practice surface first.
This is especially useful for:
- Thin curved lines
- Tiny flowers
- Small hearts
- French tips
- Geometric patterns
You can experiment with different brush movements without worrying about ruining your manicure.
Start With Simple Designs
You don’t need advanced nail art skills to create an attractive minimalist manicure.
Try these beginner-friendly ideas:
- One tiny dot on each nail
- A single accent line
- Minimalist white French tips
- Small hearts on two accent nails
- A subtle side-swept line
- Neutral nails with one metallic accent
Choose one design and repeat it until you feel comfortable.
Use the Right Basic Tools
You don’t need a large nail art collection to get started.
A few useful tools include:
- Fine nail art brush
- Dotting tool
- Nail file
- Base coat
- Nail polish in complementary shades
- Clear top coat
- Cotton pads and suitable nail polish remover
Always follow the instructions on nail products and use them in a well-ventilated space. The FDA advises consumers to read nail product labels, follow warnings, and use these products safely.
Keep Your Nails Comfortable and Well Maintained
A beautiful manicure should also be comfortable to wear.
Avoid applying polish over irritated or damaged skin, and don’t use nail products if they cause a reaction. If you experience redness, swelling, pain, or an unusual nail change, seek advice from a healthcare professional or dermatologist.
Remember that healthy nail care is just as important as the design itself.
Frequently Asked Questions
1. Why does my minimalist nail art look messy?
Minimalist nail art can look messy when the lines are uneven, dots are too large, or polish gets onto the surrounding skin. Applying too much product and rushing between layers can also affect the finish. Use smaller amounts of polish, practice your designs first, and work slowly.
2. What is the easiest minimalist nail art design for beginners?
Tiny dots, simple straight lines, and micro French tips are excellent starting points. These designs require relatively few tools and can look attractive without complicated techniques.
3. Do I need special tools for minimalist nail art?
No. You can begin with a fine nail art brush, a dotting tool, and a few regular nail polish shades. Even a toothpick can help create simple dots when used carefully. Specialized tools can make certain designs easier, but they’re not essential for getting started.
4. How many colors should I use for minimalist nail art?
Two or three complementary colors are a good starting point. For example, you can combine nude with white or soft pink with silver. Using fewer shades can help maintain a balanced, understated appearance.
5. How can I make minimalist nail art last longer?
Start with clean, properly prepared nails. Apply thin layers, follow the drying instructions for your products, and finish with a suitable top coat. Avoid using your nails as tools, and wear protective gloves when cleaning or washing dishes. Regular moisturizing can also help care for the surrounding skin and nails.
Final Thoughts
Minimalist nail art proves that beautiful manicures don’t need complicated patterns or excessive decoration. Sometimes, a tiny dot, a delicate line, or a simple color combination is all you need.
The most common minimalist nail art mistakes beginners make usually come down to using too much polish, adding unnecessary details, skipping nail preparation, choosing unbalanced colors, and rushing the process.
Start with simple designs, practice your brush control, and give yourself enough time to complete each step. You don’t need perfect technique on your first attempt.
With patience and a little experimentation, you can create clean, elegant minimalist nail designs that feel effortless and are easy to wear every day.