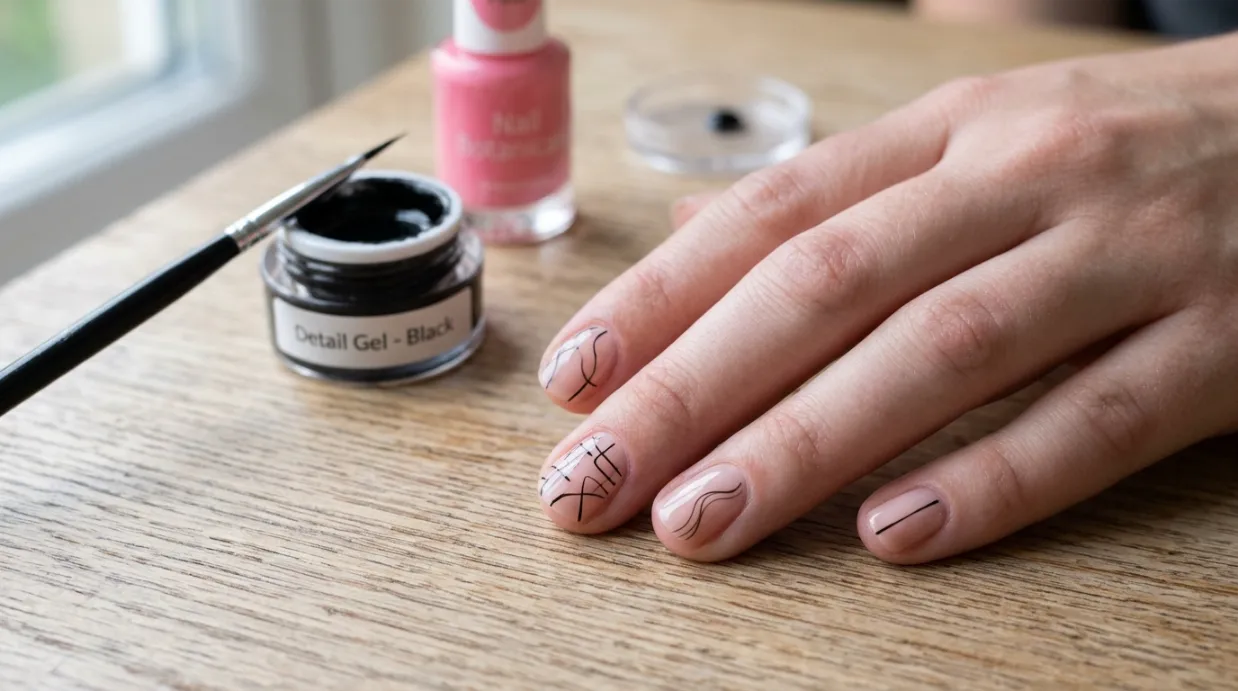
One-line nail art is proof that a simple design can make a beautiful statement.
A delicate curved line, a few thin parallel strokes, or a minimalist wave can turn an ordinary manicure into something elegant and eye-catching.
The best part? You don’t need complicated tools or professional nail-art skills to try it at home.
However, getting those lines smooth and even can be challenging when you’re just starting. Your brush might shake, the polish may spread, or your carefully planned line might suddenly look thicker than expected.
The secret isn’t having naturally steady hands. It’s learning how to position your fingers, control your brush, and move with confidence.
In this one line nail art tutorial, you’ll learn which tools to use, how to stabilize your painting hand, and how to create simple straight, curved, and wavy designs.
We’ll also cover common mistakes and easy practice exercises to help you improve your technique.
What Is One Line Nail Art?
One-line nail art is a minimalist nail design technique that uses thin strokes to create simple patterns and decorative details.
Instead of covering the entire nail with complicated artwork, you use one or a few carefully placed lines to create visual interest.
Popular styles include:
- Straight lines: Thin vertical, horizontal, or diagonal strokes.
- Curved lines: Soft curves that follow the natural shape of the nail.
- Wavy lines: Flowing patterns that create a relaxed, modern appearance.
- Geometric lines: Minimalist angles and intersecting strokes.
- Abstract line art: Creative, free-flowing patterns with no strict symmetry.
You can create these designs on short, medium, or long nails. Neutral shades, black-and-white combinations, metallic accents, and pastel colors all work beautifully.
Tools You Need for One Line Nail Art
You don’t need a large nail-art collection. A few basic tools are enough to get started.
One Line Nail Art
With a Steady Hand
Master the delicate art of creating clean, beautiful lines with confidence and control.
4 Secrets to Perfect Lines
Small techniques that make a beautiful difference.
1. Stabilize Your Hand
Rest your painting hand on a flat surface and support your wrist. A stable position reduces unwanted movement.
2. Hold Your Brush Gently
Grip the liner brush comfortably, not too tightly. Use a light, relaxed hold for better control and flexibility.
3. Move in One Smooth Motion
Load the brush with a small amount of polish. Draw slowly using a continuous stroke instead of stopping repeatedly.
4. Practice Before Painting
Try straight lines on paper or a practice nail. Build muscle memory before creating your final nail design.
Keep your brush steady and move your finger or nail slightly when needed. Remember: consistency matters more than speed!
1. Thin Nail Art Liner Brush
A long, thin liner brush is one of the most useful tools for drawing delicate lines. Its narrow bristles allow you to create longer strokes without repeatedly dipping the brush.
Choose a brush that feels comfortable to hold.
Extremely long bristles can be difficult for beginners to control, so starting with a medium-length liner brush may be easier.
2. Nail Polish or Nail Art Paint
Choose a polish with a consistency that allows it to flow smoothly from the brush.
Black, white, nude, silver, and gold are versatile choices. If you’re practicing, use a contrasting color so you can clearly see the lines.
3. Base Coat and Top Coat
A base coat prepares the nail for your manicure, while a top coat seals the finished design and adds shine.
Allow the base color to dry properly before drawing your lines. Working on a soft or tacky surface can cause the brush to drag the underlying polish.
4. Practice Nail Tips or Paper
Practice before drawing directly onto your nails. A plastic practice nail tip is particularly useful because it gives you a curved surface similar to a natural nail.
You can also practice brush movements on paper before using polish.
5. Cleanup Brush and Nail Polish Remover
A small, clean detail brush can help correct minor mistakes. Use a little remover on the brush to tidy an uneven edge without disturbing the entire manicure.
How to Do One Line Nail Art With a Steady Hand: Step-by-Step Tutorial
Follow these steps to create clean, minimalist lines without putting unnecessary pressure on your hand.
Step 1: Prepare Your Nails
Start with clean, dry nails. Remove old polish and gently shape your nails with a file.
Apply a thin base coat and allow it to dry. Next, apply your chosen background color.
For a minimalist appearance, try:
- Milky white.
- Soft nude.
- Pale pink.
- Light beige.
- Sheer peach.
Apply thin layers rather than one thick coat. Let the background color dry sufficiently before moving to the design.
Step 2: Choose the Right Brush
Select a fine liner brush with bristles that hold their shape.
Dip only the tip or working section of the brush into your nail-art polish. Avoid loading too much product onto the bristles.
Before touching your nail, test the brush on a practice surface.
Your goal is to create a continuous line without a large blob of polish at the starting point.
Beginner tip: If the brush feels difficult to control, try a shorter liner brush. A very flexible brush may require more practice to manage.
Step 3: Position Your Hands Correctly
This is one of the most important parts of creating steady nail art.
Place your painting hand on a stable table. Rest part of your forearm or wrist comfortably on the surface.
Hold the finger you’re painting with your supporting hand. You can gently grip it between your thumb and another finger to reduce unnecessary movement.
Avoid holding both hands in the air while painting.
A useful technique demonstrated by nail expert Sophy Robson is to stabilize the working finger, anchor the supporting hand, and rotate the finger to find a comfortable painting angle.
The more stable your hands are, the easier it becomes to control the brush.
Step 4: Mark Your Starting and Ending Points
Before drawing a long line, decide where it should begin and where it should finish.
For a straight diagonal line, imagine a path connecting two points on your nail.
You can place two tiny guide dots using a dotting tool or the tip of a fine brush.
This makes it easier to maintain the direction of the stroke.
Don’t worry about creating a perfectly straight line immediately. Focus on following the same path smoothly.
Step 5: Draw the Line in One Controlled Movement
Place the brush gently on the nail and move it along your chosen path.
Keep your grip relaxed. Excessive pressure can spread the bristles and make the line thicker.
Whenever possible, pull the brush toward yourself rather than pushing it away. Adjust the position of your finger to make the movement more comfortable.
Try these basic patterns first:
- One vertical line.
- One diagonal line.
- Two parallel lines.
- A simple curved line.
- A gentle wave.
Avoid stopping repeatedly in the middle of a stroke. Pausing while the brush remains on the nail can create uneven thickness or small polish deposits.
Step 6: Let the Design Dry and Apply Top Coat
Once you’re happy with the design, allow the polish to dry according to the product instructions.
Apply a suitable top coat gently to seal your artwork. Avoid pressing too hard or repeatedly brushing over the same area, as this can disturb the design.
Your minimalist one-line manicure is ready!
5 Easy One Line Nail Designs to Practice
If you’re new to nail art, start with simple patterns before attempting complicated designs.
1. Single Vertical Line
A single vertical line is an excellent starting point.
Draw one thin line from near the cuticle area toward the tip. Try black polish over a nude or milky-white background for a clean contrast.
This design works especially well on short nails.
2. Minimalist Diagonal Lines
Draw one diagonal line across the nail, starting near one corner and ending toward the opposite side.
For a slightly more detailed appearance, add a second parallel line.
Keep the distance between the two strokes consistent.
3. Soft Wavy Line
Wavy lines are ideal when you don’t want a perfectly geometric design.
Move the brush gently from side to side to create a flowing pattern. Start with a single wave rather than trying to fill the entire nail.
Pastel pink, white, and chocolate brown are attractive color combinations.
4. Double Curved Lines
Create two delicate curves that follow a similar direction across the nail.
You can leave a small gap between the lines to maintain a light, minimalist appearance.
This design looks particularly elegant with gold or silver nail-art polish.
5. Abstract Minimalist Lines
Once you feel comfortable with basic strokes, experiment with abstract designs.
Try combining a short straight line with a small curve or two intersecting diagonal strokes.
Keep the design simple so the individual lines remain visible.
How to Make Your Nail Art Lines Look Smooth and Even
Drawing a line is easy. Repeating the same result consistently takes practice.
Here are some techniques that can make a noticeable difference.
Keep Your Hand Anchored
Always create a stable contact point before painting.
Resting your hand on a table and supporting the finger being painted reduces unnecessary movement.
If your hand becomes uncomfortable, take a short break instead of forcing the brush movement.
Use the Right Amount of Polish
Too much polish can create thick lines and uneven edges. Too little can cause the brush to skip.
Load a small, controlled amount of product and test it before applying it to your nail.
Avoid Excessive Brush Pressure
Pressing harder doesn’t necessarily make a better line.
Use light, consistent pressure. Allow the brush bristles to maintain their natural shape rather than flattening them against the nail.
Adjust Your Finger Instead of Twisting Your Wrist
You don’t have to draw every line from the same hand position.
Rotate the finger or practice tip to find a comfortable angle. This can make curved and diagonal strokes easier to execute.
Practice Short Strokes First
If long lines look shaky, practice shorter strokes.
Start with lines about half the length of your nail. Gradually increase their length as your brush control improves.
Common One Line Nail Art Mistakes and How to Fix Them
| Common mistake | Why it happens | How to improve it |
|---|---|---|
| Shaky lines | Hands are unsupported | Anchor your hands on a stable surface |
| Lines look too thick | Too much polish or pressure | Use less polish and lighter pressure |
| Uneven line thickness | Inconsistent brush movement | Maintain a relaxed, steady stroke |
| Polish forms blobs | Pausing with the brush touching the nail | Keep the brush moving smoothly |
| Lines look messy | Background polish isn’t sufficiently dry | Allow the base color to dry first |
| Curves look uneven | Uncomfortable hand positioning | Rotate the finger to improve the angle |
One important rule: don’t keep painting over a shaky line in an attempt to make it perfect. This often makes the design thicker and messier.
If the polish is still workable, carefully clean up the affected area. If it has dried, correct the design with a small cleanup brush or remove the design and start again.
A Simple 10-Minute Practice Routine for Beginners
You don’t need to spend hours practicing. A short, focused routine can help you become more familiar with your brush.
Minutes 1–2: Brush control
Practice loading the brush with a small amount of polish. Draw a few short lines on a practice surface.
Minutes 3–4: Straight lines
Draw vertical, horizontal, and diagonal lines. Focus on keeping the brush pressure consistent.
Minutes 5–6: Curved lines
Practice small C-shaped curves and gentle S-shaped movements.
Minutes 7–8: Parallel lines
Draw two or three lines next to each other. Try to maintain similar spacing.
Minutes 9–10: Simple nail design
Combine two techniques into one minimalist design.
Repeat the routine whenever you have time. Focus on consistency rather than speed.
Frequently Asked Questions
1. How do you draw straight lines on nails without shaking?
Rest your painting hand on a stable surface and support the finger you’re working on with your other hand. Use a fine liner brush, load it with a small amount of polish, and draw with light, consistent pressure. Practicing short strokes first can also improve control.
2. What is the best brush for one line nail art?
A fine nail-art liner brush is a good choice for long, thin strokes. Beginners can start with a medium-length liner brush that feels comfortable to hold. A detail brush is useful for shorter lines and small corrections.
3. Can beginners do one line nail art at home?
Yes. One-line nail art is suitable for beginners because it uses simple shapes and requires only a few basic tools. Start with one straight or diagonal line before moving on to curves and abstract patterns.
4. How do you make nail art lines thinner?
Use a fine liner brush, avoid loading too much polish, and apply gentle pressure. Pressing too firmly spreads the bristles and can make the line wider.
5. Can you do one line nail art on short nails?
Absolutely. Short nails are suitable for minimalist line designs. A single vertical line, a small diagonal stroke, or a delicate curved detail can add interest without making the nail look crowded.
Conclusion
Learning how to do one line nail art with a steady hand is mostly about brush control, positioning, and consistent practice.
Start with simple straight lines, stabilize your hands, and experiment with small curves once you feel more confident. You don’t need expensive equipment or complicated designs to create a beautiful minimalist manicure.
Remember, your first few attempts might not look perfect, and that’s completely normal. Give yourself time to develop a comfortable brush technique.
With a little patience and regular practice, you can create clean, elegant one-line nail designs at home.