
Black nail polish and a nine to five don’t always get along.
Most Halloween nail ideas online are built for long coffin nails with 3D charms, and that won’t work when you type all day, shake hands, or sit across from a manager who notices everything.
The good news is that short nails can carry a spooky look just fine. You only need to change how much black you use and where you put it.
A single accent nail, a thin line, or a sheer wash of color reads as seasonal and still looks put together on a Monday morning.
This list is built around short nails for work, so every design is small, clean, and doable at home with basic tools. Some take five minutes. A few need a steady hand and a thin brush. None of them need a salon visit.
Screenshot your favorites and pick one for this week. You can always go bolder on the weekend.
1. Sheer Black Jelly Polish For A Soft Spooky Wash
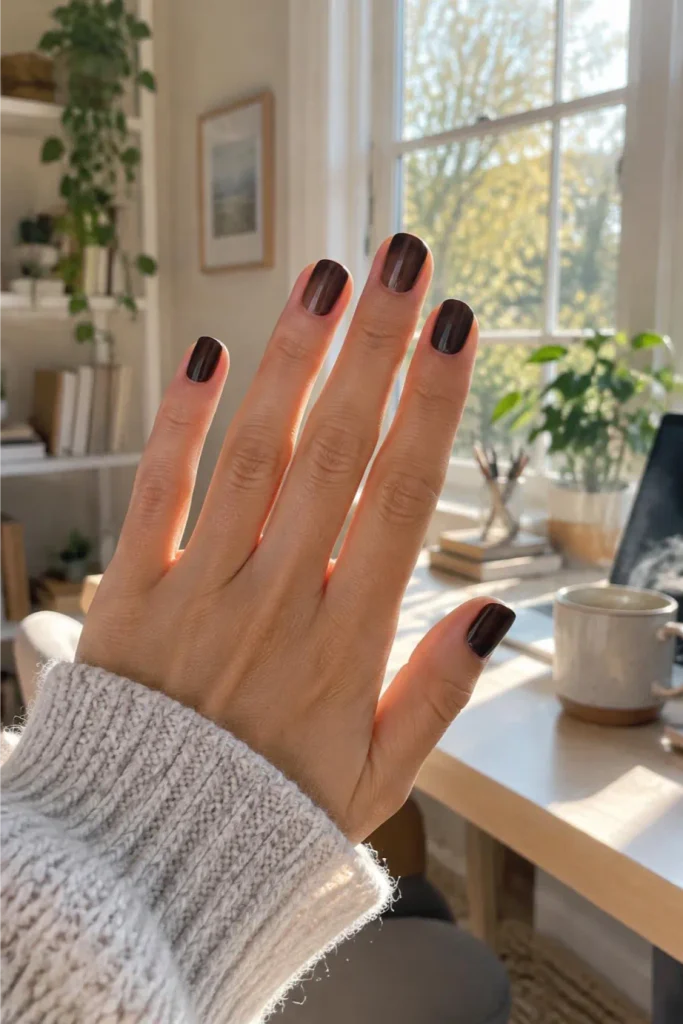
A jelly polish gives you the black without the weight.
Build it in two thin coats and the nail looks smoky, like tinted glass, instead of solid ink. Hold your hand up to a window and you can still see a hint of the nail bed through it.
Why it works at the office:
- It looks dark from across the room and soft up close
- Growth doesn’t leave a harsh line at the cuticle
- Small chips are much harder to spot than on opaque black
Finish with a glossy top coat. Skip a third coat, because that’s where it turns heavy.
2. One Glossy Black Accent Nail On A Sheer Nude Base

Here’s a simple rule: one black nail, nine quiet ones.
Paint your ring finger in solid black and the rest in a sheer nude or milky pink. From a desk distance, it looks like a deliberate style choice instead of a costume. Most people notice it only when they lean in.
This is the safest Halloween look on the list for strict dress codes. It also grows out well, since the nude nails hide regrowth.
💡 Quick Tip
Paint the black nail first and let it dry fully before you touch the nude shade. Fixing a nude smudge on black is much easier than fixing black on nude.
3. Thin Black French Tips That Pass As Short Nails For Work
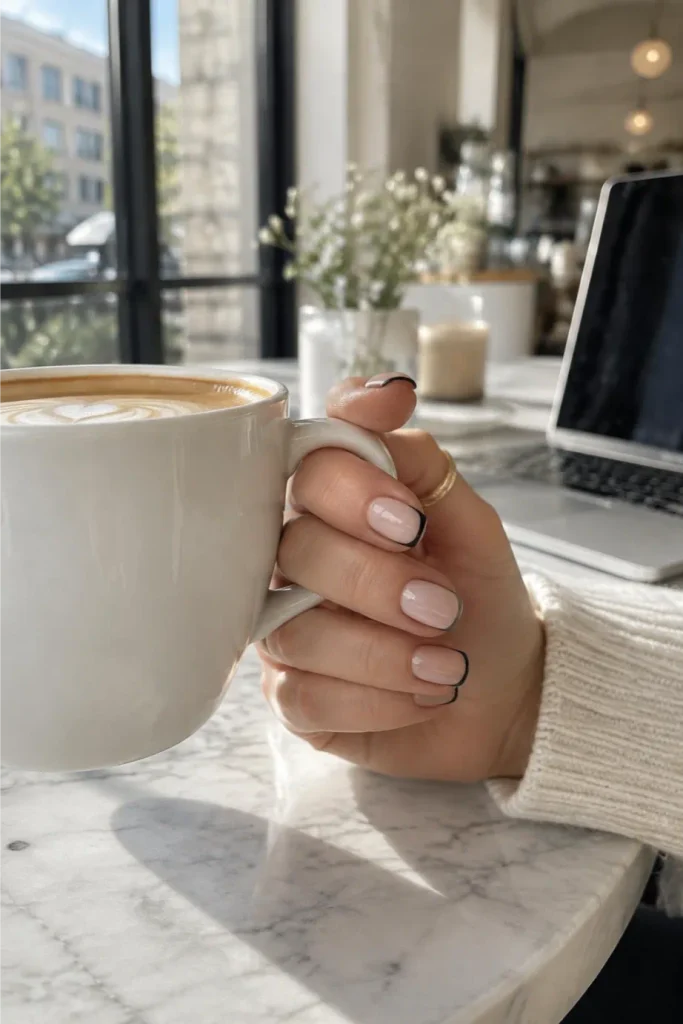
Plain French tips can feel a little bridal. Switch the white for black and the same shape suddenly looks sharp and a bit spooky.
On short nails, the trick is keeping the tip line thin. A thick band makes the nail look even shorter and starts to read as a block of color instead of a detail.
A few things that help:
- Use a thin detail brush instead of the bottle brush
- Follow the natural smile line of your nail
- Wipe the brush on a paper towel before every stroke
Tidy up edges with a small brush dipped in remover.
A thick black band across the tip. The nail looks stubby and the edge wobbles.
A hairline tip that follows your nail’s curve. The nail looks longer and the edge looks neat.
4. A Tiny Black Spiderweb In Just One Corner

Start with a clean base in nude, white, or sheer pink, then keep the web small. It should only take up the top corner of one nail.
On a short nail, a full web becomes a tangle. A corner web looks like a sketch and leaves plenty of bare nail, which is what keeps it office friendly. Use the ring finger or the thumb so it doesn’t show every time you type.
Dip a thin brush in black polish and wipe most of it off on a paper towel.
Draw three short lines fanning out from one top corner of the nail.
Connect them with two small curved lines, then seal with a glossy top coat.
5. Matte Black With One Glossy Stripe
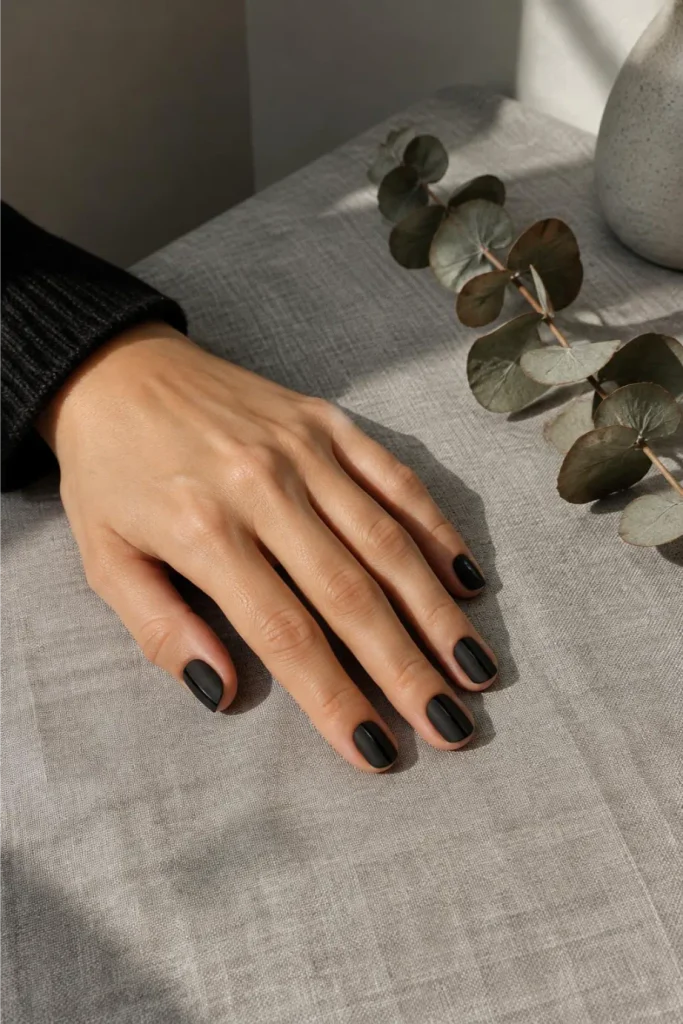
Matte black has a reputation for looking flat, but that’s usually because the whole hand is matte and nothing breaks it up.
Add one thin glossy stripe down the center of each nail, and the finish changes. Light catches the stripe and the nail suddenly has depth. You can do it with a regular top coat painted in a single line over a matte top coat.
It reads as modern more than Halloween. That’s the point. Only people who know the date will think of the holiday.
Keep the stripe thin, about the width of a toothpick.
Let the matte coat dry fully before adding the shine.
Wide stripes that cover half the nail.
Rubbing the matte area, which can leave shiny patches.
6. Black Moon And Star Dots On A Sheer Pink Base

Small shapes beat big ones on short nails.
Start with a sheer pink or milky base, then add a tiny crescent moon and two or three dot stars on only a couple of nails. A dotting tool makes the stars in one press each. The moon takes a steady hand, but it can be wonky and still look charming.
Space them out so most of the nail stays pink. The look is night sky, not crowded.
What to grab first
7. Black Cat Eye Shimmer On Squoval Nails

Cat eye polish does the work for you. A magnet pulls the shimmer into a single bright line, and the nail looks like it has a slice of moonlight across it.
The shape matters here. Squoval nails, which are square with softly rounded corners, give the line room to sit cleanly and hold up well to typing. Hold the magnet close for about ten seconds, then cure or dry before moving on.
It’s a quiet kind of dramatic, which suits meetings fine.
8. Skinny Gold Lines Over Black Polish
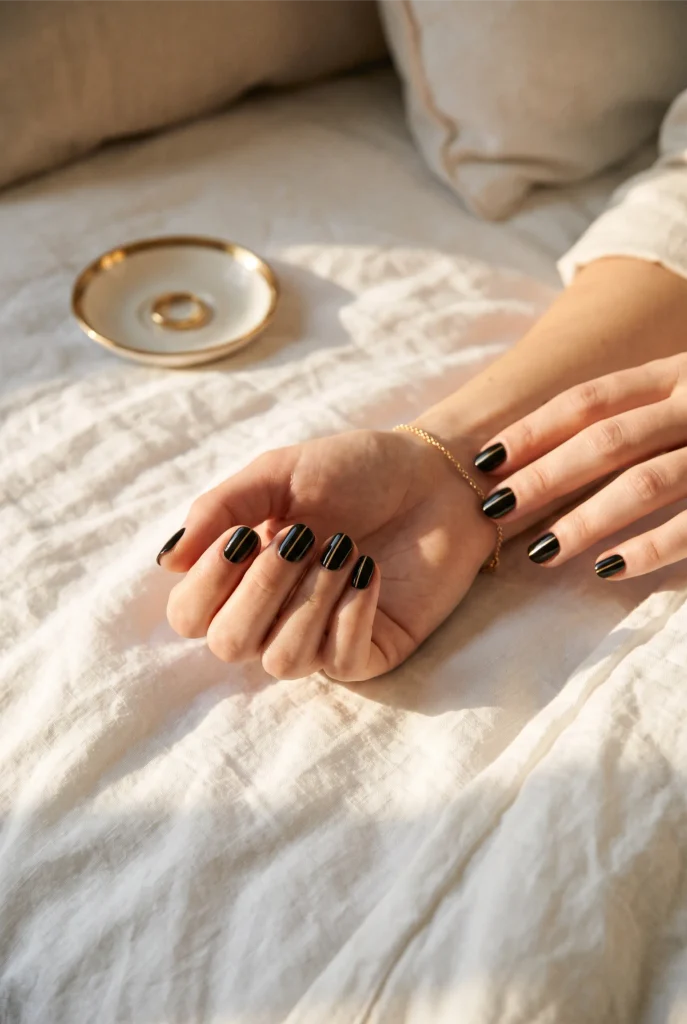
Gold and black together can look expensive or can look like a costume. The difference is how much gold you add.
Keep it to one hairline per nail, running straight, diagonal, or curved along the cuticle. That’s enough to catch the light when you reach for a coffee, and not enough to draw questions from your boss.
You have two ways to make the line. Here’s how they compare.
| Striping tape | Thin brush |
|---|---|
| Straight lines come out clean | Curves and diagonals are easier |
| Needs tweezers and a dry base | Needs a steady hand and practice |
| Can lift at the edges after a few days | Seals in fully under top coat |
9. A Small Black Bat On The Ring Finger Only
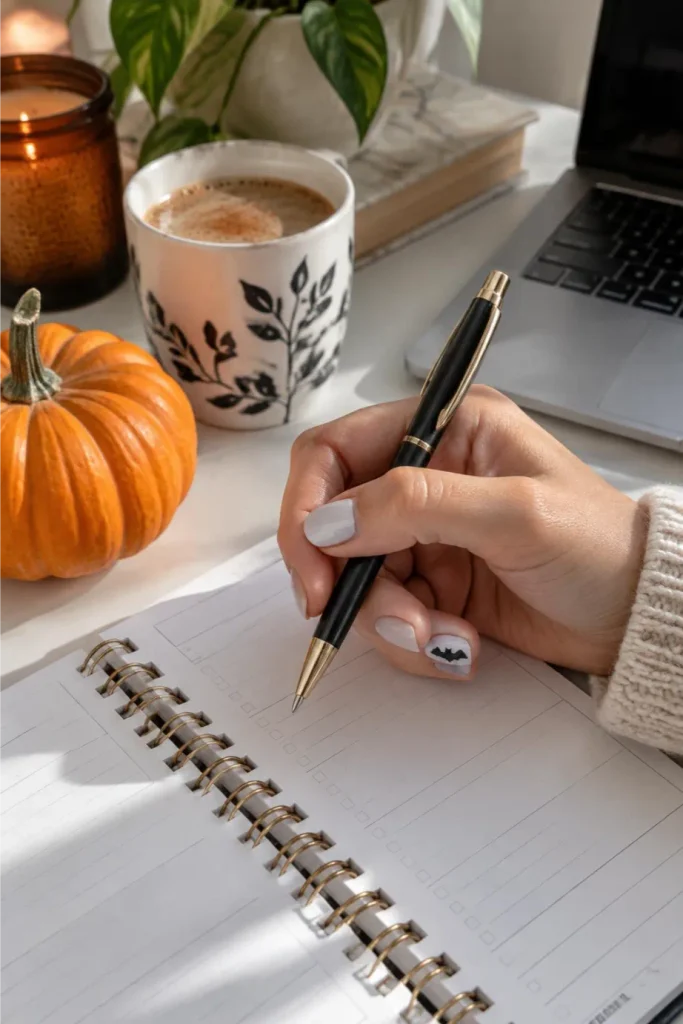
The most common mistake with nail art bats is size. People draw a big one, and on a short nail it takes over the whole surface.
Make yours small. Think of it as a tiny letter M with a little rounded body in the middle, sitting in the upper half of the nail. Paint it on the ring finger over a nude or pale gray base and leave the other nine alone.
Practice on a piece of paper first. Bats are forgiving, and uneven wings look natural.
If the bat covers more than a third of the nail, it’s too big. Shrink it and leave room around it.
10. Tiny White Ghosts On A Single Black Thumb

Your thumb is the nail people see least while you work, so it’s a good place for something playful.
Paint it solid black, let it dry well, then add one or two small ghosts in white. Each ghost is a rounded blob with a wavy bottom edge and two dot eyes. A dotting tool makes the body in a press and a pull, and the eyes take a pin tip.
Keep the rest of your nails simple. Plain black or sheer nude both work, so the ghosts stay the star.
⚠️ Watch Out
White polish over black streaks easily. Apply it in one thick dab instead of dragging it, and wait until the black is fully dry first, or the colors will smear together.
11. Black Polka Dots On A Milky White Base

Polka dots look friendly, which is useful when you want Halloween without the horror.
Paint your nails in a milky white or soft ivory, then press small black dots in loose rows with a dotting tool. Vary the size a little. Dots that are slightly different look hand done, and dots that are identical look like stickers.
Think about a retro diner more than a haunted house. It still works in October, and the white base keeps things bright at a desk.
12. A Black Tip Gradient That Fades Into Bare Nails
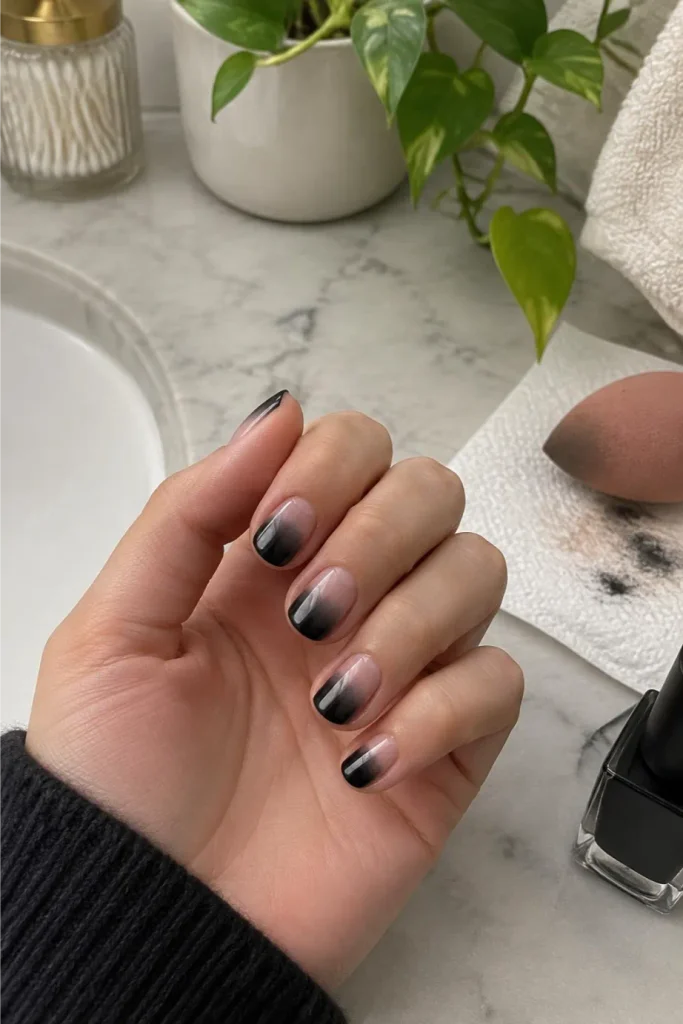
Most people skip this one because they think it needs an airbrush. It doesn’t. A makeup sponge does the whole job.
The fade starts black at the tip and melts into your natural nail color. Since there’s no hard edge, there’s also no line to chip, and regrowth barely shows. It’s a good pick if you only get to repaint every couple of weeks.
Dab, don’t swipe. The stamping motion is what blends the color.
Paint a sheer nude or pink base and let it dry.
Brush black polish onto a small corner of a makeup sponge.
Dab the sponge on the tip of each nail, then roll it slightly upward to soften the edge.
Clean skin with a brush dipped in remover, then add top coat.
13. Black And Deep Plum On Alternating Nails

Black on every nail can feel heavy by Wednesday. Swapping in deep plum on every other nail gives you the same dark mood with a little more life in it.
Paint your thumb, middle, and pinky black, and your index and ring fingers plum. Under office lighting, the plum reads almost black. In daylight, it shows its color.
Pick a plum with a lot of depth, nothing bright or purple-pink. The darker the plum, the more it looks planned.
Ten solid black nails. Striking, but it can look stiff in soft office light.
Black and deep plum swapped nail by nail. Same mood, with a little color that shows up in the sun.
14. A Black Glitter Cuticle Line Instead Of Full Sparkle
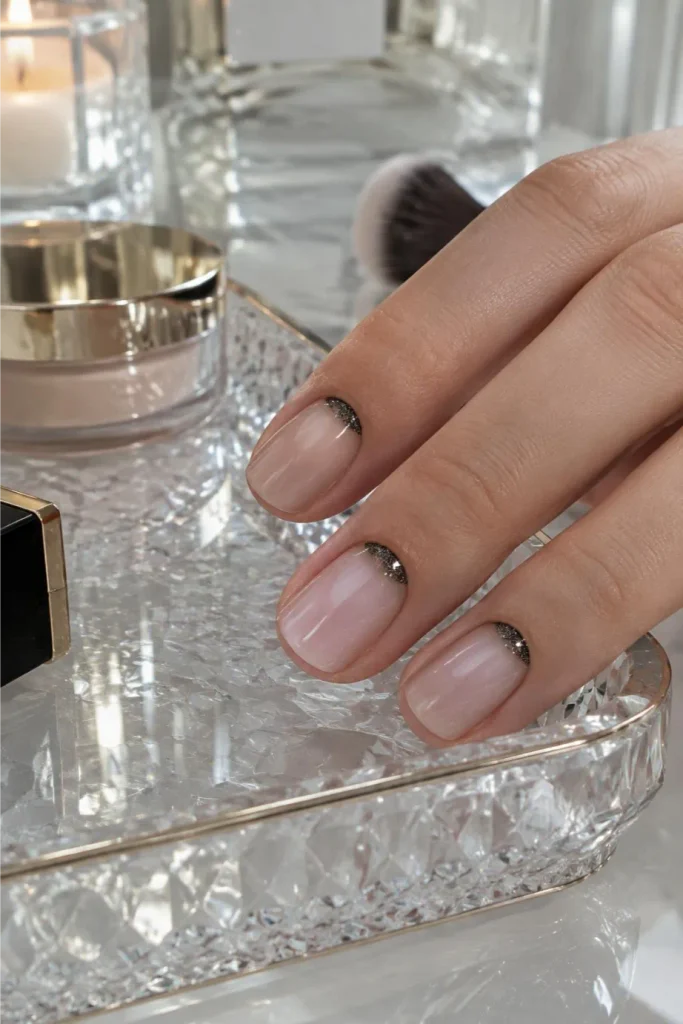
Full glitter on a short nail can look like a craft project. A thin band at the cuticle keeps the sparkle and loses the mess.
Paint a sheer or nude base, then brush a narrow arc of black glitter polish along the cuticle. Because it sits at the base, it also hides the gap that appears as your nails grow.
Go easy on the cleanup. Glitter edges look best slightly soft, so you don’t have to trace them perfectly.
Here’s how the two styles compare day to day.
| Full glitter nail | Cuticle line |
|---|---|
| Reads as party | Reads as a small detail |
| Can feel gritty and snag on sweaters | Smooth under a glossy top coat |
| Hard to remove | Comes off with a normal soak |
15. Black Chrome Powder For A Mirror Finish
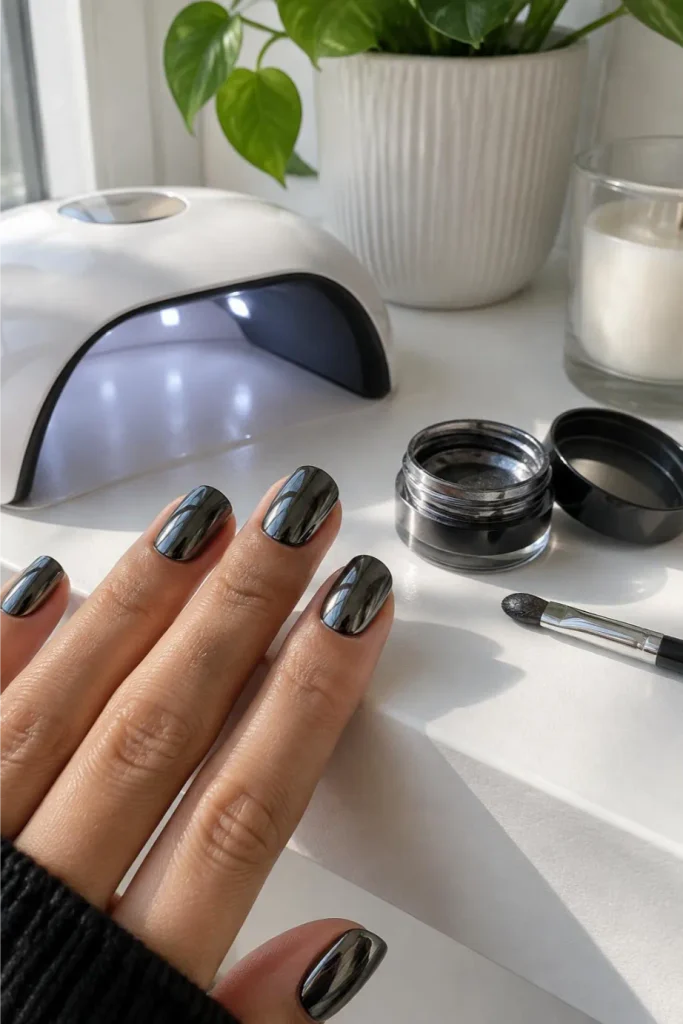
Chrome sounds like a salon only job, but the basic version is manageable at home with the right kit.
Rub a small amount of black chrome powder over a cured, tacky layer of no wipe gel top coat, using the little applicator that comes in the jar. The surface turns into a dark mirror. Seal it with another layer of top coat and cure again.
The finish is shiny, so keep everything else about the look simple. A short, clean nail shape does the rest.
This one does need a UV or LED lamp, so it’s the only design here that isn’t regular polish.
16. Black Lace Stamping On One Accent Nail

Lace looks hard to paint by hand, which is exactly why stamping exists.
You press a lace pattern from a metal plate onto your nail with a soft stamper. The pattern lands in one go, so it’s far more even than anything you’d draw. Use it on your ring finger over a nude or pale gray base and keep the other nails plain.
Lace feels more elegant than spooky, which makes it easy to wear to a client lunch in October.
📌 Good To Know
Stamp and press fast. Black stamping polish dries quickly, and if you wait even a few seconds, the pattern won’t pick up cleanly from the plate. Scrape, stamp, press, then seal with top coat.
17. A Black Checkerboard On Just One Nail
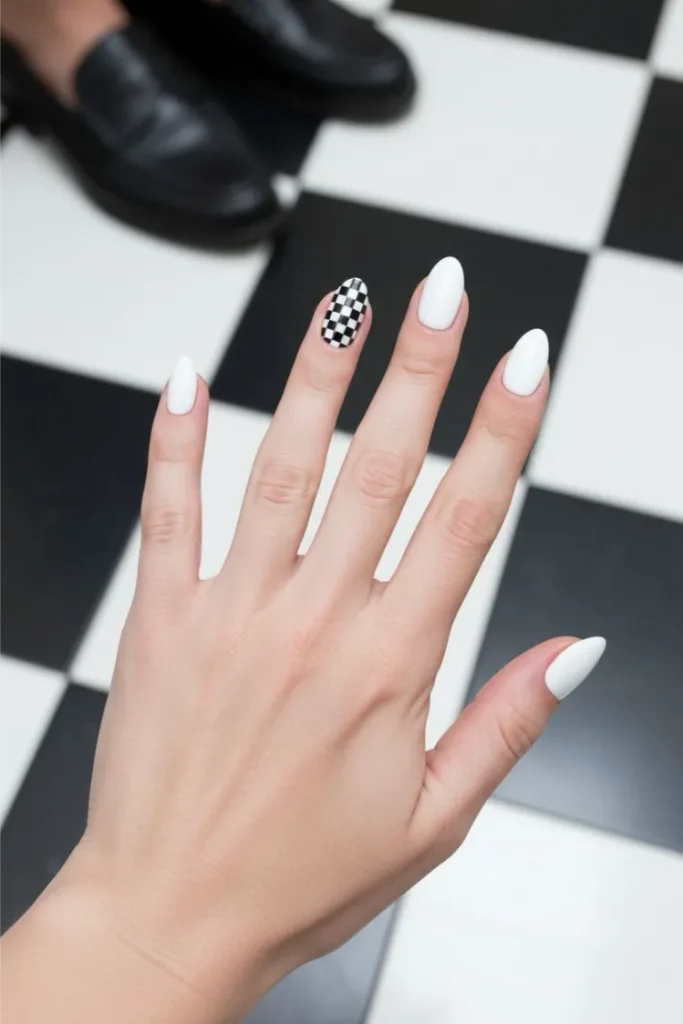
A checkerboard on all ten nails looks busy. On one nail, it looks like a deliberate pattern.
Paint the nail white, then lay down black squares in a grid. Keep it to four or six squares total on a short nail. Smaller grids are easier to keep straight, and larger ones tend to crowd the nail.
It’s a good option if your office is more relaxed and you want something with a bit of edge.
Use a sheet of striping tape or a thin brush to keep edges crisp.
Limit it to one nail, ideally the ring finger.
Eight or more tiny squares, which blur together on short nails.
Painting the grid before the white base is fully dry.
18. Black Negative Space Half Moons

Negative space just means leaving part of the nail bare, and half moons are the easiest way to try it.
Use a small hole reinforcement sticker, the paper kind from the office supply aisle, at the base of each nail. Paint the rest of the nail black, then peel the sticker off to reveal a clean bare arc at the cuticle.
The bare section also hides regrowth, so the look stays neat for longer. And it’s very short nail friendly, since it makes the nail bed look longer.
Before you start
19. Black Speckles Over A Clear Base Like Cracked Pepper
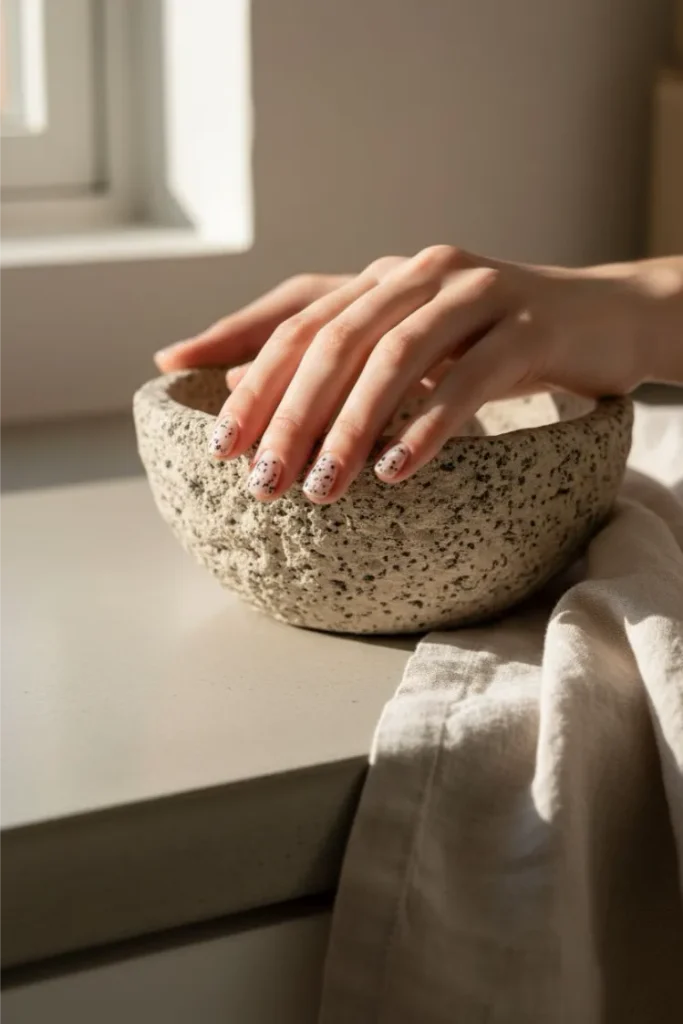
This one is nearly foolproof, and that’s the appeal.
Start with a clear or sheer nude base. Dip a tiny brush in black polish, then flick it lightly so small specks land across the nail. There’s no wrong placement. The more random it looks, the better it works.
It reads like a stone or a speckled egg. Subtle and a little unusual, and it hides smudges and chips well.
Less is the whole trick. Start with five or six specks per nail and stop before it feels like enough.
20. Plain Black Polish, Applied Cleanly At Home
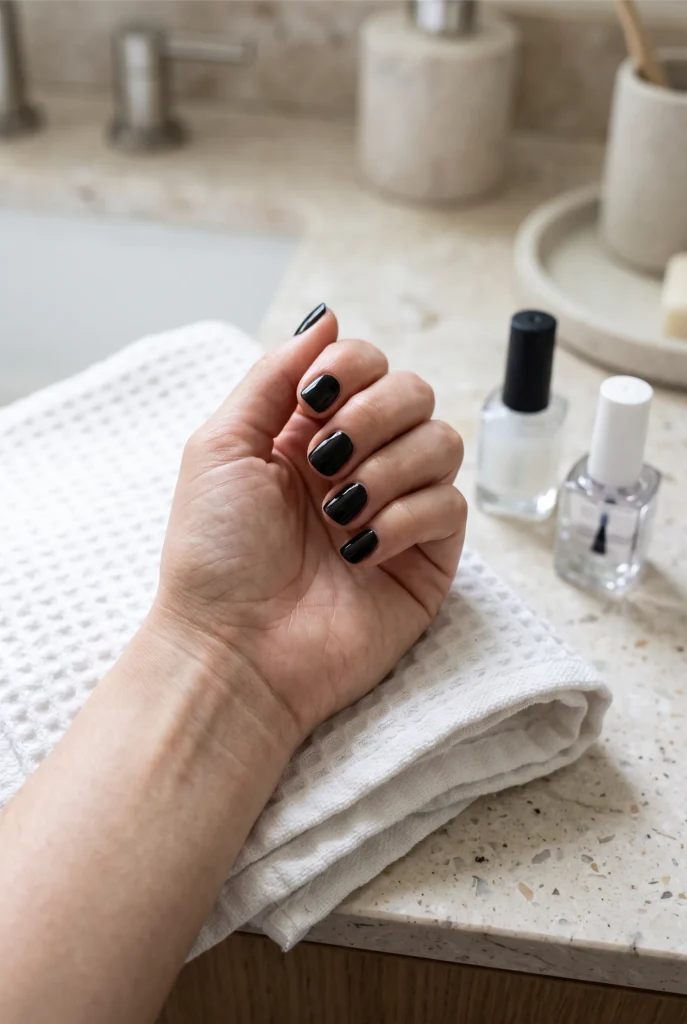
Sometimes the best design is no design.
Solid black on short nails looks sleek when it’s done well and messy when it isn’t. The difference is mostly prep and patience, not skill. Thin coats, clean edges, and a good top coat go further than any nail art.
Here’s the order that gives the cleanest result.
Push back cuticles, shape nails short and even, and wipe each nail with remover.
Apply a base coat. It keeps black polish from staining the nail.
Paint two thin coats, with a few minutes of drying between them.
Clean up edges with a small brush and remover, then seal with top coat, including the tip.
Conclusion
Black nails and a work week can get along. You just need the right amount in the right place. A sheer wash, one accent nail, or a hairline detail is usually enough to make October feel like October without raising an eyebrow in a meeting.
Start with whichever design matches your patience today. The speckles and plain black are easy wins. Lace and chrome can wait for a slower weekend. Short nails for work don’t have to be plain, they just have to be planned.
Pick your look in 30 seconds