Halloween nails do not have to mean fake blood and plastic spiders.
This year the cutest sets lean sheer, glossy, and a little bit sweet, with tiny ghosts, glassy pumpkins, and soft pastel moons doing the work.
Below are 20 cute Halloween nail ideas, from five-minute dotting designs to salon-level chrome, plus a supply checklist, aftercare tips, and answers to the questions people ask most.
20 Cute Halloween Nail Ideas
1. Minimalist Little Ghosties

A sheer milky-white base makes the perfect backdrop for tiny floating ghosts on alternating accent nails.
Use a dotting tool to pull soft, wavy ghost shapes, then add two pinpoint black eyes. The result is clean, modern, and easy to wear to the office.
Vibe & Colors: Whimsical and subtle; sheer milk, opaque white, pitch black
Style Tip: Stamp the eyes with the rounded tip of a bobby pin dipped in black polish for perfectly even dots.
2. Spooky French Web Tips
Classic French tips get a Halloween twist with ultra-fine white and silver web lines following the smile line.
Over a sheer nude pink base, the look reads elegant from a distance and intricate up close. One tiny rhinestone at the center adds a flash of sparkle.
Vibe & Colors: Elegant goth; sheer nude, crisp white, metallic silver
Style Tip: Ask your nail tech for a detail liner brush and fine silver foil flakes along the web joints.
3. Tortoiseshell Pumpkin Accents
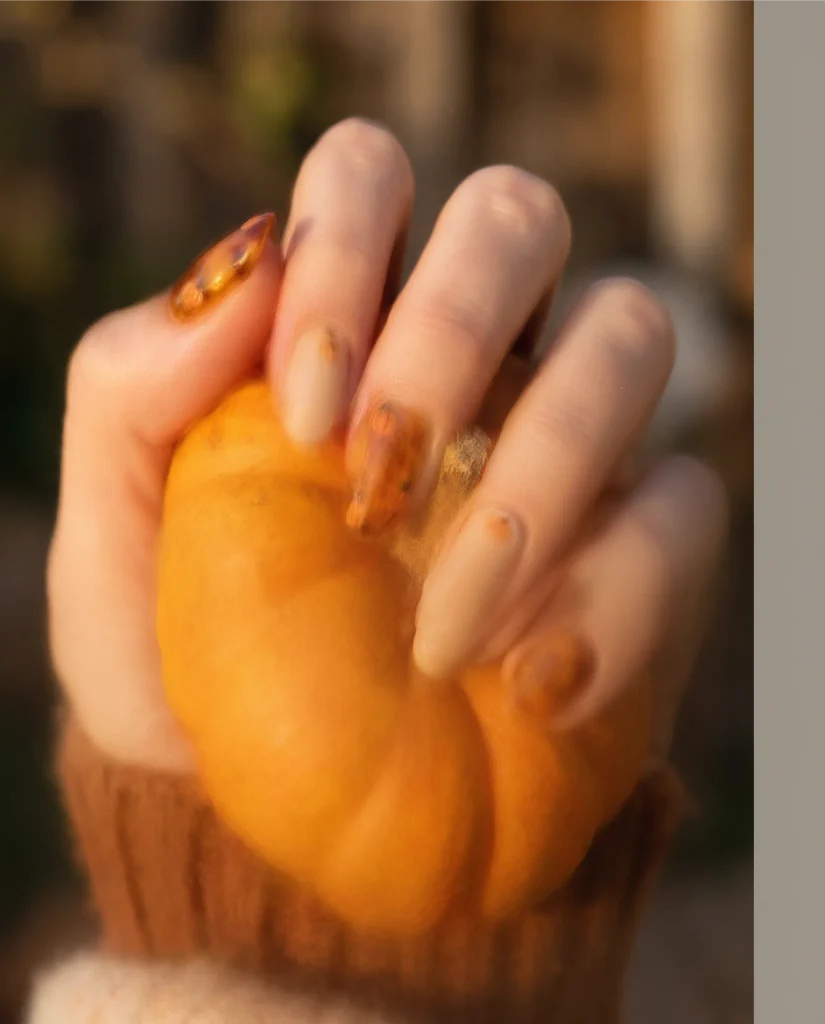
Amber and sepia tortoiseshell print turns into mini pumpkin shapes along the cuticle and tip edges.
The translucent jelly finish gives the pumpkins real depth, especially next to creamy beige accent nails.
It bridges everyday autumn style and Halloween without a single skull.
Vibe & Colors: Warm vintage; amber brown, burnt caramel, creamy beige
Style Tip: Layer sheer brown jelly gel over a warm mustard base to get that glassy tortoiseshell depth.
4. Glazed Candy Corn Chrome
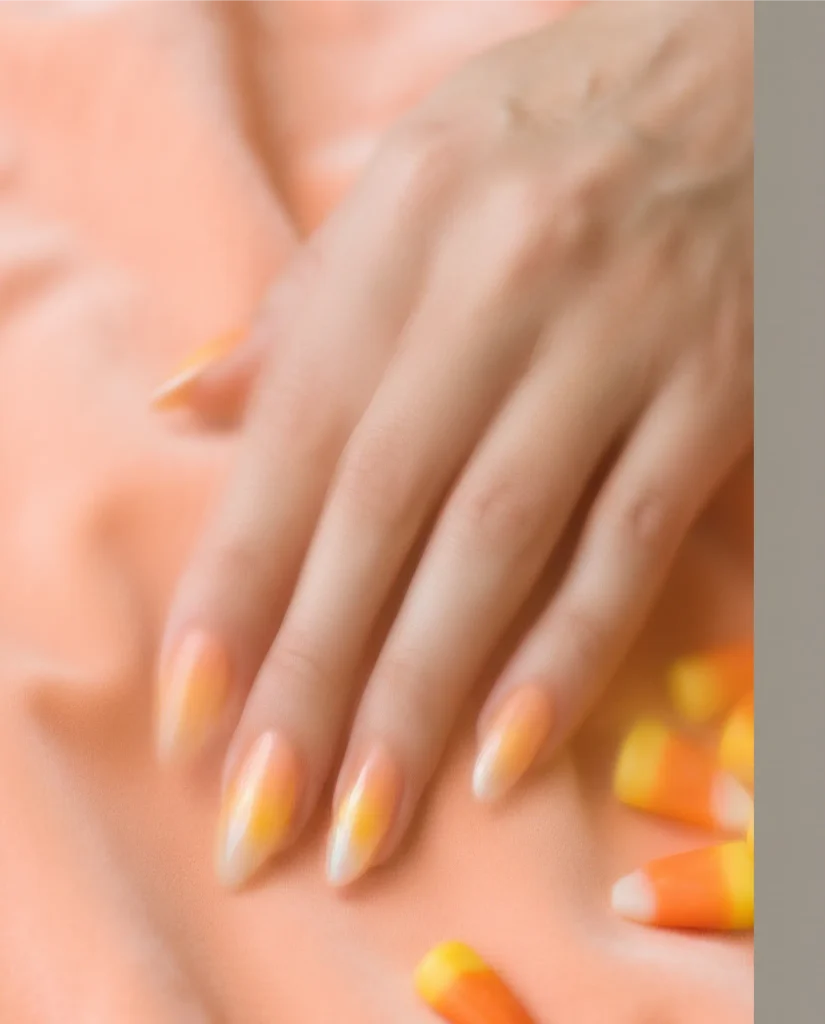
Skip the harsh neon stripes and blend warm white, marigold, and soft apricot into a gradient, then dust it with pearl chrome powder.
The colors melt into each other and nod to trick-or-treat candy without looking like a costume. The glaze keeps everything luminous and polished.
Vibe & Colors: Sweet and luminous; pearlescent white, marigold, soft apricot
Style Tip: Tap the three shades together with a damp makeup wedge before applying the white chrome powder.
5. Blood-Drip Velvet French

Deep bordeaux velvet polish shimmers across the tips and melts downward in glossy drip shapes.
Set against a neutral, semi-sheer base, the contrast shifts with every hand movement. It is the dramatic pick on this list.
Vibe & Colors: Vampy and luxe; deep oxblood, velvet ruby, sheer tinted pink
Style Tip: Use a magnetic cat-eye polish and pull the particles toward the tips with the magnet before curing.
6. Pastel Boo Crew

Not into dark palettes? Lilac, mint, and baby pink bases carry pastel ghosts, stars, and crescent moons.
The candy colors feel fresh and youthful, and prove Halloween nails do not need black and orange.
Vibe & Colors: Sweet retro; lavender, pastel mint, bubblegum pink, soft white
Style Tip: Apply a matte top coat over the pastel base, then add the ghosts in gloss so they pop.
7. Black Cat Moons

Negative-space crescent moons pair with black cat silhouettes peeking over the sides of select accent nails.
Yellow dot eyes and tiny whisker strokes give each cat personality without crowding the nail.
The open space keeps the set light and modern.
Vibe & Colors: Sleek and mysterious; glossy obsidian, bare neutral, golden yellow
Style Tip: Leave the base bare with just a clear base coat, so the black shapes stay crisp against the natural nail.
8. Gilded Celestial Bats

Tiny gold foil bats flutter across a midnight navy or sheer smoke gel base, scattered among fine metallic starbursts. The effect is a starry night sky with a romantic edge, and one of the more luxurious takes on nocturnal themes.
Vibe & Colors: Celestial romance; midnight navy, bright gold, sheer charcoal
Style Tip: Press pre-cut metallic bat decals onto a tacky gel layer for crisp, uniform silhouettes.
9. Frankenstein Green Swirls
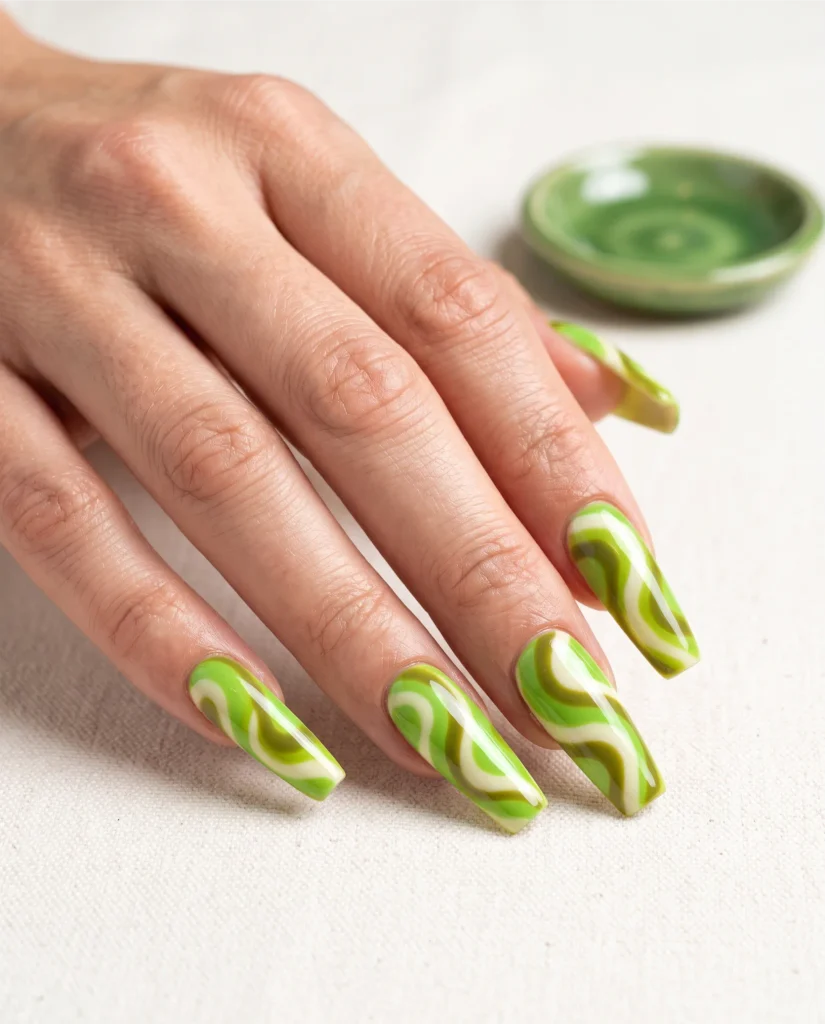
Retro swirls in slime green, olive, and off-white coil around each nail for a quirky monster-movie feel. The curved lines visually lengthen the fingers, and a glass-like top coat keeps the greens vivid.
Vibe & Colors: Retro and quirky; chartreuse, moss olive, ivory
Style Tip: Load a long striper brush and draw each swirl in one continuous curve without lifting.
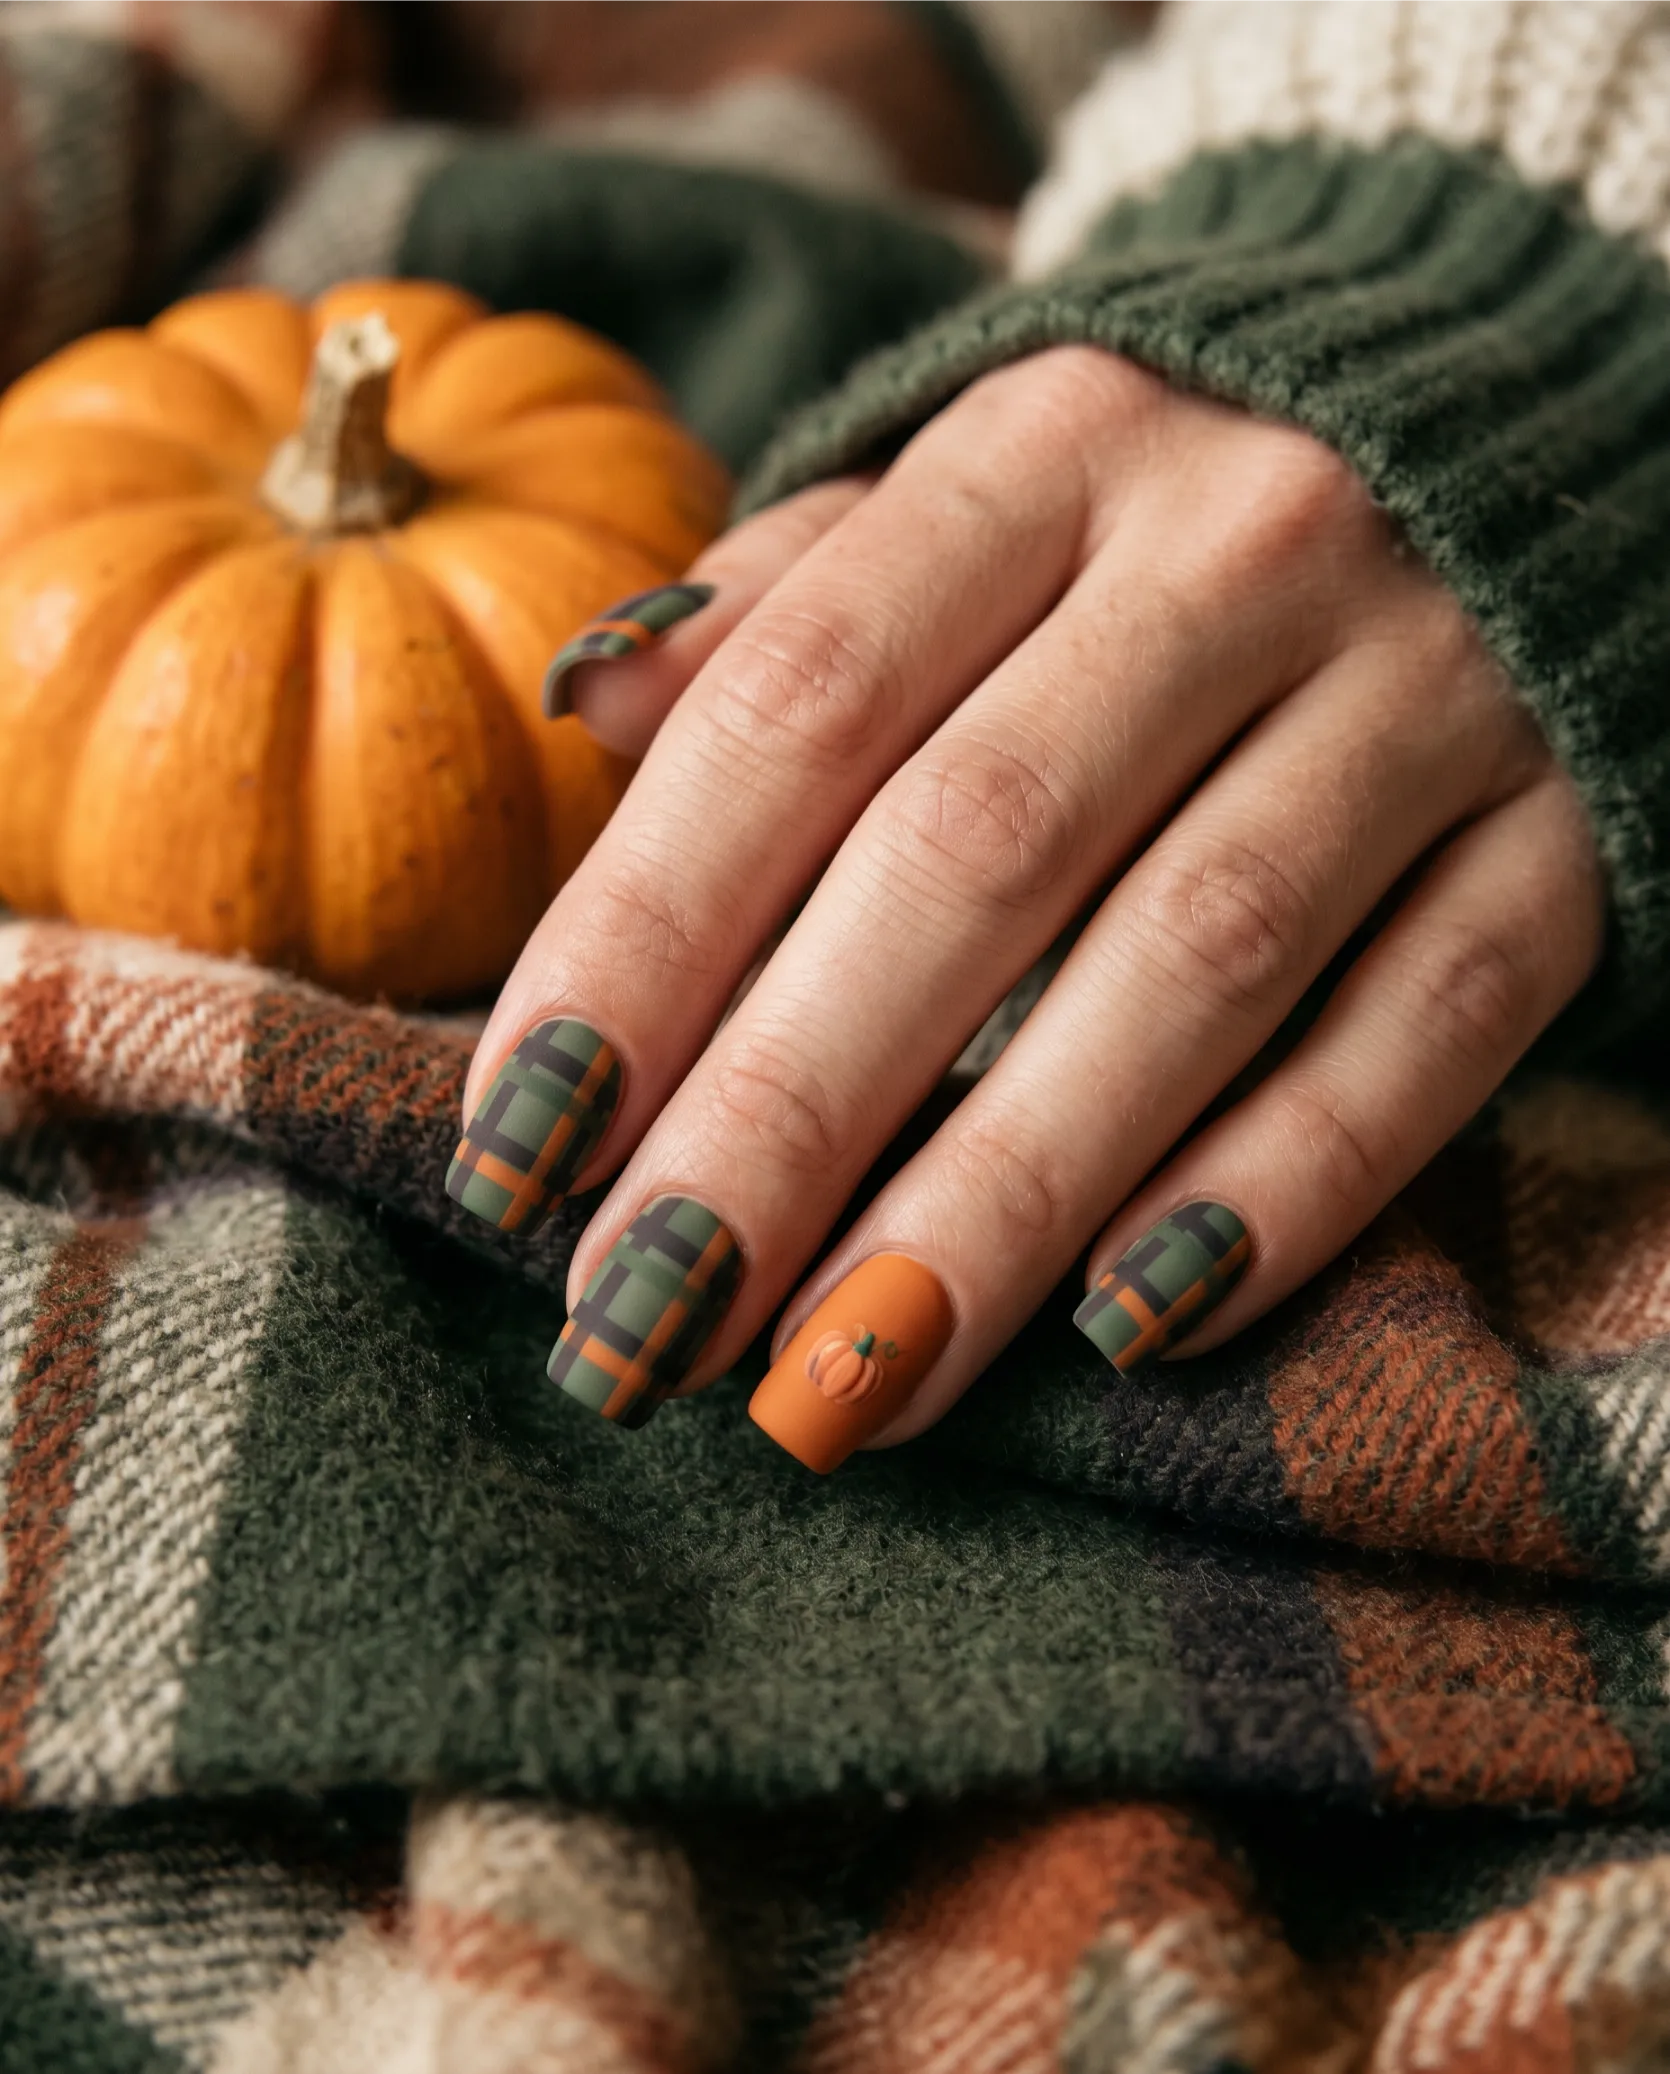
10. Matte Plaid & Pumpkins
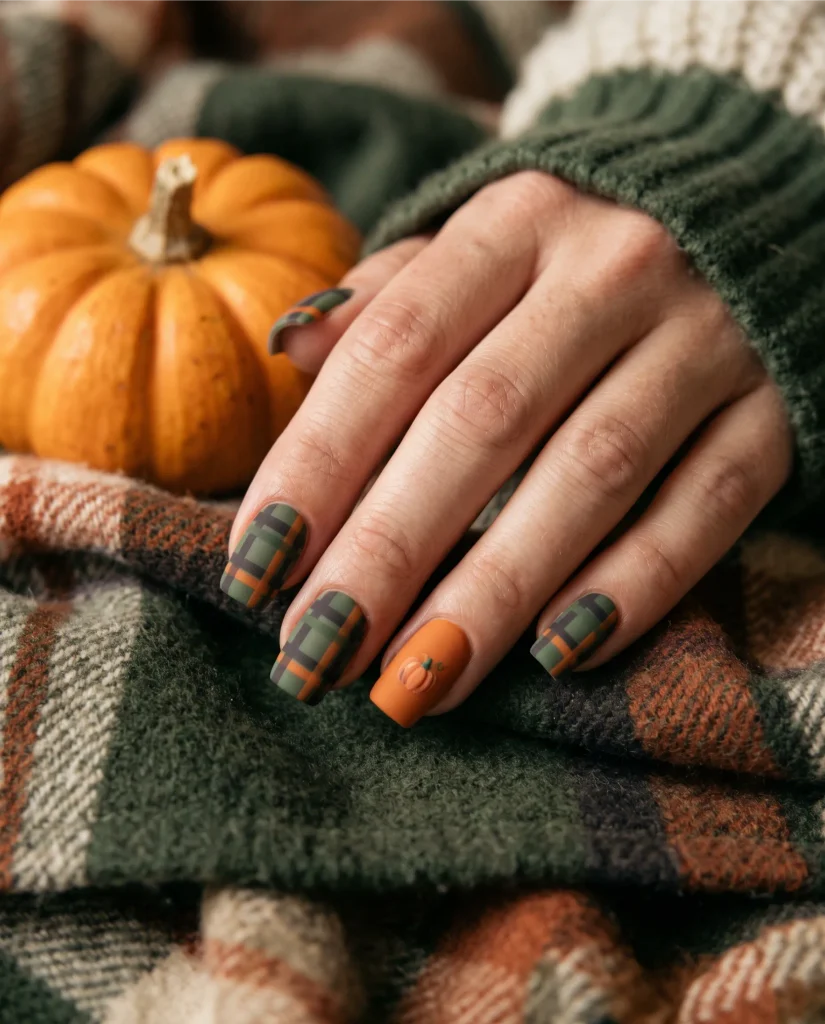
Flannel plaid in forest green, charcoal, and pumpkin orange sits beside one matte pumpkin accent nail per hand.
The velvety finish turns Halloween icons into a cozy, sweater-weather look made for pumpkin patch trips.
Vibe & Colors: Cozy rustic; forest green, charcoal, pumpkin orange, matte finish
Style Tip: Make sure the matte top coat is fully dry or cured before drawing thin glossy plaid lines over it.
11. Pearlescent Spider Silk
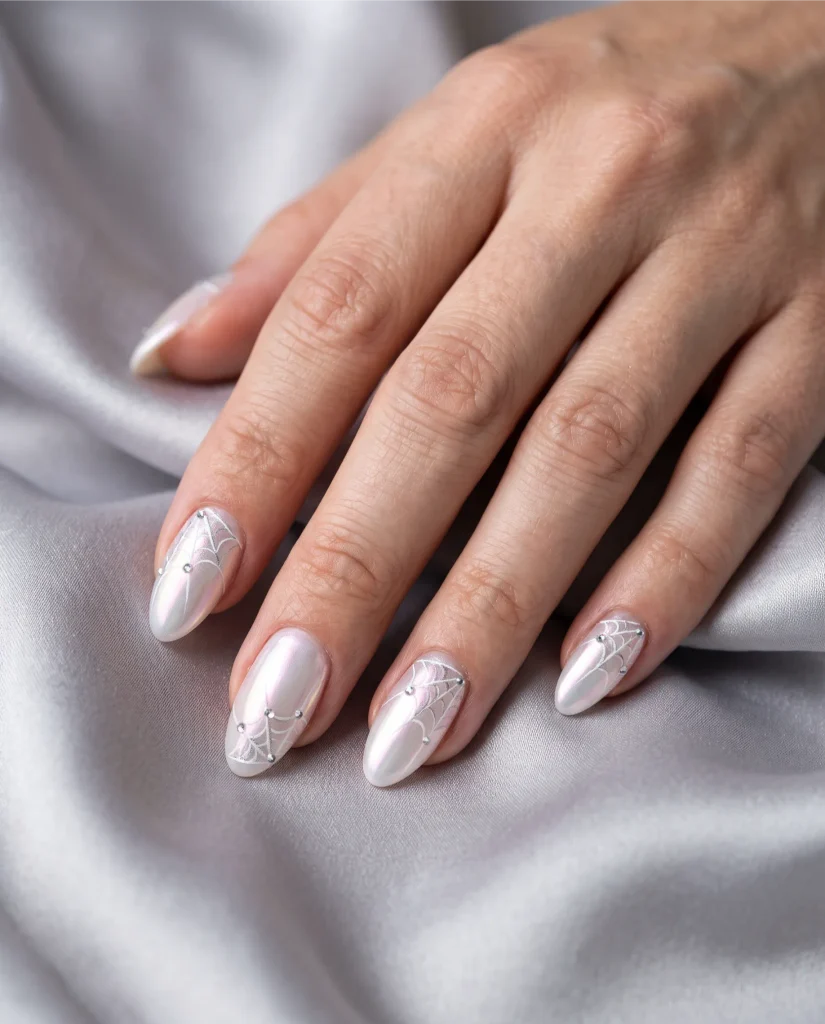
An iridescent pearl-white base sets a dreamy tone, with a delicate web draped across one side of the nail.
Tiny crystals sit at the web intersections like dew drops. It is an editorial take on a spooky classic.
Vibe & Colors: Ethereal glam; mother-of-pearl, oyster sheen, clear crystal
Style Tip: Set micro-crystals at the center of the web with a dab of builder gel so they last.
12. Midnight Starburst Aura

Black and deep plum aura gradients glow outward from the center of the nail toward sheer edges, topped with hand-painted white twinkle stars.
The soft, airbrushed fade gives a mystical look that works with any autumn outfit.
Vibe & Colors: Witchy and mystical; plum, deep violet, starry white
Style Tip: Tap loose pigment powder or eyeshadow onto a tacky base with a sponge applicator, or use an airbrush, for a seamless fade.
13. Retro 70s Jack-O’-Lanterns
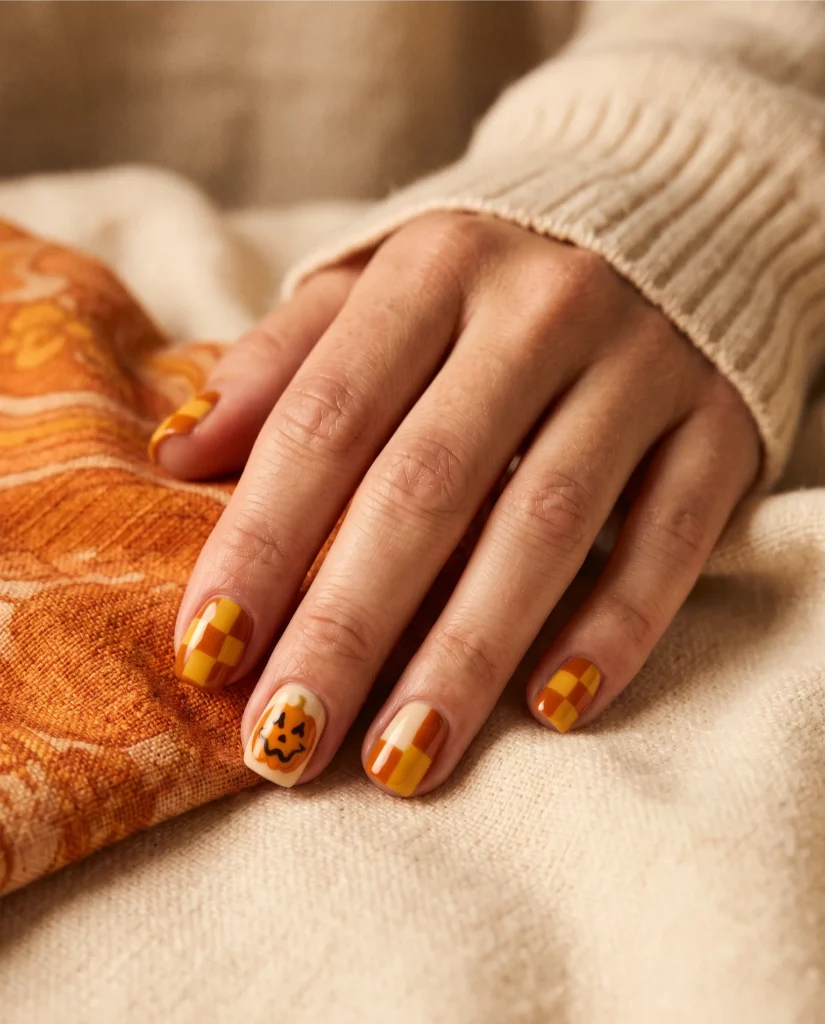
Mustard and burnt orange checkerboard accent nails sit beside groovy smiling pumpkin faces.
The warm 70s palette makes the playful theme feel deliberate and nostalgic.
Vibe & Colors: Nostalgic and groovy; burnt sienna, mustard gold, warm cream
Style Tip: Mark the checkerboard grid with light pencil guides or striping tape before painting so the boxes stay even.
14. Sheer Black Lace Coffins
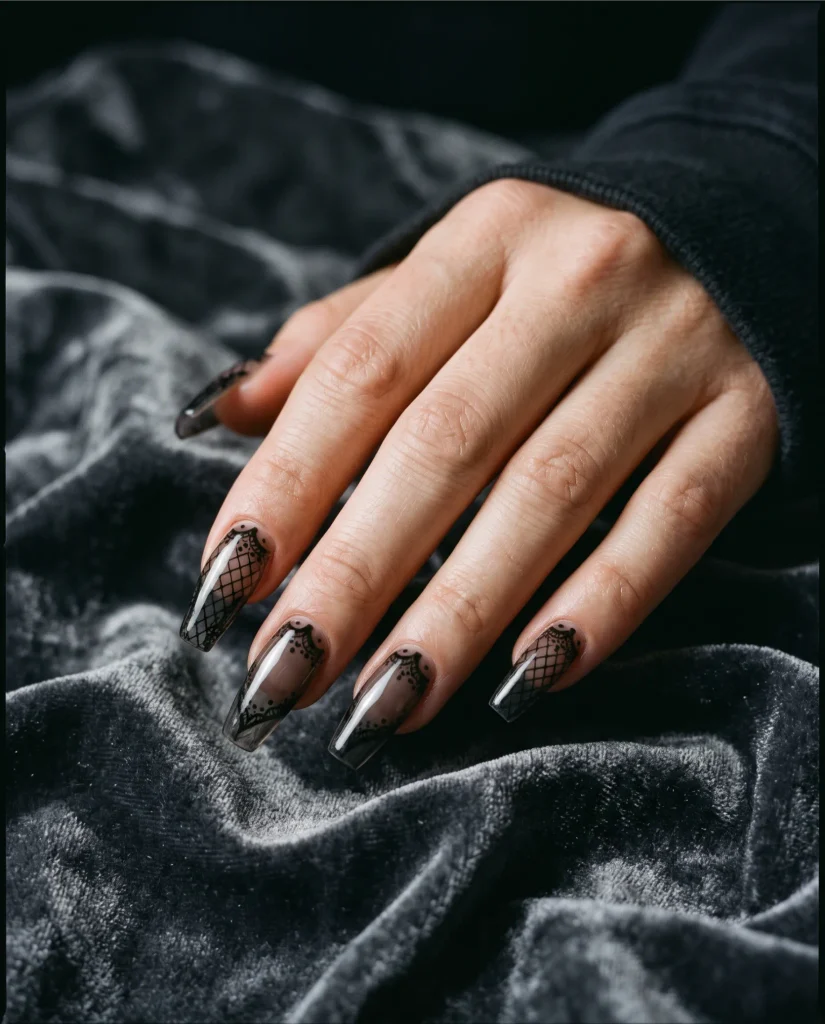
Fishnet and scalloped lace patterns are painted over a smoky, translucent base on crisp coffin-shaped nails.
The layered transparency feels gothic and refined, with plenty of impact and no bright color.
Vibe & Colors: Fashion-forward goth; sheer smoke, matte ink black, charcoal
Style Tip: Start with a sheer jelly black or smoke-tinted gel for the “stocking” base, then draw the lace over it with a fine liner.
15. Mummy Wrap Lines
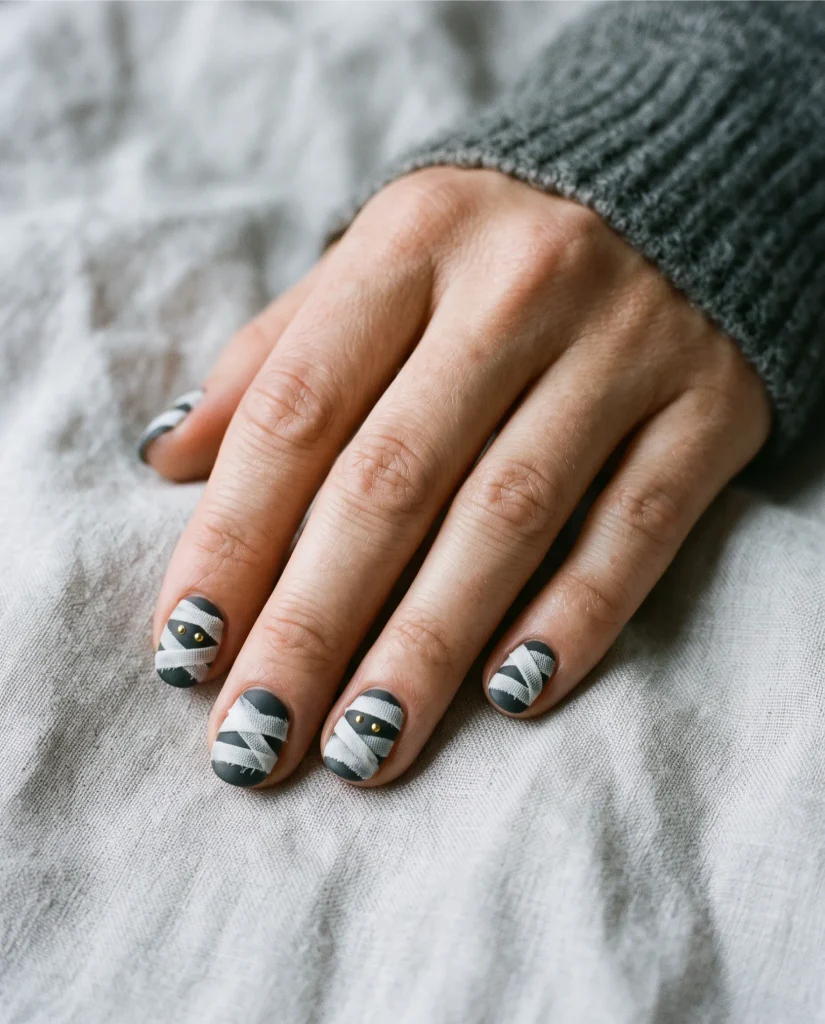
Overlapping white ribbon stripes crisscross over a charcoal or muted neutral base like old bandages.
Two tiny gold or lime-green eyes peek out between the layers for a cheeky surprise.
Vibe & Colors: Playful and textured; chalk white, antique cream, deep slate
Style Tip: Use a highly pigmented white gel paint so one thin layer covers and the nail does not get bulky.
16. Metallic Copper Cauldron Brew
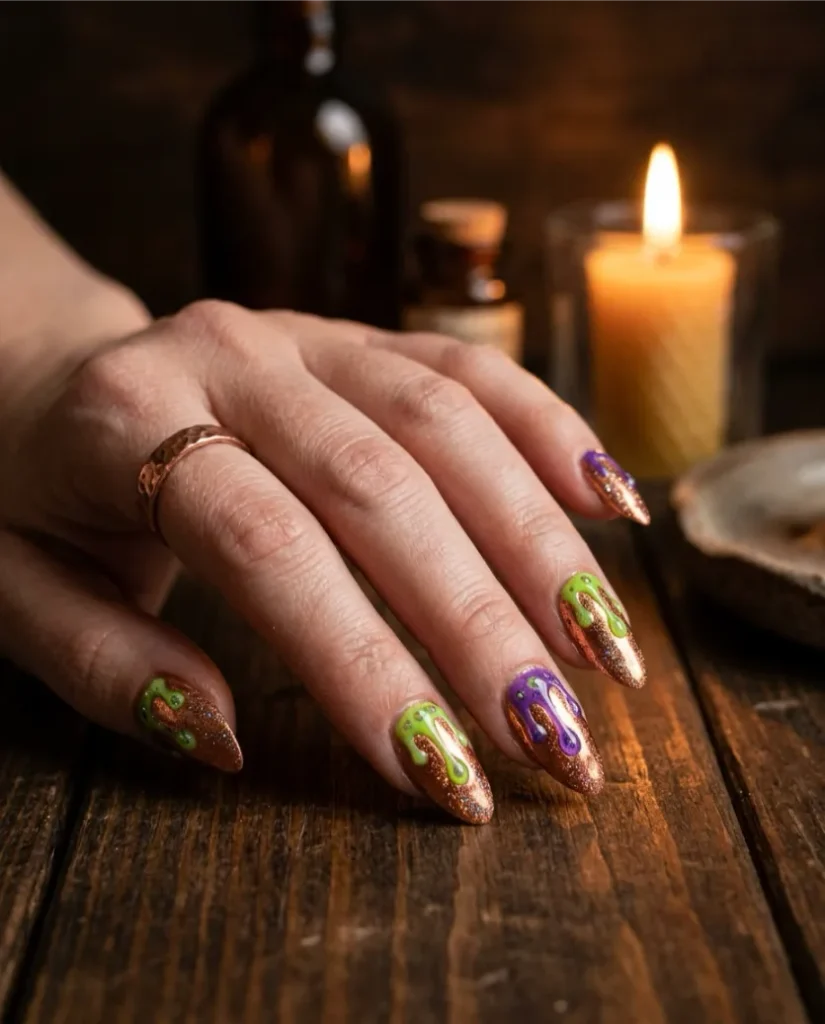
A warm metallic copper base meets lime-green and purple bubbling drips running down from the cuticle. The bubbles look like a simmering potion, while the copper keeps the palette warm and wearable.
Vibe & Colors: Magical and vibrant; metallic copper, bright chartreuse, deep violet
Style Tip: Add fine holographic glitter over the green bubbles for a fizzing, carbonated look.
17. Chrome Bone French

Milky-nude almond nails carry silver chrome tips shaped like skeletal finger joints or small crossed bones.
It updates the French tip with a clever anatomy-inspired twist that feels edgy and modern.
Vibe & Colors: Edgy and modern; mirrored silver, cool nude, soft ivory
Style Tip: Apply mirror chrome powder only over a no-wipe gel tip outline, then brush off the excess before your final top coat.
18. Trick-or-Treat Confetti
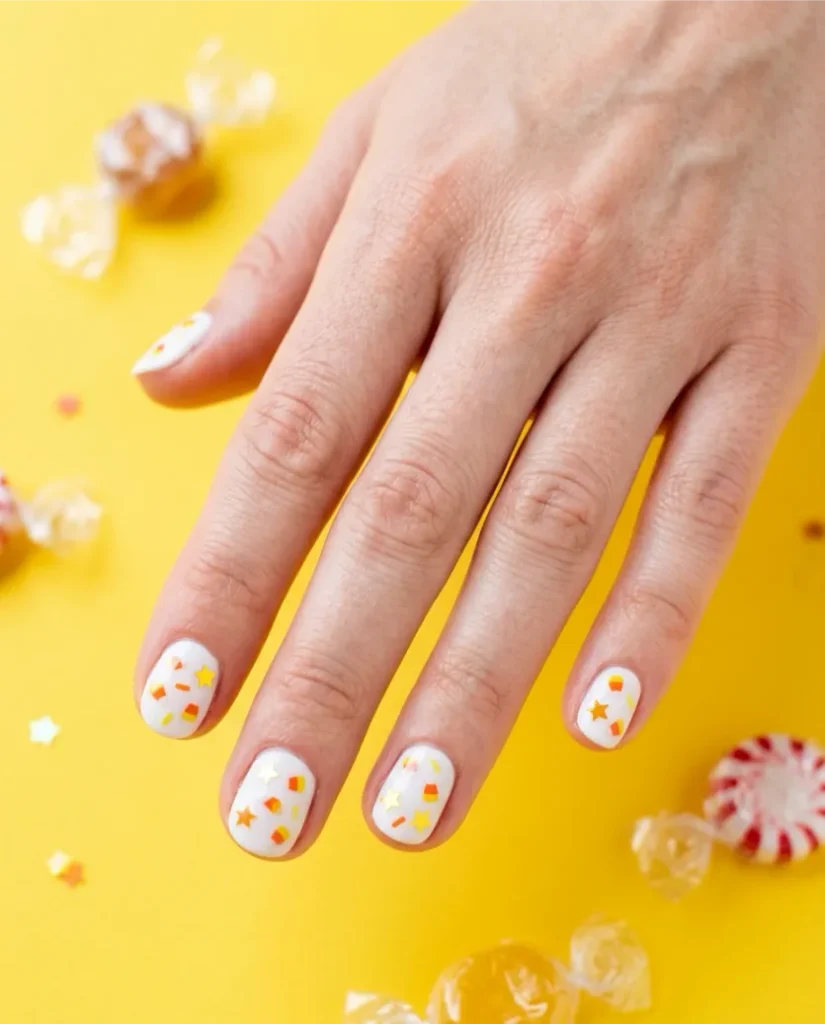
Crisp white nails hold scattered micro candy corn confetti and tiny yellow and orange star sequins, sealed under a clear top coat.
It is bright and cheerful, and suits anyone who prefers carnival fun over haunted vibes.
Vibe & Colors: Cheerful and sweet; glossy snow white, sunshine yellow, tangerine
Style Tip: Press the glitter flat with a silicone tool while the clear coat is still wet so no sharp edges poke out.
19. Witchy Forest Foliage

Deep emerald nails carry silhouette branches, dried leaves, and tiny gold crescent moons, like a witch’s cottage glimpsed through the trees on a dark October night.
It reads sophisticated and nature-inspired, and carries easily into Thanksgiving.
Vibe & Colors: Woodland witchy; deep forest green, metallic gold, muted taupe
Style Tip: A matte emerald base makes the shiny gold foliage stand out.
20. Creepy Cute Eyeballs

Glossy white “eyeball” accents with pastel green or violet irises peek out from a sheer jelly base, with one or two tiny red veins for extra spook. It is the funniest set on the list and a guaranteed conversation starter.
Vibe & Colors: Cheeky and spooky; glossy white, lime green, soft violet, blood red
Style Tip: Paint the iris first, add a black pupil dot, then finish with a tiny white highlight dot so the eye looks wet.
Halloween Nail Design Comparison
| Design Name | Difficulty | Best Nail Shape & Length | Finish |
|---|---|---|---|
| Minimalist Little Ghosties | Intermediate | Short Round or Oval | High Gloss |
| Spooky French Web Tips | Intermediate | Medium Almond | High Gloss |
| Tortoiseshell Pumpkin Accents | Intermediate | Medium Oval | Glass / Jelly Gloss |
| Glazed Candy Corn Chrome | Intermediate | Medium Almond | Glazed Chrome |
| Blood-Drip Velvet French | Advanced | Long Coffin or Almond | Shimmer Velvet |
| Pastel Boo Crew | Beginner | Short Square or Oval | Soft Matte |
| Black Cat Moons | Intermediate | Short to Medium Round | Glossy |
| Gilded Celestial Bats | Beginner (with decals) | Medium Almond | High Gloss |
| Frankenstein Green Swirls | Intermediate | Long Coffin | Ultra Gloss |
| Matte Plaid & Pumpkins | Advanced | Medium Square | Velvet Matte |
| Pearlescent Spider Silk | Advanced | Medium Almond | Iridescent Gloss |
| Midnight Starburst Aura | Intermediate | Medium Coffin | High Gloss |
| Retro 70s Jack-O’-Lanterns | Advanced | Short Squoval | Glossy |
| Sheer Black Lace Coffins | Advanced | Long Coffin | Semi-Matte / Sheer Gloss |
| Mummy Wrap Lines | Beginner | Short Round | Satin Matte |
| Metallic Copper Cauldron Brew | Intermediate | Medium Almond | Metallic Foil Gloss |
| Chrome Bone French | Advanced | Long Almond | Mirror Chrome |
| Trick-or-Treat Confetti | Beginner | Short Round | High Gloss |
| Witchy Forest Foliage | Intermediate | Medium Oval | Matte with Gloss Accents |
| Creepy-Cute Eyeballs | Intermediate | Short to Medium Almond | High Gloss |
Supplies Checklist for Halloween Nail Art
Most of the designs above need only a handful of tools. Gather these before you start:
- Dotting tools in two or three sizes (ghosts, eyes, bubbles)
- Fine detail liner brush and a long striper brush (webs, swirls, plaid, lace)
- Base coat and a quality gloss top coat, plus a matte top coat for velvet and matte looks
- Chrome or pearl powder with a no-wipe gel top coat (designs 4 and 17)
- Magnetic cat-eye polish and magnet (design 5)
- Foil flakes, bat decals, micro-crystals, and glitter (designs 2, 8, 11, 16, 18)
- Silicone nail stamper and striping tape for clean lines (designs 13 and 20 of the French-style looks)
- UV/LED lamp if you are using gel
Nail Care & Longevity Tips
Detailed nail art needs to survive sweaters, costume prep, and cold autumn air. These habits make the biggest difference.
Prep Without Over-Filing
Chip-free nails start on the natural nail plate. Wipe nails with isopropyl alcohol or a nail dehydrator before the base coat to remove oils.
Soften the cuticle area and gently push the skin back with an orange wood stick.
Never cut living tissue or scrape hard across the nail surface, because the micro-ridges it leaves make polish lift sooner.
Float Your Top Coat
Over detailed nail art, let a generous bead of top coat “float” across the nail instead of dragging the bristles on the surface.
Dragging can smear wet lines and dull chrome effects. Cap the free edge of every nail to seal out water from hand washing.
With air-dry lacquer, wait until the art is fully dry before top coat.
With UV/LED gel, cure the art fully first, then wipe the sticky inhibition layer if your formula leaves one, following the manufacturer’s directions.
Know Your Formula: Gel vs. Lacquer
Regular air-dry lacquer dries by evaporation and will not cure under a UV/LED lamp, so it stays tacky or bubbles if you try. Keep the two systems separate.
If you like changing your design every week, choose lacquer with a fast-dry top coat.
If you want 2 to 3 weeks of wear through the whole Halloween season, go with a soak-off gel system.
Frequently Asked Questions
How can I make my Halloween nail art last until the holiday without chipping?
If you wear regular lacquer, add a fresh layer of clear top coat every 2 to 3 days to re-seal the edges.
If you wear gel, you do not need to re-top-coat; focus on cuticle-side prep and sealing the free edge instead.
For either type, wear gloves for cleaning and dishwashing, since long exposure to hot water and detergent is a common cause of lifting.
Can I achieve these designs on short, natural nails?
Yes. Minimalist Little Ghosties, Black Cat Moons, and Trick-or-Treat Confetti all look charming on short, rounded or squoval nails.
Scale down the size of the accent figures and use negative space so the nail bed stays balanced and uncluttered.
What is the safest way to remove Halloween gel nail art or press-ons?
Gently buff off the shiny top layer with a 180-grit file to break the seal. Soak cotton pads in pure acetone, place them on your nails, and wrap each fingertip in foil for 12 to 15 minutes.
The product softens and slides off with a wooden stick. Never pry, peel, or rip it off, because that removes layers of your natural nail.
Is acetone safe for my skin?
Acetone is drying, so work in a well-ventilated room and rub petroleum jelly or cuticle oil on the skin around your nails before soaking.
Afterward, wash your hands and apply a rich hand cream or nail oil to restore moisture.
Save These Halloween Nails for Later
Pick one or two favorites for your next manicure, and save this list to your Pinterest board so it is ready when you head to the salon or set up your own nail night.
Start with the beginner-friendly designs like Pastel Boo Crew or Mummy Wrap Lines, then work your way up to chrome and velvet once you have the tools.